I bit more work on F10 model. I've assembled exhaust pipes. Fujimi is using small tabs for alignment of parts here, same as on 97T. This approach does not guarantee good final result, because tabs allow for quite a bit of play and to glue parts properly aligned I have to find a way to simulate final position of parts, while they are been glued. I figured a way for 97T. But for F10 I don't see a good way. I've just coarsely aligned exhausts, engine and floor, while glueing exhaust parts together. I think there will be some gaps between exhaust and engine in the end, but I don't see a way to have perfect alignment done. Hopefully gaps will be small and not very visible.
Next, I've closed up rear brake ducts with small pieces of styrene sheet and filled up back of oil tank with epoxy putty.
Saturday, May 12, 2012
CF work for RB7 started
Started CF work on RB7 model. First is the main body - nose and underneath of monocoque. All done with my own templates and according to reference photos I have. I've used SMS CF twill weave and high def. 1/24 decals. I applied high def. CF decal on the nose cameras. Not exactly as on real car, but at least I got some contrast in CF. Here are some close ups and over all shots.
Thursday, May 10, 2012
Monopost MP4/25 WIP
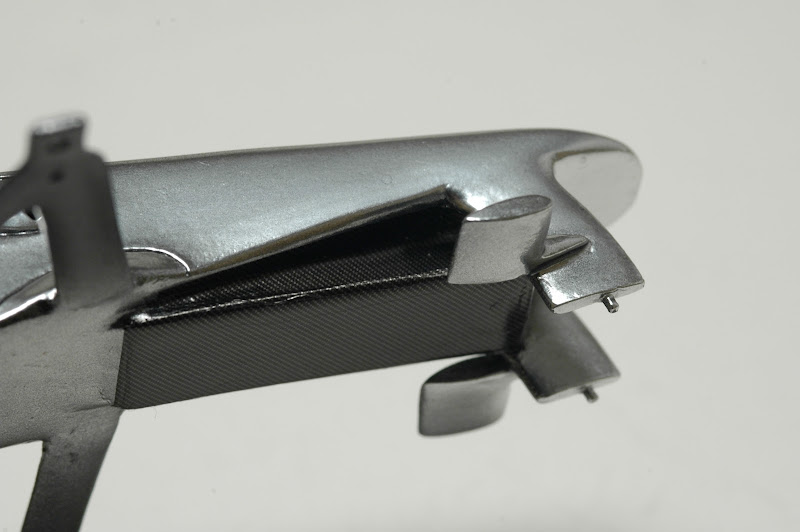
MP4/25 went full cycle of painting again. This time I've used Alclad HPA and Alclad Aqua Clear. I've run out of Mirrachrome, so was forced to substitute it with Alclad HPA. It's very close in shade, imho. Aqua Clear preserved shine quite well. It dried OK, compare to Alclad Klear, which refused to dry even after 5 months waiting. It was time to start CF decals application. I've started with under nose area. Used 5 pieces to cover it. I'm satisfied with result. CF pattern is a bit to big for that area, as reference pictures show very fine pattern there. But I did not have smaller scale decals, so vent with 1/24 scale ones. I think it'll look acceptable when finished.
I've used Macro lens to do first three close ups and my standard zoom lens to do last shot.
Wednesday, May 9, 2012
F10 Japanese GP Alonso
I have been thinking about a way to create body fasteners for this model for quite a while now. Fujimi put small bump in places where fasteners are on real car. I did not expect this bumps to leave through preparation, priming and painting process. Yet I needed to mark places where to put them later. I've decided to drill small holes in place of those fasteners and either put rivets with flat heads in them or put PE fasteners over later, when whole painting process is over. I've also added few more holes in places which Fujimi missed, using my reference pictures as guide.
Tuesday, May 8, 2012
Masking exercise
Another masking exercise was needed for RB7 build. I had to mask out all the main body to paint semi-gloss black on its bottom and on the nose. Plan is to cover these areas with CF decals later. I felt SG background was required. It takes quite a bit of time and is not my favorite part of any build for sure. But it has to be done, because I don't seen any alternative sequence of applying paint layer to achieve results I want.
I could only imagine how much more time is required to mask and paint real car. For sure much more involving and time consuming task I can hardly comprehend.
And here is the result. Looks ok, but not perfect. Some lines aren't as clear as I'd want. Hopefully I will be able to fix them while applying CF. Another daunting task, which however adds a lot to final appearance of the model.
I could only imagine how much more time is required to mask and paint real car. For sure much more involving and time consuming task I can hardly comprehend.
And here is the result. Looks ok, but not perfect. Some lines aren't as clear as I'd want. Hopefully I will be able to fix them while applying CF. Another daunting task, which however adds a lot to final appearance of the model.
Monday, May 7, 2012
Real Macro
I've got myself real Macro lens. I can capture quite small details with it as well as flaws on my models, I was not able to capture before. First few shots below show what kind of detail I could capture with real Macro lens. My current setup of light box and tripod does not allow me to get close to subject. I have to figure out how to change it, so I could capture even smaller details. Last 2 shots show what kind of flaws my models have in reality. They are quite hard to capture without Macro lens and proper lighting. Good thing is - they also hard to see in real life, unless you look at specific spot under high magnification. And they also not show well on generic photos.
I need to learn more about this new lens, figure out best settings for my set of lights and change setup to allow me get closer to subjects and capture even smaller details. We'll be playing more with it soon.
Friday, April 27, 2012
Macro photography
I've been toying with ideas for Macro photography for models. My current lens gives pretty good zoom, but good enough to capture things like name labels on cars or switches on steering wheels. When I will be adding smaller details to my models, I would not be able to capture those on photos. Macro lenses for SLR cameras not cheap. Old manual focus lenses are cheaper, but some times ever better then modern stuff. I've decided to check how well I could focus on small items in manual focus mode, no autofocus. Below are some samples. Apparently I could do it to pretty much acceptable level. So, lenses without autofocus support aren't a problem, apparently.
F2007 was nearby and poses as a "model" for photos. To see bigger version click on the image.
Subscribe to:
Posts (Atom)