
Monday, October 19, 2026
Quick mockup for F2008
On its wheels for temporary quick mockup. Still need to add more winglets and rear view mirrors. After that wheel covers, steering wheel, cameras and other small items will be left to complete it.

Saturday, October 17, 2026
Front suspension and bargeboards competed
Re-painted brake parts and completed front suspension. Completed bargeboards and underside winglets. Had some alignment issues with both. While not perfect, end result overall is not that bad. Started rear wing assembly as well. Spent about an hour thinking what kind of jig I can make up. Could not come up with anything and just went with gluing main horizontal plane plus end plates in one shot. End plated came out not fully parallel. But I could not do any test fitting and alignment check beforehand. Still need to fit upper horizontal plane. Because end plates go wider on the top, it's going to be a challenge. Looks like main horizontal plane is a bit too wide, which I did not know.


Tuesday, October 6, 2026
Assembly progress on F2008
Some progress on this build - glued seat to the floor and then glued floor and rest of the body assembly together. Next finished rear winglets and added some rivets. Photo in day light this time for comparison and in attempt to show how that F2008 color changes with different lightning.

Sunday, August 23, 2026
Final assembly started
Started with rear suspension and front wings as per instructions. Both are almost complete, with small PE parts still to attach. Learned my lesson and follow instructions more closely now.

Had a small setback. Eagerly assembled front brakes, drums and uprights and only after realized that you cannot attach uprights to suspension arms when drums are installed over them. So, I had to put those assembles into aceton. Fortunatelly that loosened epoxy glue and I was able to brake parts back apart. But it stripped paint as well of course. Now I need to re-prime and re-paint parts and do assembly in proper order. That exact mischamp made me come back to following assembly order from instructions more closely. Usually for plastic kits I apply my own logic to assembly order time to time. Not for this MFH kit.

Next started actually putting together body elements. Gearbox, rear body items, air box and main monocoque have been glued togther. As well as big side aero flaps. Before I can mate that body assembly and the floor, I needed to get seat ready, becasue I can only put seat in from bottom. Doing seat belts is not my favorite part of build, but I had to finish it. Turned out ok'ish. PE from MFH is nice and mostly accurate, but seat belt material is just ribbons and they are not easy to work with.
I love this car and kit is cool. But number of panel do not want to go together. Fit is not perfect and there are enoying gaps. I guess I have not done my test fitting properly at the start. Well, more lessons to learn. Wish there was 1/20 kit of MP4/23 available.

Had a small setback. Eagerly assembled front brakes, drums and uprights and only after realized that you cannot attach uprights to suspension arms when drums are installed over them. So, I had to put those assembles into aceton. Fortunatelly that loosened epoxy glue and I was able to brake parts back apart. But it stripped paint as well of course. Now I need to re-prime and re-paint parts and do assembly in proper order. That exact mischamp made me come back to following assembly order from instructions more closely. Usually for plastic kits I apply my own logic to assembly order time to time. Not for this MFH kit.
Next started actually putting together body elements. Gearbox, rear body items, air box and main monocoque have been glued togther. As well as big side aero flaps. Before I can mate that body assembly and the floor, I needed to get seat ready, becasue I can only put seat in from bottom. Doing seat belts is not my favorite part of build, but I had to finish it. Turned out ok'ish. PE from MFH is nice and mostly accurate, but seat belt material is just ribbons and they are not easy to work with.
I love this car and kit is cool. But number of panel do not want to go together. Fit is not perfect and there are enoying gaps. I guess I have not done my test fitting properly at the start. Well, more lessons to learn. Wish there was 1/20 kit of MP4/23 available.
Thursday, July 16, 2026
SD Model 3D printed engine detail set
I am considering adding more detail to the engine bay. Acquired number of 3D printed engine detail sets made by SD Model. They seem to provide nice level of detail. Resin is brittle, though. Also fit is not perfect for 962C floor. Not 100% certain yet. Main issue will be cross bars connecting rear firewall to gearbox mounts. Might need to re-make them. And oil tank which is molded together with them in Tamiya 956 kit will have to be reconnected somehow to new cross bars. May be too much for my skill level.

Sunday, July 5, 2026
Last test fittings before final assembly starts
Over Canadian Holidays I've put clear coat over CF decals and painted other parts in Zero CF. Most of the parts are ready for assembly by now.
Doing final test fittings before it will start to come together.

Brakes and suspension adaptations done
I’ve made a decision to adopt brakes from Fujimi kit to the Tamiya’s donor chassis. Needed to remove parking brakes and uprights which were
moulded together with rear rotors. Also reduced ride height at the front.


 Looking at the profile of the body I can see that front bonnet bulges too much. I start to understand issues with Fujimi body jaykay was referring to.
But it’s too late to change plans now. Unless there is an accurate conversion body for Tamiya kit.
Looking at the profile of the body I can see that front bonnet bulges too much. I start to understand issues with Fujimi body jaykay was referring to.
But it’s too late to change plans now. Unless there is an accurate conversion body for Tamiya kit.
 My scratch made from plastic diffuser keeps deforming on its own. I am now thinking about making one from metal.
Have some thin brass sheets I can use for that.
My scratch made from plastic diffuser keeps deforming on its own. I am now thinking about making one from metal.
Have some thin brass sheets I can use for that.
Looking at the profile of the body I can see that front bonnet bulges too much. I start to understand issues with Fujimi body jaykay was referring to.
But it’s too late to change plans now. Unless there is an accurate conversion body for Tamiya kit.
My scratch made from plastic diffuser keeps deforming on its own. I am now thinking about making one from metal.
Have some thin brass sheets I can use for that.
Wednesday, June 24, 2026
Scratch building started
Started making some items from scratch using parts of MFH F40GTE kit as templates.
Current plan is to detach rear engine cover. Rear bumper is not going to be attached to it, but rather I plan to attach to the chassis and floor. So, first I needed to make racing diffuser, which is missing in Fujimi kit.
Next I made big front radiator and supporting structure around it.
I am facing issue of warped rear engine cover and at present I am not sure how I will be able to fix that. But I will continue modifications and scratch building for now until I am ready to paint.
Still undecided if I will make bigger intercoolers. And I need to start making roll change bars next.


Current plan is to detach rear engine cover. Rear bumper is not going to be attached to it, but rather I plan to attach to the chassis and floor. So, first I needed to make racing diffuser, which is missing in Fujimi kit.
Next I made big front radiator and supporting structure around it.
I am facing issue of warped rear engine cover and at present I am not sure how I will be able to fix that. But I will continue modifications and scratch building for now until I am ready to paint.
Still undecided if I will make bigger intercoolers. And I need to start making roll change bars next.
Thursday, June 11, 2026
Continued F40 chassis conversion work
Continued with modifications to chassis:
- removed most of the front structures not relevant to race car. made a compromise by removing most of the bridge over from suspension, but leaving some material on the sides to keep it's strength. not willing to fully re-create racing frame
- adjusted front of the floor to fit inside Fujimi's body
- re-made rear firewall from Fujimi and Tamiya parts. not 100% accurate, but most of this build will not be very accurate anyway
- made some rising side blocks on the floor, so it fits well inside Fujimi's middle body
Next will attempt to re-create bigger front radiator of the race car and structures holding it in place. Will also think about scratch making bigger turbo intercoolers and turbo air intake boxes used in race car

- removed most of the front structures not relevant to race car. made a compromise by removing most of the bridge over from suspension, but leaving some material on the sides to keep it's strength. not willing to fully re-create racing frame
- adjusted front of the floor to fit inside Fujimi's body
- re-made rear firewall from Fujimi and Tamiya parts. not 100% accurate, but most of this build will not be very accurate anyway
- made some rising side blocks on the floor, so it fits well inside Fujimi's middle body
Next will attempt to re-create bigger front radiator of the race car and structures holding it in place. Will also think about scratch making bigger turbo intercoolers and turbo air intake boxes used in race car
Tuesday, June 9, 2026
F40 GTE LM1995 conversion started
Inspired by new release of MFH F40 GTE I've decided to make my own conversion, but in 1/24 scale.
Idea is to kit bash Fujimi F40LM and Tamiya F40. I plan to use full chassis and cockpit from Tamiya kit
and mate it with body, wheels and brakes from Fujimi kit. It will not be 100% correct and perfect, but I will
try to address as many differences with real car, as I am able to.
Here are some photos of the work so far. Mock up of Tamiya chassis. The design of this 38 years old kit is
typical Tamiya. Fit is good and amount of detail is pretty decent. Race car has bigger turbo intercoolers. Not
sure if I will be able to make them or will live with incorrect smaller ones, yet.
 Fujimi body does not fit as is over that chassis. However with some modifications and added material, I think
I will be able to make it work.
Fujimi body does not fit as is over that chassis. However with some modifications and added material, I think
I will be able to make it work.
 For some reason Fujimi did not include channels behind rear windows. It's open space and looks strange. Current
thinking is to get those cut from Tamiya body and transplanted onto Fujimi's. Hopefully I will be able to do it.
Also plan to cut off street car's muffler and scratch make straight tail pipes.
For some reason Fujimi did not include channels behind rear windows. It's open space and looks strange. Current
thinking is to get those cut from Tamiya body and transplanted onto Fujimi's. Hopefully I will be able to do it.
Also plan to cut off street car's muffler and scratch make straight tail pipes.
 Next things to do are modifications to front end of the chassis to get rid of street car's structures, adoption
of Fujimi's breaks and wheels to Tamiya's chassis, some mods of Fujimi's rear end lower body to accept radiators
from Tamiya. scratch making of racing diffuser and many other smaller mods.
Next things to do are modifications to front end of the chassis to get rid of street car's structures, adoption
of Fujimi's breaks and wheels to Tamiya's chassis, some mods of Fujimi's rear end lower body to accept radiators
from Tamiya. scratch making of racing diffuser and many other smaller mods.
Fujimi body does not fit as is over that chassis. However with some modifications and added material, I think
I will be able to make it work.
For some reason Fujimi did not include channels behind rear windows. It's open space and looks strange. Current
thinking is to get those cut from Tamiya body and transplanted onto Fujimi's. Hopefully I will be able to do it.
Also plan to cut off street car's muffler and scratch make straight tail pipes.
Next things to do are modifications to front end of the chassis to get rid of street car's structures, adoption
of Fujimi's breaks and wheels to Tamiya's chassis, some mods of Fujimi's rear end lower body to accept radiators
from Tamiya. scratch making of racing diffuser and many other smaller mods.
Saturday, June 6, 2026
More work on 962C body panels
Deeper I get into this project, more "ambitious" it gets. Cut out rear engine cover. Also decided
to make front clamshell detached. So, done even more cuts.
 Next was time to mix some Tamiya 2 parts putty and try to improve door fit. First photo shows small patches of putty I've applied.
Second photo shows my first crude attempt to replicated exhaust pipes using donor 956 floor as a guide. Need to improve my putty forming skills for the future.
Next was time to mix some Tamiya 2 parts putty and try to improve door fit. First photo shows small patches of putty I've applied.
Second photo shows my first crude attempt to replicated exhaust pipes using donor 956 floor as a guide. Need to improve my putty forming skills for the future.


Next was time to mix some Tamiya 2 parts putty and try to improve door fit. First photo shows small patches of putty I've applied.
Second photo shows my first crude attempt to replicated exhaust pipes using donor 956 floor as a guide. Need to improve my putty forming skills for the future.
Saturday, January 3, 2026
SF70H livery decals finished
It did not actually take 7 years to complete decals on this model, even though I am still not done with CF ones. There were just 7 years this build was on hiatus as well. Happy to finally return to it and make some good progress. As I've said pretty much all sponsor decals are applied and mostly CF decals left to finish. However CF decals application is the step when I often lose interest. Hopefully it will not go to hiatus for 7 more years :)


F2008 CF decals finished
While I finally have time for model building over holidays, I bring back from hiatus another one. It is still stuck in the phase of applying CF decals. However I made good progress and almost ready to move past CF. Few aero bits and bottom of the floor as shown on photos took over 11 hours to complete. Basically CF decals take forever for me. I've used many, but Tamiya CF decals become my preferred choice. Easy to work with and respond to micro-set and micro-sol well. Hair dryer is a must, though, to help decals conform to complex shapes.


Friday, January 2, 2026
Fixing 962C doors
Plan A of mating 926C front and rear with 956 middle body did not really work. 962C front does not meet well with 956 body. Quite a gap between 956 front wind shield window and 962C front clamshell.

Plan B is to transplant 956 doors into 962C body seems to be more realistic. Starting with left doors, I've cut out doors from bodies and modified 956 doors and cut out in 962C to fit. Fit is not perfect and more work will be needed to improve it. But it is possible to fit 956 doors into 962C body. Apparently doors in 962C kit are smaller and bigger 956 door could be trimmed a bit to fit into slightly enlarged opening in 962C body. That will be my chosen way forward. I wonder if regga did the same for his build. Unfortunately he did not specify how he got new doors and front clamshell for his 962C conversion.

Finished second door as well. However looking at the fit I got in the end, I am not sure I've chosen the right direction. Fit is not good. Might have been better to stick with plan A and somehow mate 962C front with 956 middle body. Not sure now.

Plan B is to transplant 956 doors into 962C body seems to be more realistic. Starting with left doors, I've cut out doors from bodies and modified 956 doors and cut out in 962C to fit. Fit is not perfect and more work will be needed to improve it. But it is possible to fit 956 doors into 962C body. Apparently doors in 962C kit are smaller and bigger 956 door could be trimmed a bit to fit into slightly enlarged opening in 962C body. That will be my chosen way forward. I wonder if regga did the same for his build. Unfortunately he did not specify how he got new doors and front clamshell for his 962C conversion.
Finished second door as well. However looking at the fit I got in the end, I am not sure I've chosen the right direction. Fit is not good. Might have been better to stick with plan A and somehow mate 962C front with 956 middle body. Not sure now.
Work to adopt engine from 956 donor to 962C chassis and gearbox
Next modification is to get engine spacer and engine from 956 into 962C chassis. I've decided to keep gearbox from 962C as is. So, had to cut off gearbox from 956 powertrain and modify it to fit. Fit is not perfect, but will do for my conversion.


Work on 962C conversion project resumed
After a hiatus of about 9 years, I am returning back to this build. I have been looking for ways to correct doors, as I could not live with their compromised shapes. Recently looked more closely into what were the differences between 962C and 956 cars. Also got inspired by way Studio27 solved door shape issue in their trans-kits and by work of the guy behind clay-models. In the end I've decided to use internals and middle body from 956 donor. Pictures are of modifications of internal parts so far. New plan is to have parts of 956 cockpit transplanted onto 962C cockpit, have 956 engine transplanted over as well and then have middle body from 956 mated with front and rear covers from 962C.


Tuesday, December 15, 2020
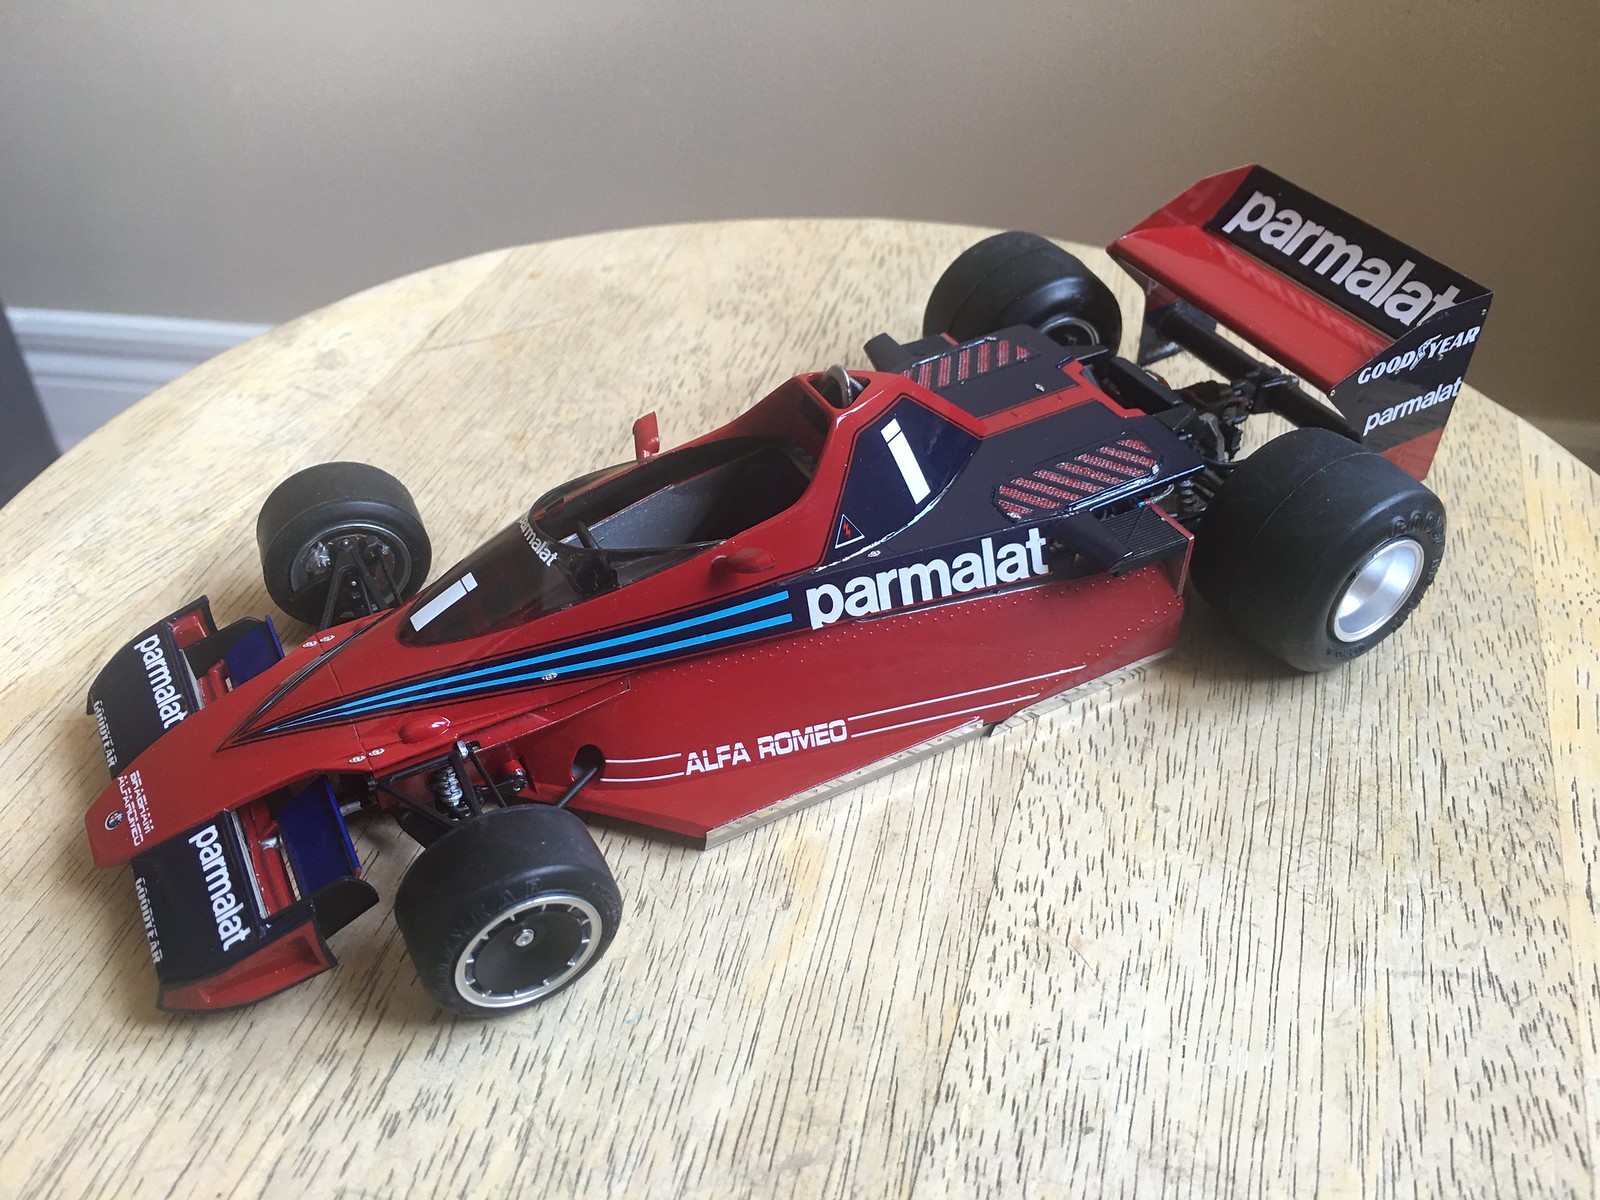
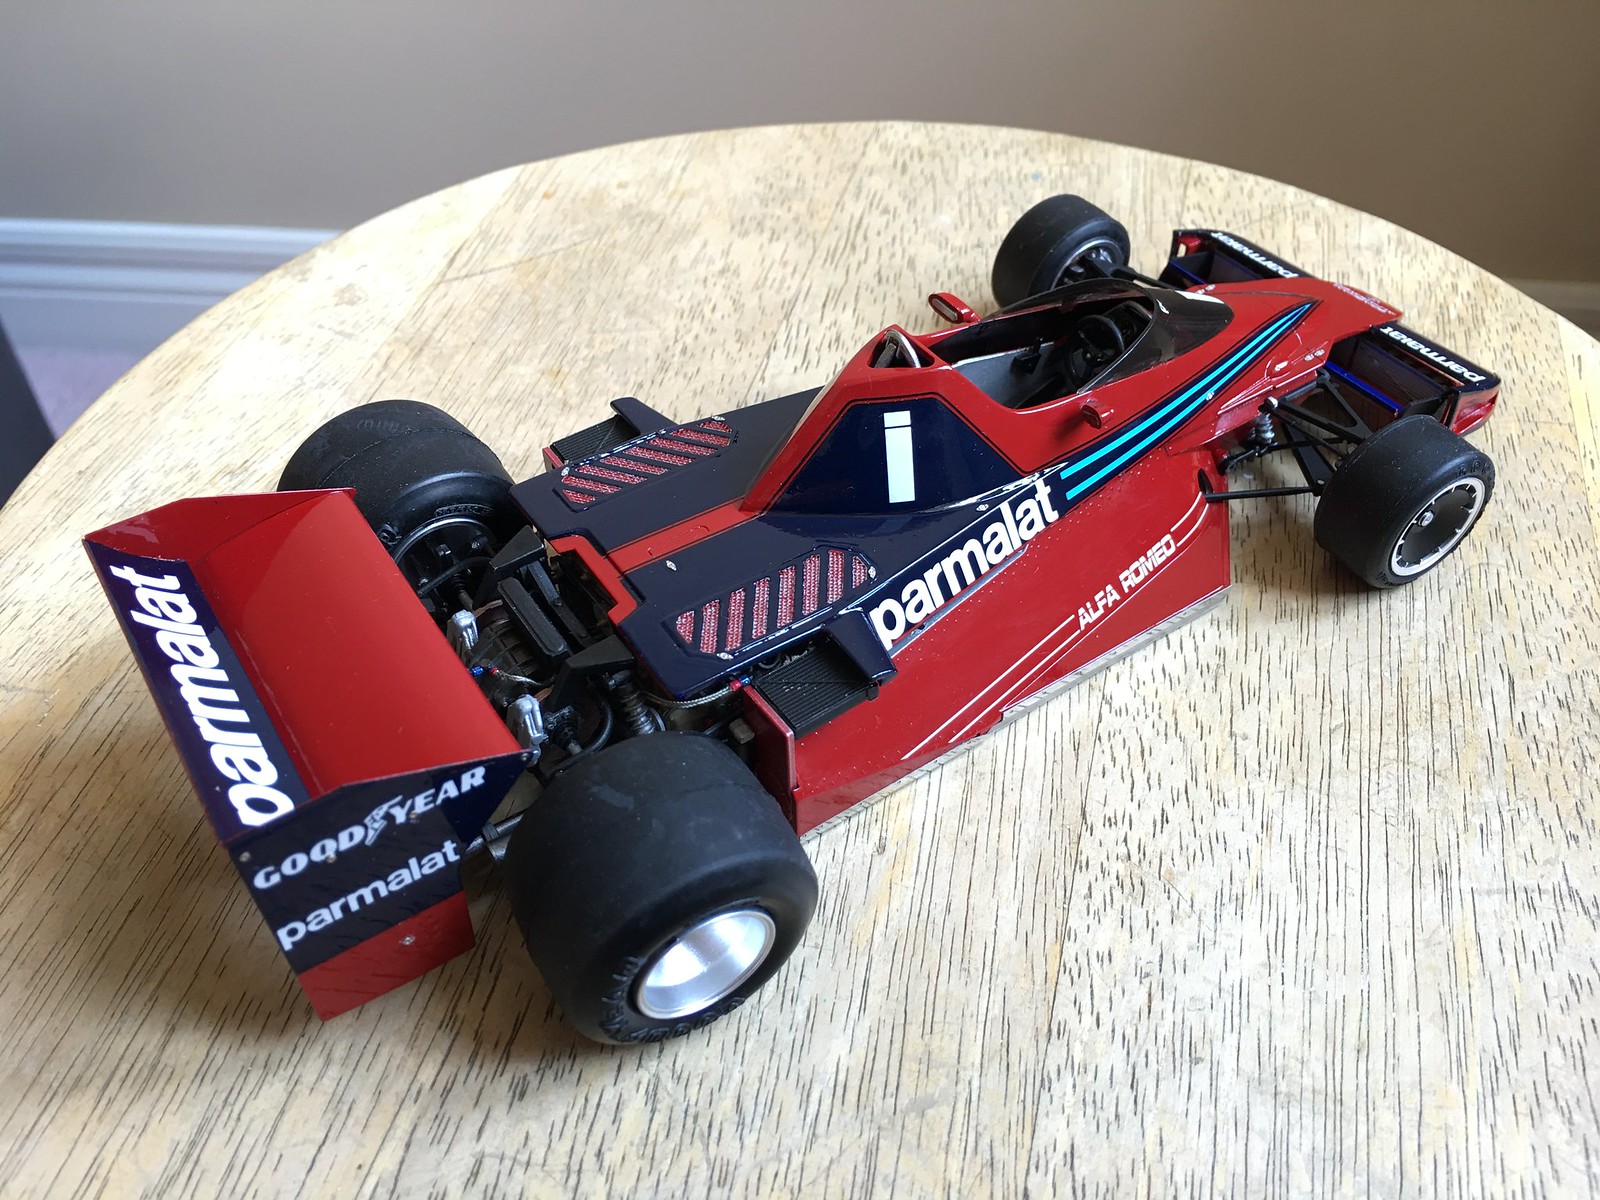
BT46 is completed
Added all the missing small things and completed model this summer. Finally posting updaate.

Fujimi MP4/6 build completed
Added rivets and other minor things for this build in the summer. Used tires with lables from another old model. Finally posting update.


Wednesday, October 30, 2019
Falling behind in builds of modern cars
I still have quite a bit of work to do on my Tamiya SF70H build. But already I have 3 more kits of modern F1 cars. One red one from 2018 (not pictured) and silver and blue ones from 2019. And my own project of 3D printed blue car from 2018 on top of all.

Thursday, October 17, 2019
More assembly steps completed for MP4/6
More progress. Cables are tied up. Steering wheel attached. Brakes assembled and installed. Brake lines routed out to calipers. Rear and front wings assembled. Need to complete number of small items and wheel before Saturday's local context. Will be adding rivets later and some other small details later.


Subscribe to:
Posts (Atom)