It's hard to believe that F2007 build has been waiting for new rear wing's main element for almost a year now. I couldn't make myself to tackle resin casting needed. I wanted to make a resin copy of part from MFH kit. Below are photos of the process and couple of test casts. As I have feared, result is not great. I will do couple more attempt on casting from this mold. Hopefully I will be able to make decent cast to use a start. It will still require quite a bit of putty work to fill all imperfections. So far my experience of making silicon mold has not been great. Still lot to learn and experiment to improve result. Lego blocks are great for making mold boxes.
Wednesday, October 5, 2011
Saturday, September 17, 2011
MP4/22 rescue build
I finally have something to show. Finished applying CF decals to the floor of this model. Took me about 10 hours to complete. Lot more parts to CF.
Internal area of diffusor was most difficult part. But SMS decals work well. I have left bottom plank area for later treatment. Plan is to clear coat CF decals first and then attach plan simulated by wooden sticker or paint it flat earth color.
Top of diffusor wasn't easy also. Had to do quite a bit of patching. But I'm happy with results over all.
Rest were mostly flat straight surfaces and took much less time to complete.
Thursday, September 8, 2011
Monopost MP4/25 WIP
Small update, but big step. I've tested Zero 2k and while it seemed to work on test spoon, it started to change shade on real parts. I've started with parts, which will be covered in red decals. So, those were my test parts. My conclusion was that Zero 2K is "no go". I've even tried to spray Mirrachrome over Zero 2K second time. Didn't help much. And trusted Gunze H30 affected Mirrachrome paint and dulled finish as well.
So, I've set out to find another clear, which would preserve this paint. Special Mirraclear product is out of my reach at present. Fortunately Wing&Wheels (probably best LHS in GTA) had all new Alclad clear coats in stock. I've picked up Alclad gloss clear. And it actually did preserve Mirrachrome paint well. Not much affect on shine, if at all. Though it is smelly paint. I've probably put too much of it on the body and it has been drying for 3 days by now, including about 12 hours in dehydrator. Still not 100% dry, I think. Beside it seems to be fragile, compared to Zero 2K, which is pretty solid, when dry.
I'm wondering if it will be save to cover Alclad gloss clear with Zero 2K ? I would really like to get more solid and less fragile clear over Alclad's clear, before I start decal application and parts would see quite a bit of handling.
Here is quick snapshot. Not much difference with previous one. But that's the point - it means shine has been preserved well. MP4/22 on background received few coats of Zero @K clear to protect decals. Zero 2K clear also helped to make colors more vivid on those fluo red decals.
Lotus 97T Belgium WIP
Build is progressing well. I'm almost done painting parts. Will polish body parts and then it's decal time. Should be OK for OOB, but kit is definitely lacking details in engine bay area.
Painted black inside body panels. Monocoque shell is painted with TS40. Should be CF, as on real car, but I'm not going to bother for OOB build.
Engine block is painted with Alclad aluminium. Gearbox was painted with TS42 and then darkened with Tamiya TS71 smoke. A bit too shiny for my liking. Will probably have to dull it a bit with flat clear.
Rest of exhast/turbo system parts painted in Alclad PA and semi-gloss black. I've gone adventures on exhausts and put many different paints over in almost random order :) Looks acceptable to me. Suspension parts were painted in TS29 semi-gloss black and Alclad PA. Brake calipers were painted with TS21 gold, brake hubs with Alclad SS.
Wednesday, August 31, 2011
Lotus 97T Belgium WIP
Small update for now. Started painting process. Put TS14 onto body parts and number of exhaust/turbo system parts as base for Alclad's high gloss paints. Painted all suspension parts in TS29. And finally put TS40 onto main monocoque shell. Real car of course has a lot of CF used, but I've decided to go with paint only. TS40 is not a perfect match, but I felt it's fine for my OOB build. I thought something else is needed instead of just semi-gloss black. I'm not 100% happy with how TS14 turned out on body parts and will have to polish them before decals. Next, I will be painting various Alclad metallic shades on engine, gearbox, exhausts, radiators, etc.
Quick snapshot of drying parts inside my paint booth. Will do proper pictures when parts are finished. Sorry for messy background.
Monopost MP4/25 WIP
Thrown away my hesitations, got new nozzle and needle for my air-brush and set out to put Mirrachrome paint onto body and wing elements. Nice paint. It actually felt quite similar to Alclad Polished Aluminum. I've got very similar result with some over spray. So, I had to buff the paint a bit to bring full shine out. I mentioned already, that black base I use is TS14. I have compared samples sprayed over Alclad's black base and over TS14, and in my opinion TS14 is better. Overall shade looks brighter and shinier compare to Alclad PA on MP4/22. I was told that Mirrachrome should withstand 2K clear coat better. However judging by how similar it feels to Alclad PA, I suspect that might not be 100% correct. I will try clear out on some not so visible spots.
I have not polished full body surface and you could see that reflections aren't perfect. Ideally one would need to properly level black base to get perfect reflections.
First couple of shots of current state of the body.
Next couple of traditional "family" shots. At present MP4/25 looks brighter. I hope it will stay like than after clear. In my opinion real car does have a brighter shade compare to older 2007-2008 cars.
Saturday, August 27, 2011
MP4/22 rescue build
Finished decal application to the body. It looked like shown on picture right below after that.
I could not stand those wrinkled stripes and decided to patch them up. Fortunately I had couple of black striped left over from 2 old decal sets. So, I've sliced them up and patched stripe on the top of engine cover and stripes on the nose. Done the same for fir big side pod decals. Patched some visible seams. I'n reasonably satisfied with end result. Not ideal, but better this way. Hopefully clear coat will make it all look a bit better.
I do not plan any more corrections for this decals. So, this signifies start of finish straight for this model. Next will be a big job of applying CF decals. Plan is to CF everything black on this car.
I could not stand those wrinkled stripes and decided to patch them up. Fortunately I had couple of black striped left over from 2 old decal sets. So, I've sliced them up and patched stripe on the top of engine cover and stripes on the nose. Done the same for fir big side pod decals. Patched some visible seams. I'n reasonably satisfied with end result. Not ideal, but better this way. Hopefully clear coat will make it all look a bit better.
I do not plan any more corrections for this decals. So, this signifies start of finish straight for this model. Next will be a big job of applying CF decals. Plan is to CF everything black on this car.
Wednesday, August 24, 2011
MP4/22 rescue build
Started over new decals application. Took me couple of months to build up my courage. Yet, I was so nervous. Decals are best and worst part of this kit. Best, because graphics is great, resolution is great, colors are nice. Worst - because they don't fit well.
I did get big red decals on side pods to more correct position this time. But thin stripes along the body came out worse then on previous attempt. While it was easier to apply decals over 2K coat, I still managed to do more damage to them this time. Spent close to 5 hours doing only few mail ones. Well, I'm not going to re-do it 3rd time anyway. Rest of the decals should be less problematic.
Monday, August 22, 2011
Lotus 97T Belgium WIP
I've finally reached the point where parts were ready for primer. Sprayed all with Tamiya light primer and metal primer for PE parts. Lots of primer was used. As with other OOB builds of plastic kits, that step signifies beginning of the finish straight for me. From that point it's straightforward, pretty much just painting of different colors, decals and assembly. Looks like this one might be quick as well, similarly to Lotus 79.
Quick snapshot. Sorry, my paint booth is a bit messy.
Thursday, August 18, 2011
Lotus 97T Belgium WIP
Work continues slowly, but steadily. There plenty of preparation steps and small modifications to finish before I could get into priming. So far I've done following
- cut off rear wing's plastic end plates, will be using PE parts instead
- assembled wings and putties seams
- puttied seams in parts of turbo system and exhausts
- cut holes in the body for turbo "snorkels" and puttied around them
- re-created missing end of front upper wishbone
- glued together brake cooling ducts and gearbox parts
- removed logos from head covers and replaced them with PE parts
- assembled roll protection bar.
Here is quick overall snap shot
Saturday, August 13, 2011
Monopost MP4/25 WIP
I've finally reached that elusive point in the build when i could say preparations are done to my satisfaction, never perfect, and I can start painting process. So, I went ahead and started it. Put few coats of TS14 as base for Mirrachrome paint onto the body and wing elements. And put coats of TS29 as base for CF decals on suspension parts, floor, seat, gearbox and others.
First picture of the body. I love finish TS14 provides right out of airbrush. It's basically a mirror like, just without a silver. Coin is there the give some idea of it's reflection properties. It is a little harder to get such finish with TS14 compare to Alclad's black base, but TS14 does actually dry and is much more durable compare to Alclad's enamel paint.
Next is over all shot of other parts. Template'd CF decals are included in the kit and presumably should make my life easier, that is of course if they will actually stick. So, in theory I will not have to make my own templates for CF work. We'll see how well they work in practice soon. Kit provides decals for all parts, which supposed to be day glow red color on real car. While I would have preferred to paint that color myself, S27 for some reason did not provide separate logos for that. Instead logos are printed together with red color That means I have no choice except representing red with decals. I've decided to apply them over Mirrachome paint in hope that mirror background will enhance red color of decals, if decals aren't fully opaque. We'll see how it works out.
Parts are drying at present. Next will be masking and spraying of Mirrachrome paint. Another "moment of truth" in this build.
First picture of the body. I love finish TS14 provides right out of airbrush. It's basically a mirror like, just without a silver. Coin is there the give some idea of it's reflection properties. It is a little harder to get such finish with TS14 compare to Alclad's black base, but TS14 does actually dry and is much more durable compare to Alclad's enamel paint.
Next is over all shot of other parts. Template'd CF decals are included in the kit and presumably should make my life easier, that is of course if they will actually stick. So, in theory I will not have to make my own templates for CF work. We'll see how well they work in practice soon. Kit provides decals for all parts, which supposed to be day glow red color on real car. While I would have preferred to paint that color myself, S27 for some reason did not provide separate logos for that. Instead logos are printed together with red color That means I have no choice except representing red with decals. I've decided to apply them over Mirrachome paint in hope that mirror background will enhance red color of decals, if decals aren't fully opaque. We'll see how it works out.
Parts are drying at present. Next will be masking and spraying of Mirrachrome paint. Another "moment of truth" in this build.
Saturday, August 6, 2011
Lotus 97T Belgium WIP
I've struggled couple of hours fiddling with bits of turbo/exhaust system of his kit trying to figured out how to assemble it. That system of tabs and slots designed by Fujimi is not working for me. Some tabs did not fit into slots. I've fixed that by sanding plastic off. But main issue is a "play" those parts have after tabs and slots match up. With big "plays" between parts how am I supposed to align them properly ? And alignment between those parts is critical for whole turbo/exhaust assembly to fit into its intended place.
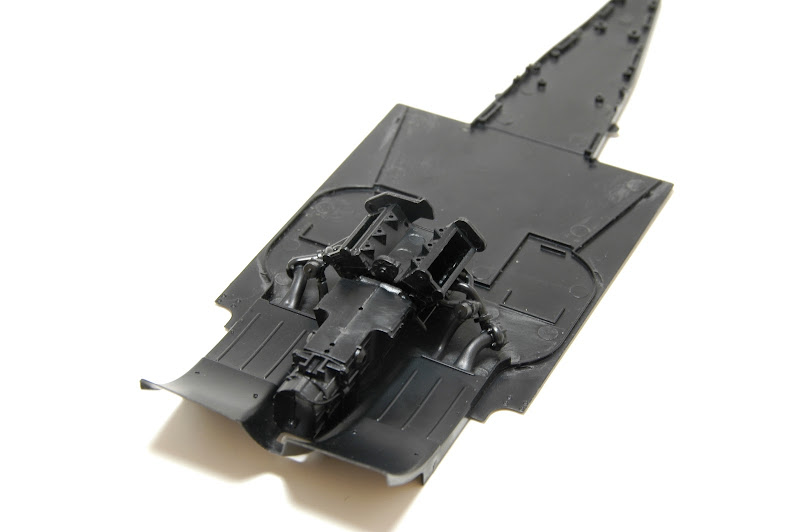
I've come up with solution to the issue eventually and was able to assemble exhausts with corresponding parts of turbo system. I don't know names of parts of real car, so I will use part numbers from Fujimi kit. Fist I've mock assembled engine and glued it in place with small spots of CA glue. Next I've glued exhaust pipes in place also using small CA drops (parts D1, D2). That gave me two main reference "anchors" for alignment. Next I've glued together main components F2+F16 and F1+F17, and glued them to D1/D2 at the same time. I worked on each side separately of course. Keeping eyes on slots in F1/F2 parts and making sure they are close to horizontal position was important, so sub-assemblies E and F would fit and vertical snorkels would properly align. I've used Tamiya plastic glue, because I wanted bonds to be permanent here. After plastic glue made stable bonds, I've broken of CA seals and taken resulting sub-assemblies out. Last I've glued on parts F6/F7 doing some minor tweaking of parts again using plastic glue to get stronger bond. I plan to paint those whole assemblies all together.
While alignment of parts F6/F7 is a bit off, I'm reasonably happy with how it all turned out. Now I can move on and from this point build should be pretty much straightforward. There might be some tweaks required to get parts F18/F19 fit well. I actually plan to attache them to C8/C9 beforehand, putty seams and paint. Then I will play with fit of parts F3/F4 to make it all come together.
Below is a pictures of mock up with parts in place around the engine.
Thursday, August 4, 2011
Monopost MP4/25 WIP
Tuesday, August 2, 2011
Monopost MP4/25 WIP
Next thing to correct was position of rear brake calipers. S27 put them in horizontal position with front edges even pointing upwards (right side on the picture). According to my references position of calipers should be vertical instead with little positive angle towards front. I've cut new cavities and filled old ones with removed original material. Looks more correct to me now (left side on the picture).
Saturday, July 23, 2011
Monopost MP4/25 WIP
While working on body surfaces in numeric putty/sand/prime/sand iterations, I've unintentionally altered shape of exhaust outlet cover. I looked at my reference pictures and as I have to go through another iteration, I've decided to modify it again in attempt to get closer to original car. While I still couldn't get it to be a 100% correct shape, I think it's better then before.
As it happened many times before, I hope this putty/sand/prime/sand iteration will be the last before I could put layers of TS14 over it. As it happened with MP4/22 build, I will eventually get feed up with attempts to get perfect surface and just move on. After all it's just a model and real perfection basically requires eternity to obtain. Beside when I put models on the shelf and look at them from meter or so away, I don't see small defects and I forget about past issues with each kit quickly too.
Saturday, June 18, 2011
Lotus 97T Belgium WIP
Started Fujimi kit. Plan is to build De Angelis car from Belgium GP. I'm building it OOB with addition of bits from Studio27 PE set. Looks like this time I will be able to use almost all parts from S27 PE set. I think it's a good value for the price.
For my experience so far Fujimi kits aren't as well designed as Tamiya's. Casting and plastic quality also not as good. Fit is mostly fine, but many tabs, pins and holes have to be adjusted to make parts fit properly. Mock up pre-assemblies and test fits are a must for Fujimi kits. A lot more so then for Tamiya.
Spent quite a few hours to get to this point, but at least body panels, wings and suspension arms fit good together now. Still have number of parts related to car's turbo system to clean and test fit. I will have to fix broken arm end on upper arm of front suspension. It's a first time I see such defect in Fujimi kit. I don't see a missing piece in the box, so I assume it came like that from manufacturing plant.
Friday, June 17, 2011
Fujimi 248F1
I've finished wheels of 248F1 and put MFH replacement tires on. I like MFH tires much more that tires from the kit itself. And as a bonus I don't have to worry about tire markings, they are pre-printed. Model is not 100% finished yet, but I just could not resist and made few pictures. The is something in the looks of this car. I like it. Model is not as tight and clear as F60, with number of big gaps between panels and bunch of glue marks. But from a distance it looks great to me.
MP4/22 rescue build
Sprayed Alclad PA onto the body yesterday night. Weird thing happened. I saw some lighter spots on the body and tried to remove them with cotton swab while paint wasn't fully dry. Overall surface was looking bad as if some paint over spay was applied to it. But as soon as I've started "polishing" it with cotton swab, it started to remove "over spray" and brighter shinier surface started to emerge from under it. I've "polished" entire surface of the body with number of cotton swabs. And it looks a lot better now. Is seems that swabs removed some of the paint and made something like polishing effect. I wonder if that result of different black base - TS14. People were saying that Alclad paint would rub off if Alclad's black enamel base isn't used. But in my case only some paint was removed by cotton swabs and plenty of paint remained to make a nice shinny reflective surface. I've made couple of pictures, but again it's hard to capture that shade with photos.
I'm satisfied with result and plan to protect it with Gunze H30 acrylic clear next. From all my experiments, that's the only clear which does not affect Alclad PA finish much. Then I plan to paint some black spots and decals will be next.
Thursday, June 16, 2011
MP4/22 rescue build
I got tired of that putty/sand/prime cycle and decided MP4/22 body surface is good enough for me. I want to move on and finish it. I'll leave the goal of making it perfect for another project. On this attempt I've chosen to use Tamiya TS14 black as base for Alclad PA. From experiments I've done, I believe it provides as good a base as Alclad's enamel black base. It has couple of advantages though - it could be polished and it actually dries. Enamel paint don't seem to dry ever. While enamel base supposed to help Alclad paint to be more resilient to rubbing, I found Alclad holds on to TS14 pretty good too. And for MP4/22 I will be putting H30 clear and then Zero 2K clear over Alclad paint, so rubbing should not be and issue in the end.
Black reflective body probably requires different light setup for photography. My picture doesn't look that good, but it'll do for simple progress report.
Tuesday, June 14, 2011
MP4/5B re-build
Looks like f1m.com forum is closed for now. So, I'm going to put update on my MP4/5B re-build here. It's pretty close to completion. Just need to finish off rear wing, tires and windshied. Rear wing is attached only for mock up at present. I've modified brakes of this model. Separated and hollowed calipers, added bleed valves and connection pipes. I've used some brass bolts and nuts from my local hobby shop. First time I've tried "Blacken-it" product. It supposed to make metal parts look like anodized black. It did darken nuts somewhat, but not to the extent I wanted. Alternative would be to paint them. However painting of nuts is tricky and my attempt failed. Paint was simply too thick and affected nut threads, so they stopped working. When I tried to thread them, paint chipped. So, I guess I will live with current color this time.
Wheels are all out of alignment, most likely because of modifications I've done to brakes. I've used Tamiya acrylic paint for hubs and it shows. Will use TS paints via airbrush next time to get cleaner finish. I've had no luck so far with those acrylic paints.
Anyway, result is again isn't as clean as I would want, but will look OK from feet or two viewing distance. I love the look of this car and glad it is back on my shelf. Next time I plan to build this kit detailed and cleaner into model of Senna's car. Have 2 Perfect Parts detail sets to make it as detailed as I want.
Sunday, May 22, 2011
Lotus 79 1979 WIP
Making good progress on Lotus build. Masked and painted all areas needed to be black. I have no reference pictures for inside of the body, so I used my own discretion and painted it all black. It seemed to go well until I started to remove masking tape. Tape lifted clear coat a bit in few places. Unfortunately one is on rear engine cover is quite visible. Don't know what to do with that now. I guess I will have to leave with it and make sure I clean parts better after decal application next time. I'm having more issues with this build compared to F60. It isn't that smooth at all.
Next I installed radiators. Then worked on seat belts and finally put seat in place. I just used kit PE parts and "plastic" like belt material. They look Ok, but for my detailed build of 1978 car I will most likely use different material, more realistic and closer to real car.
I then went on to install dashboard, gearbox and rear sway bar adjustment levers and both fire extinguishers. Basically put everything in place before I can close monococque with top panels.
Installed front body panels and closed monococque. I don't think it is like that on a real car, but probably the only way to design model kit, so internals could be installed easily. It's all practically finished. I plan to polish clear coat on the body panels and try to get rid of some contamination. Then only wheels and tires will be left to finish this model off. And steering wheel and refinished velocity stacks of course.
Enjoyable kit of great car, but not without issues. I'm a bit surprised by those issues after F60 went together easily and cleanly.
Thursday, May 5, 2011
Tamiya Lotus 79 1979 WIP
Mated engine/gearbox with monococque. That's was first time for last two builds of Tamiya kits when I got an issue. Under body panels do not fit very well because of interference with exhaust pipes. I might have done something wrong, but I'm not sure what. Had a bit of struggle to align engine and body parallel to the ground. Had to remove some plastic here and there. Finally got it ok, but in the process of multiple test fittings I've rubbed some Alclad paint of. Now I have to fix edges on monococque and re-paint engine trumpets. Alclad's own enamel black base does not work that well for me. I found Tamiya TS-14 to provide better base for Alclad metallic paints. Will use TS-14 from now on.
This is how it looks right now with body panel temporary on. Body panels still need to be painted black inside. Then I will attach the remaining detail parts. Last part will be wheels and tires. I plan to try using tire stencil again. According to other modelers tire markings on cars from that era weren't crisp and were made via real size stencils. Hopefully I will have better luck compare to markings on modern tires.
Saturday, April 30, 2011
Lotus 79 1979 WIP
Small update. Assembled front suspension and other parts around it. Everything fit nicely. Applied decals and metal transfer ring to dashboard. Struggling to decide if I should try to form lenses over dashboard indicators using Micro Scale Crystal Clear. Never tried that before, so, I'm afraid to screw up quite visible part of car. Have to do seat belts next. Going to use PE and simulated fabric from the kit. Took quick snapshot before I close it all with upper monococque panels.
Lotus 79 1979 WIP
Managed to get all parts, except body panels ready for assembly. From that point build starts to go fast. Tamiya Photo-Etch parts are very nice too. Found PE body fasteners on the small fret with seat belt hardware. I thought they were only simulated by decals. Was I nice surprise. Glued them on. They look great, IMO. Also attached radiator faces, pedal details, brake rotor and hubs details and last bit of heat shielding over gearbox.
Attached water pipes and throttle linkage to engine. And finally mated engine and gearbox. Then put exhausts in place. No issues there. Drive train is basically complete now. Will work on front suspension and monocoque next.
Subscribe to:
Posts (Atom)