I've come up with solution to the issue eventually and was able to assemble exhausts with corresponding parts of turbo system. I don't know names of parts of real car, so I will use part numbers from Fujimi kit. Fist I've mock assembled engine and glued it in place with small spots of CA glue. Next I've glued exhaust pipes in place also using small CA drops (parts D1, D2). That gave me two main reference "anchors" for alignment. Next I've glued together main components F2+F16 and F1+F17, and glued them to D1/D2 at the same time. I worked on each side separately of course. Keeping eyes on slots in F1/F2 parts and making sure they are close to horizontal position was important, so sub-assemblies E and F would fit and vertical snorkels would properly align. I've used Tamiya plastic glue, because I wanted bonds to be permanent here. After plastic glue made stable bonds, I've broken of CA seals and taken resulting sub-assemblies out. Last I've glued on parts F6/F7 doing some minor tweaking of parts again using plastic glue to get stronger bond. I plan to paint those whole assemblies all together.
While alignment of parts F6/F7 is a bit off, I'm reasonably happy with how it all turned out. Now I can move on and from this point build should be pretty much straightforward. There might be some tweaks required to get parts F18/F19 fit well. I actually plan to attache them to C8/C9 beforehand, putty seams and paint. Then I will play with fit of parts F3/F4 to make it all come together.
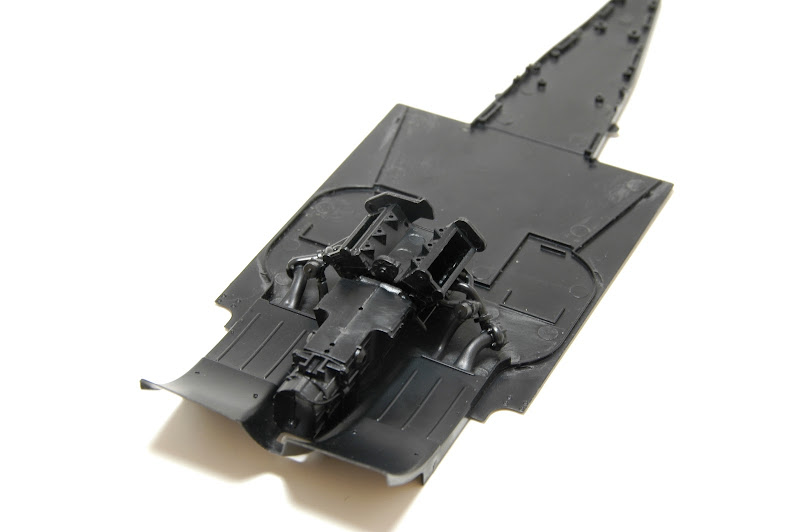
Below is a pictures of mock up with parts in place around the engine.
No comments:
Post a Comment