Wednesday, August 31, 2011

Lotus 97T Belgium WIP

Small update for now. Started painting process. Put TS14 onto body parts and number of exhaust/turbo system parts as base for Alclad's high gloss paints. Painted all suspension parts in TS29. And finally put TS40 onto main monocoque shell. Real car of course has a lot of CF used, but I've decided to go with paint only. TS40 is not a perfect match, but I felt it's fine for my OOB build. I thought something else is needed instead of just semi-gloss black. I'm not 100% happy with how TS14 turned out on body parts and will have to polish them before decals. Next, I will be painting various Alclad metallic shades on engine, gearbox, exhausts, radiators, etc.

Quick snapshot of drying parts inside my paint booth. Will do proper pictures when parts are finished. Sorry for messy background.


Monopost MP4/25 WIP

Thrown away my hesitations, got new nozzle and needle for my air-brush and set out to put Mirrachrome paint onto body and wing elements. Nice paint. It actually felt quite similar to Alclad Polished Aluminum. I've got very similar result with some over spray. So, I had to buff the paint a bit to bring full shine out. I mentioned already, that black base I use is TS14. I have compared samples sprayed over Alclad's black base and over TS14, and in my opinion TS14 is better. Overall shade looks brighter and shinier compare to Alclad PA on MP4/22. I was told that Mirrachrome should withstand 2K clear coat better. However judging by how similar it feels to Alclad PA, I suspect that might not be 100% correct. I will try clear out on some not so visible spots.

I have not polished full body surface and you could see that reflections aren't perfect. Ideally one would need to properly level black base to get perfect reflections.

First couple of shots of current state of the body.


Next couple of traditional "family" shots. At present MP4/25 looks brighter. I hope it will stay like than after clear. In my opinion real car does have a brighter shade compare to older 2007-2008 cars.


Saturday, August 27, 2011

MP4/22 rescue build

Finished decal application to the body. It looked like shown on picture right below after that.


I could not stand those wrinkled stripes and decided to patch them up. Fortunately I had couple of black striped left over from 2 old decal sets. So, I've sliced them up and patched stripe on the top of engine cover and stripes on the nose. Done the same for fir big side pod decals. Patched some visible seams. I'n reasonably satisfied with end result. Not ideal, but better this way. Hopefully clear coat will make it all look a bit better.


I do not plan any more corrections for this decals. So, this signifies start of finish straight for this model. Next will be a big job of applying CF decals. Plan is to CF everything black on this car.

Wednesday, August 24, 2011

MP4/22 rescue build

Started over new decals application. Took me couple of months to build up my courage. Yet, I was so nervous. Decals are best and worst part of this kit. Best, because graphics is great, resolution is great, colors are nice. Worst - because they don't fit well.

I did get big red decals on side pods to more correct position this time. But thin stripes along the body came out worse then on previous attempt. While it was easier to apply decals over 2K coat, I still managed to do more damage to them this time. Spent close to 5 hours doing only few mail ones. Well, I'm not going to re-do it 3rd time anyway. Rest of the decals should be less problematic.


Monday, August 22, 2011

Lotus 97T Belgium WIP

I've finally reached the point where parts were ready for primer. Sprayed all with Tamiya light primer and metal primer for PE parts. Lots of primer was used. As with other OOB builds of plastic kits, that step signifies beginning of the finish straight for me. From that point it's straightforward, pretty much just painting of different colors, decals and assembly. Looks like this one might be quick as well, similarly to Lotus 79.

Quick snapshot. Sorry, my paint booth is a bit messy.


Thursday, August 18, 2011

Lotus 97T Belgium WIP

Work continues slowly, but steadily. There plenty of preparation steps and small modifications to finish before I could get into priming. So far I've done following
- cut off rear wing's plastic end plates, will be using PE parts instead
- assembled wings and putties seams
- puttied seams in parts of turbo system and exhausts
- cut holes in the body for turbo "snorkels" and puttied around them
- re-created missing end of front upper wishbone
- glued together brake cooling ducts and gearbox parts
- removed logos from head covers and replaced them with PE parts
- assembled roll protection bar.

Here is quick overall snap shot


Saturday, August 13, 2011

Monopost MP4/25 WIP

I've finally reached that elusive point in the build when i could say preparations are done to my satisfaction, never perfect, and I can start painting process. So, I went ahead and started it. Put few coats of TS14 as base for Mirrachrome paint onto the body and wing elements. And put coats of TS29 as base for CF decals on suspension parts, floor, seat, gearbox and others.

First picture of the body. I love finish TS14 provides right out of airbrush. It's basically a mirror like, just without a silver. Coin is there the give some idea of it's reflection properties. It is a little harder to get such finish with TS14 compare to Alclad's black base, but TS14 does actually dry and is much more durable compare to Alclad's enamel paint.


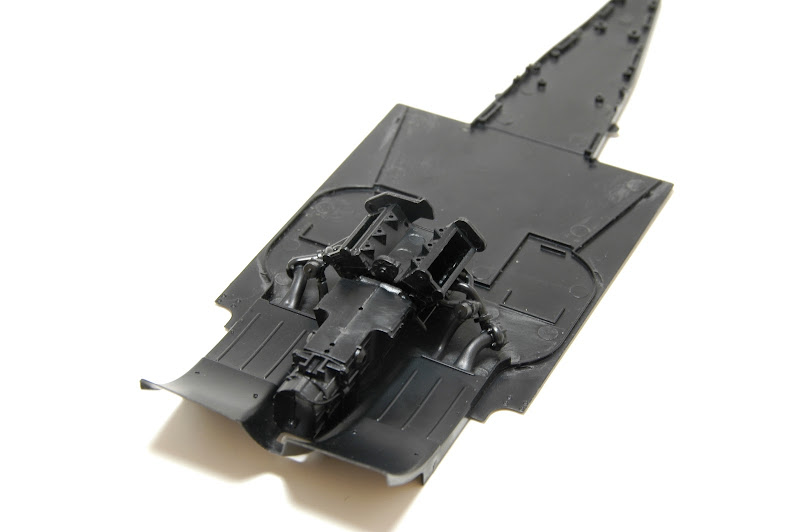
Next is over all shot of other parts. Template'd CF decals are included in the kit and presumably should make my life easier, that is of course if they will actually stick. So, in theory I will not have to make my own templates for CF work. We'll see how well they work in practice soon. Kit provides decals for all parts, which supposed to be day glow red color on real car. While I would have preferred to paint that color myself, S27 for some reason did not provide separate logos for that. Instead logos are printed together with red color That means I have no choice except representing red with decals. I've decided to apply them over Mirrachome paint in hope that mirror background will enhance red color of decals, if decals aren't fully opaque. We'll see how it works out.


Parts are drying at present. Next will be masking and spraying of Mirrachrome paint. Another "moment of truth" in this build.

Saturday, August 6, 2011

Lotus 97T Belgium WIP

I've struggled couple of hours fiddling with bits of turbo/exhaust system of his kit trying to figured out how to assemble it. That system of tabs and slots designed by Fujimi is not working for me. Some tabs did not fit into slots. I've fixed that by sanding plastic off. But main issue is a "play" those parts have after tabs and slots match up. With big "plays" between parts how am I supposed to align them properly ? And alignment between those parts is critical for whole turbo/exhaust assembly to fit into its intended place.

I've come up with solution to the issue eventually and was able to assemble exhausts with corresponding parts of turbo system. I don't know names of parts of real car, so I will use part numbers from Fujimi kit. Fist I've mock assembled engine and glued it in place with small spots of CA glue. Next I've glued exhaust pipes in place also using small CA drops (parts D1, D2). That gave me two main reference "anchors" for alignment. Next I've glued together main components F2+F16 and F1+F17, and glued them to D1/D2 at the same time. I worked on each side separately of course. Keeping eyes on slots in F1/F2 parts and making sure they are close to horizontal position was important, so sub-assemblies E and F would fit and vertical snorkels would properly align. I've used Tamiya plastic glue, because I wanted bonds to be permanent here. After plastic glue made stable bonds, I've broken of CA seals and taken resulting sub-assemblies out. Last I've glued on parts F6/F7 doing some minor tweaking of parts again using plastic glue to get stronger bond. I plan to paint those whole assemblies all together.

While alignment of parts F6/F7 is a bit off, I'm reasonably happy with how it all turned out. Now I can move on and from this point build should be pretty much straightforward. There might be some tweaks required to get parts F18/F19 fit well. I actually plan to attache them to C8/C9 beforehand, putty seams and paint. Then I will play with fit of parts F3/F4 to make it all come together.

Below is a pictures of mock up with parts in place around the engine.

Thursday, August 4, 2011

Monopost MP4/25 WIP

After months of preparation work and running out of primer, I call it a milestone. I plan no more coats of primer and will have to live with whatever state surfaces of model are by now. That means black base and Mirrachrome paint will be next, after primer dries and some wet sanding is done.


Tuesday, August 2, 2011

Monopost MP4/25 WIP

Next thing to correct was position of rear brake calipers. S27 put them in horizontal position with front edges even pointing upwards (right side on the picture). According to my references position of calipers should be vertical instead with little positive angle towards front. I've cut new cavities and filled old ones with removed original material. Looks more correct to me now (left side on the picture).