Monday, December 10, 2018

Masking, masking and more masking

Spent over 8 hours on masking parts for SF70H and BT46 builds. Most on SF70H. Never have done so much and so complex masking before. Prior to that clear coat was applied over livery decals for BT46 and over main colours for SF70H and MP4/6. At least builds will be unblocked for decal application after that.


Wednesday, October 31, 2018

Main colors painted

Got white and red base paint coats on over last few weeks. I’ve used masks provided in the kit for the fin on engine cover. Zero matched red went on reasonably well. It might not be 100% even, but close enough. Clear coat is going to be next, before I could mask again and spray some semi-gloss black. After SG black is applied, I should be able to switch focus to applying decals for the main livery and CF decals as well.

I’ve also painted floor, gearbox and number of suspension pats in new Zero carbon paint. It’s not a direct replacement for CF decals and does not provide CF patterns out of the jar. But I will use it as base for CF decals and probably even leave it exposed as is on some parts, that I won’t apply CF decals to. The likes of brake ducts, underside of the floor and probably most of the gearbox casing.


Fluo orange painted

After body was stripped off of paint from my previous attempt, it took a while to get it primed and painted base white. Work on other projects got in a way. But last weekend I got it masked and was able to put fluo orange on. In attempt to minimize paint bleeds under masking tape, I’ve “sealed” masks with one more coat of base white. In the end it did not come out perfect, but it’s not too bad either. I was able to polish some overspray, bleeds and orange peal spots. So, I am ok with it and it will have to do it for this build. Need to get thin clear coat on top of base paint, before I could apply decals. Color is a bit of on the photo made with my cell phone. I will get proper white balanced photos after clear is applied and true colors will show.


Saturday, September 29, 2018

Completed decals for BT46

Finished decals for BT46 on Sep 2. Patched broken spots last Saturday's night. Struggled with decals quite a bit, until I tried Solvaset. It worked much better then my "go to" Micro-Set/Sol combination. And altough Solvaset melts those decals to big extent, it softened decals more and allowed them to conform to surfaces much better.

Tuesday, July 3, 2018

More rear end assembly done

Got gearbox and rear suspension assembled past week


Primed parts of SF70H model

Last weekend I started to prime parts. Decided to go with light layers of grey first. Will need to smooth these coats a bit and then get white primer on the parts, which will be white and red later. First photo shows well how much pre-assembly I've done for the main shell of my model. On second photo it is possible to make out what other pre-assemblies I've done before primer for other parts.


Thursday, June 7, 2018

Assembly steps started on BT46

While focus was on BT52 build, I've continued to work on BT46 in parallel. After decals with simulated rivets were applied, I've primed over them and then shot Zero Alfa red onto body parts and wings' elements. Next I've done detail painting on engine and suspension items. And finally this week I've started assembly steps. Engine is coming together first. Put extra effort into wiring it up. Ignition wires and fuel lines could be seen on photos. I still need to come up with solution for ignition plugs/booths, which are missing from the kit. I also plan to put extra effort into plumbing. Most of the hoses will be added latter, but accepting holes have been drilled ahead of time.


Monday, May 7, 2018

Putty work started for SF70H build

Lots and lots of seems and injection pin marks to fill in. Recent Tamiya kits seems to have an excessive number of injection marks. I wonder how is the kind of injection process they use different from other manufacturers. BeeMax and Fujimi kits for example, don't seems to have as many. I've even decided to leave some of them, which will not be very visible under black paint and in some hard to see places. Don't like those prep steps much, so trying to avoid any extra work.


Friday, May 4, 2018

On the finish line with BT52

First time on its wheels. Since last update I have installed seat with added seat belts, installed dashboard and steering wheel, completed front and rear wings, added some smaller items. Still have to complete wheel decals and add more accessory items. But next update should likely be with photos of completed model, as I have to wrap it up by Mat 24th.


Friday, April 27, 2018

More assemblies done

Completed more assembly steps. Attached monocoque shell to the floor. Routed more wires and hoses. Assembled front suspension and attached brakes. Also attached main element of front wing. There is still a small gap between body cover and that main element, but it is quite small and not very visible. I might still drill through that wing element and install a screw to tighten them or leave it as it. Not sure at the moment.

Still have no idea to where route that red cable from electronics box and where route second hose from second filter.


Monday, April 23, 2018

Progress on BT52

I am making good progress on this build. Worked on engine wiring and detailing over past weeks. Completed radiator assemblies as well. On the weekend I was able to start putting it all together. Installed engine/gearbox and radiators onto the floor. Added electronics box too. Still have to route wires and some additional hoses. Last weekend I put clear coat over body parts and wing elements. On Friday masked off and sprayed semi-gloss black inside those body panels. Then installed side panels onto main monocoque shell. Hope to attach monocoque to floor next and then work on front suspension assembly.


Saturday, April 14, 2018

Suspension re-build completed

Used brass rods, brass square stock, aluminium pipe and styrene to re-build damaged suspension arms. Fortunately I was able to save some bits and pieces from damaged ones. I think it turned out ok. Not 100% identical to right side, but good enough for recovery. After suspension was reassembled, I continued working on engine and monocoque details. Some photos of the progress below.


Wednesday, April 11, 2018

Pre-assemblies for SF70H

Spent some time looking through my reference photos and contemplating a way to eliminate the seam that would be present if side pod front parts are glues later as instructions suggest. I don't see this seam on real car. In attempt to eliminate it I've decided to partially assemble side pod front parts and glue then in. Same applies to all nose and parts of monocoque under side. And to roll hop as well. I also don't see any seams around it on real car. Below is a photo of the pre-assemblies I've done so far. Prior to that I have painted semi-gloss black inside body panels. It would not have been possible to paint it later.


Monday, April 2, 2018

Big disaster

I've done the most stupid thing to date in my model building hobby. I've decided to apply heat to shrink tube "in place". Used matches and melted left side of rear suspension in an instant. Fortunately I was able to contain my anger and have not thrown it against the wall. Kept myself calm, thinking "You cannot change past, so move on". Next 2 nights I spend re-building suspension arms and rods from scratch. Good, but unexpected exercise in scratch building for me and kit is becoming multi-media, because of all the metal I've used to re-make parts. It's not completely fixed yet and my scratched parts will not look the same as kit parts. But I think I will be able to recover and hopefully scratch built suspension will be strong enough.


Saturday, March 24, 2018

Tamiya SF70H WIP started

Received my copy of this kit this week. Wanted to start it right away. Starting with usual test assembly and parts preparations. So far it feels right at same high Tamiya standard engineering level as other Formula 1 kits from them. Made some photos with S27 W08 and Ebbro MP4/30 in the frame for comparison.


Wednesday, March 21, 2018

Simulated rivets added for BT46

I've decided to add simulated rivets for this model, using Archer fine transfers. This is first time for me. Watched video tutorial at decals maker's site and followed process almost exactly. Only deviation was use of Miro-Set to help decals settle better. Without Micro-Set it was difficult to move and position decals and they did not want to stick well. Over all result is satisfactory, even if it may not be 100% accurate. Got as close as my patience allowed me. There are many more rivets on real car. But I was not willing to spend extra time on those less visible. It's a time consuming process and I'm not even sure rivets will show that well on finished model. We'll see.


Assembly started on BT52

Started assembly process with engine. Completed routing of ignition wires. Used some TopStudio straight A/N fitting to simulate spark plugs. I think they look close enough, even it not 100% accurate. Also added couple of PE detailing items.


Sunday, March 4, 2018

CF decal work for F2008 on going

After finishing CF decals for BT52 build, I've used momentum and finally started CF decal work for my F2008 build. Already spend close to 20 hours, but only got gearbox, diffuser and top of the floor done. CF patterns I've used are not 100% correct according to my photos. But I did not have correct ones available. So, I've used what I had and what was closer to real car. I've use fresh new Tamiya CF decals for the diffuser. They were easy to work with. Quite similar in their properties to SMS CF decals. Main difference being that I did not need to use Miro-Set first before I use Micro-Sol. Went straight to Micro-Sol and they reacted well. Used some heat from hair drier as usual to help them conform to curved surfaces.

I've also decided to use few different patterns, which aren't 100% correct either. But it makes the looks a bit more appealing, imho. Lot more parts to do. But mostly suspension items in twill weave pattern. And less complex. So, hopefully progress will be a bit faster.


Tuesday, February 27, 2018

W08 from 2017 vs MP4/30 from 2015

More I think about it, more it looks like original fin of W08 is not worth saving. I'll try to thin metal parts for air vent as much as I can and then build up rest of the fin from metal or plastic sheet.

Regarding the size of this car. I've placed Ebbro MP4/30 beside it and it seems similar in dimensions. I think cars became that long back in 2010 or so, when re-fueling during the race was banned. At least F10, MP4/27 and MP4/30, I've built so far, look similar in terms of sizes. See photos below for comparison. W08 does have a bit longer wheel base. But in terms of body work sizes, I think it's similar as well.


Monday, February 26, 2018

Work started on W08 model

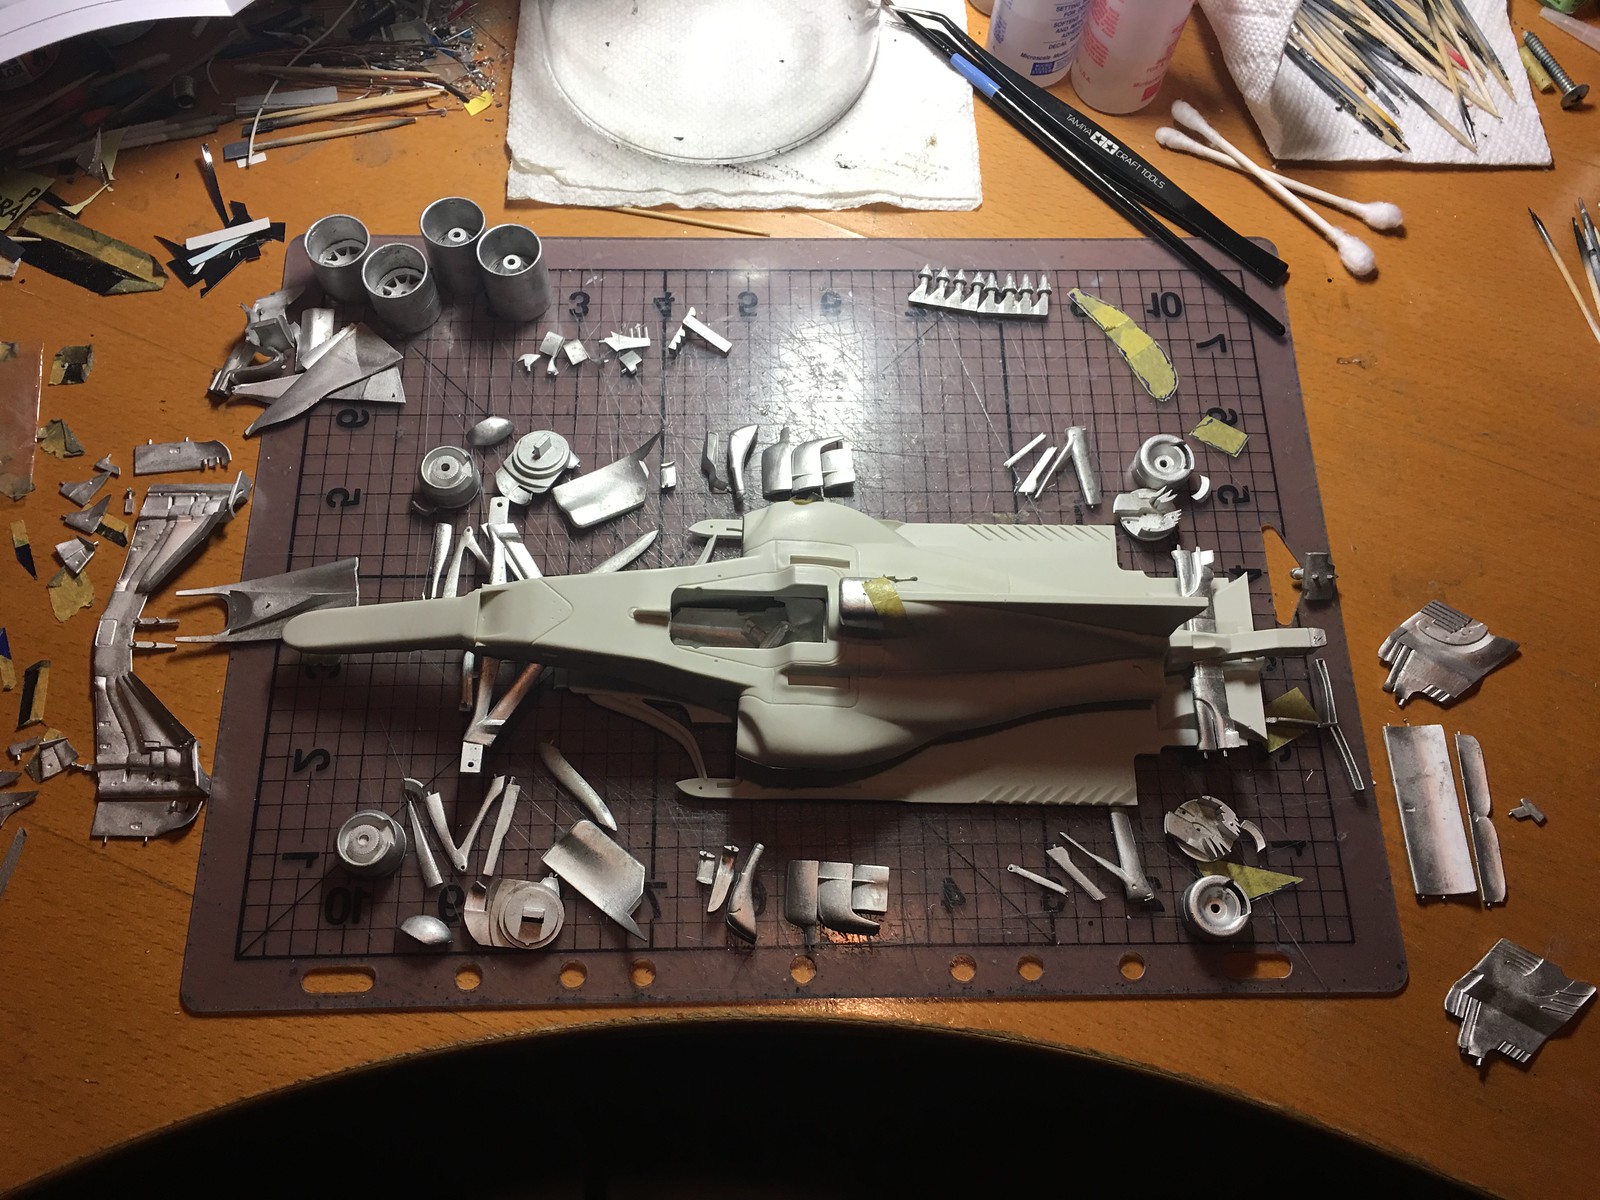
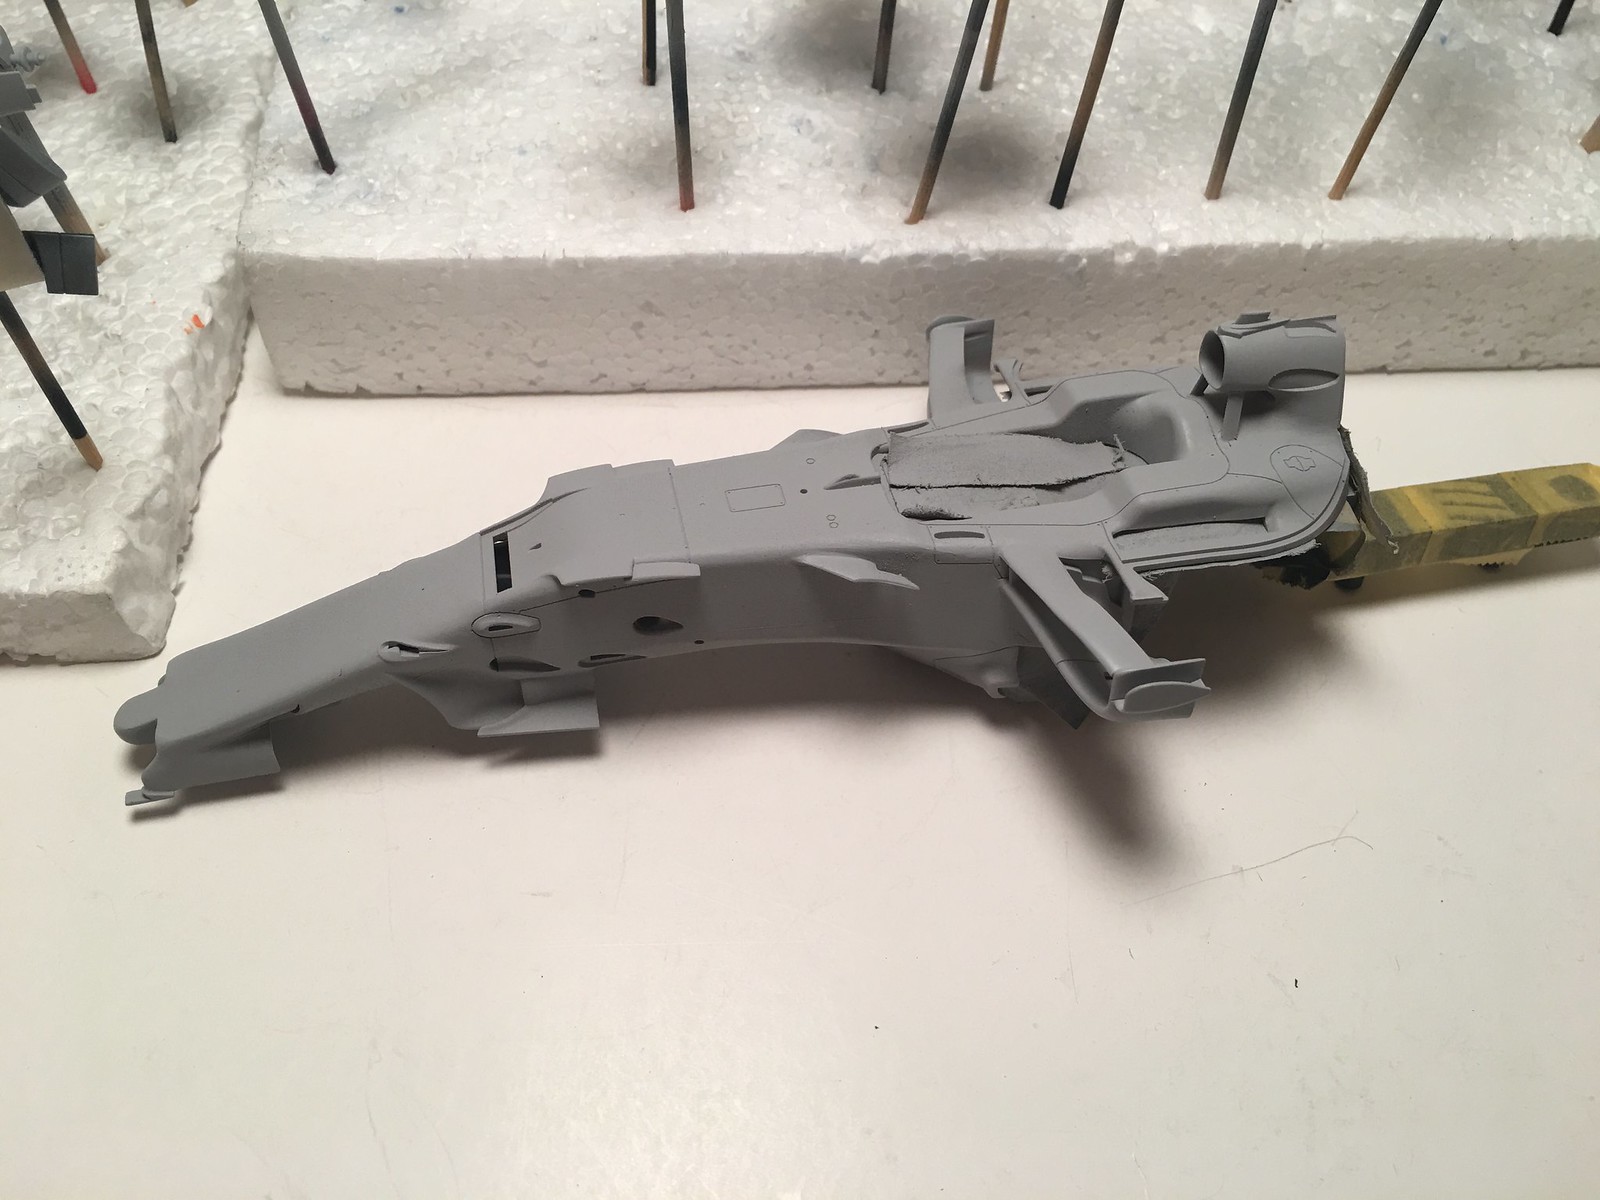
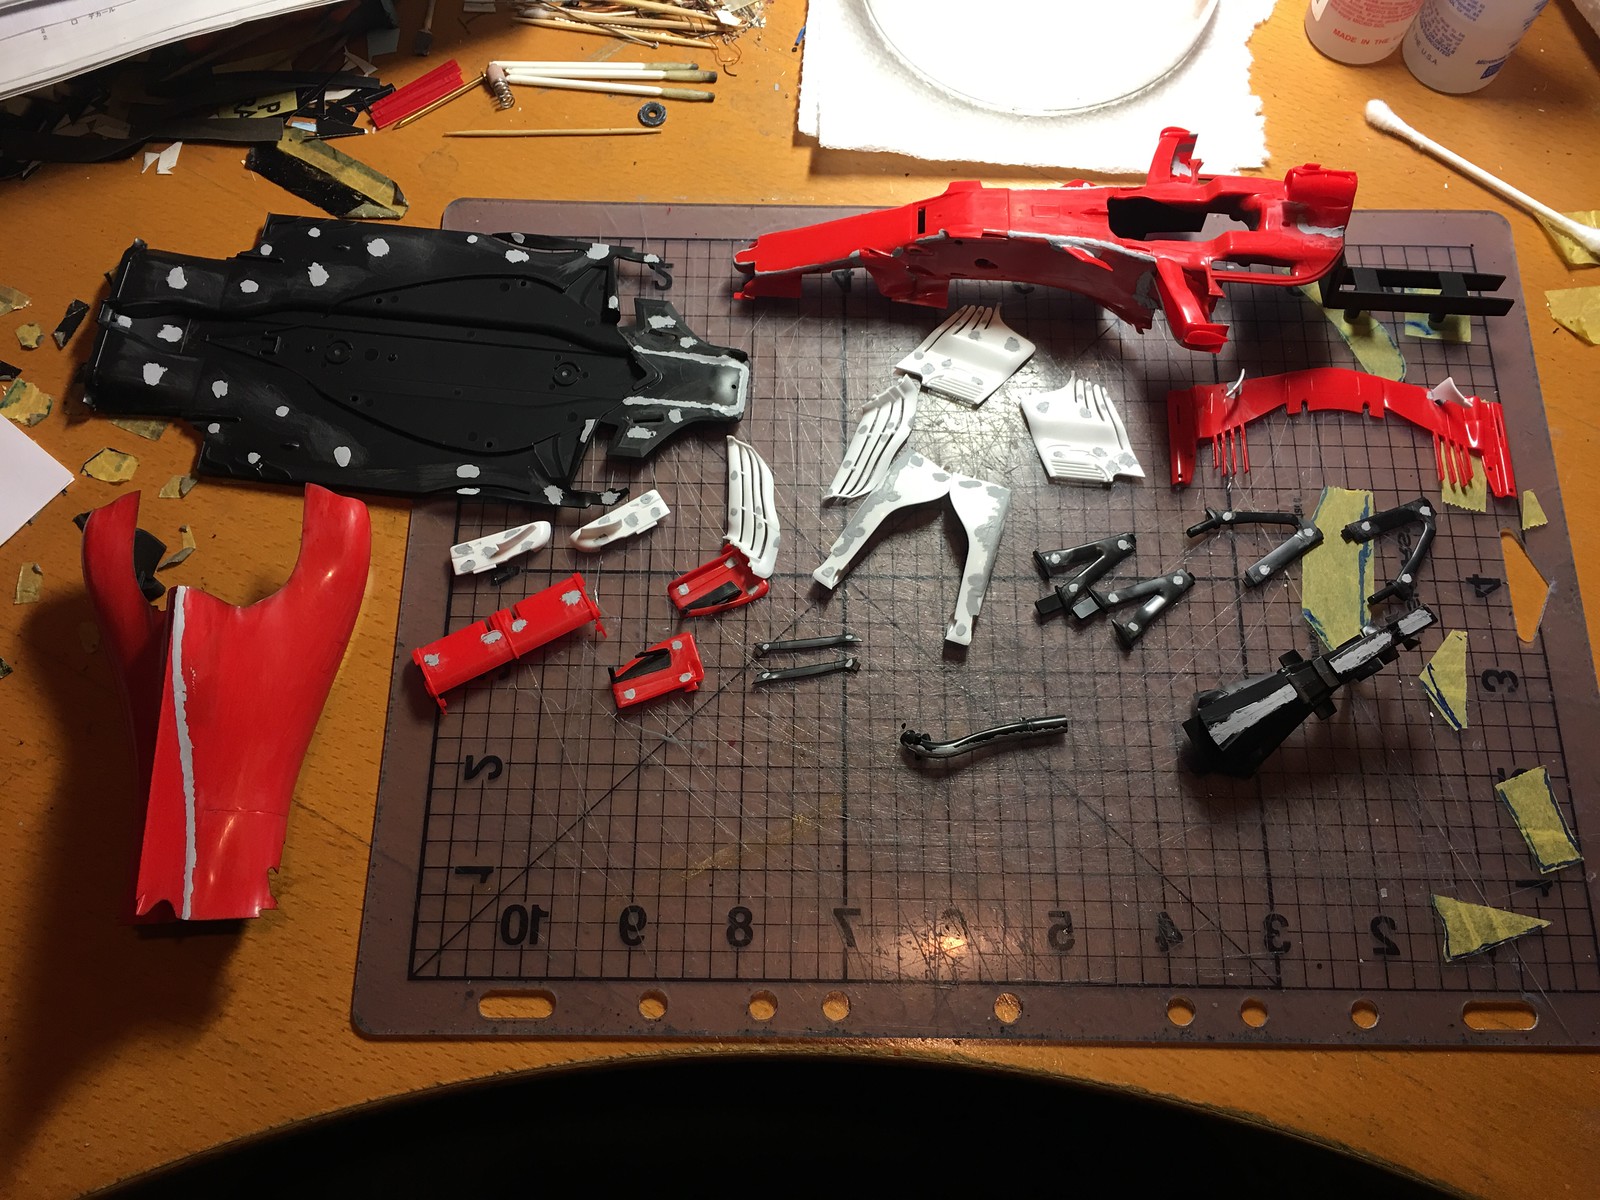
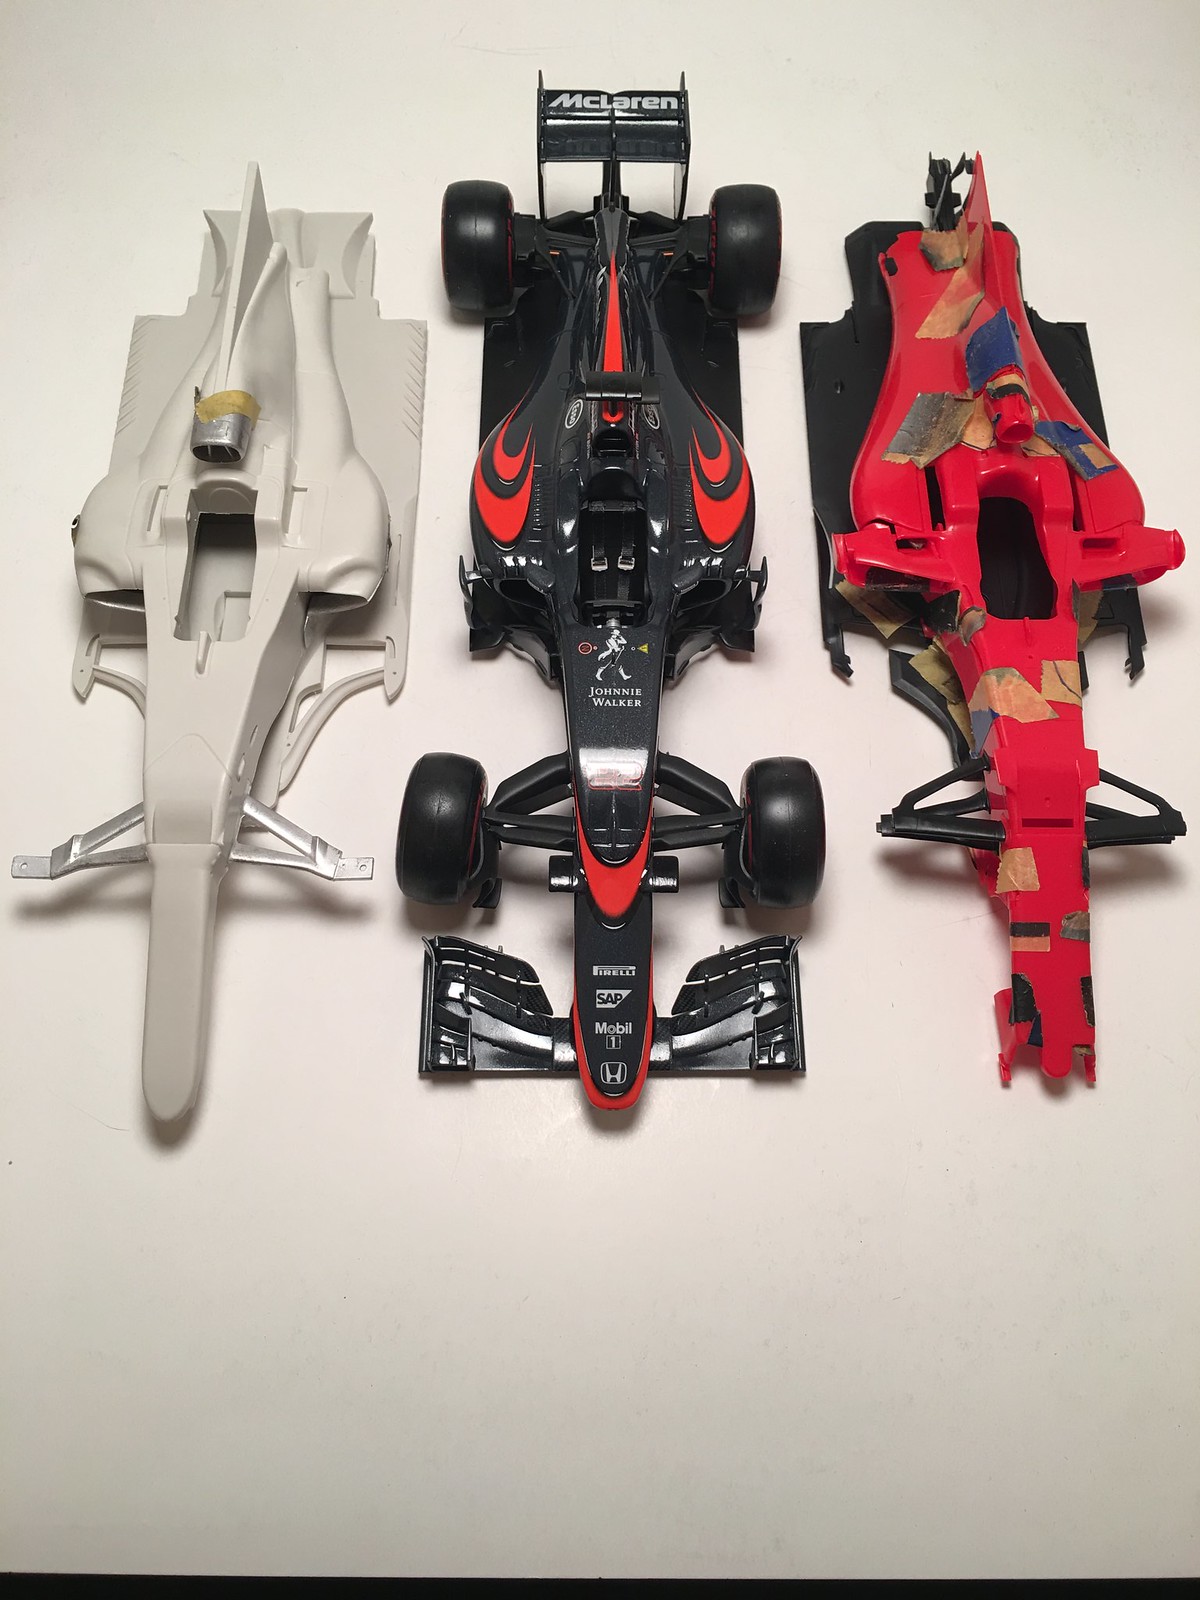
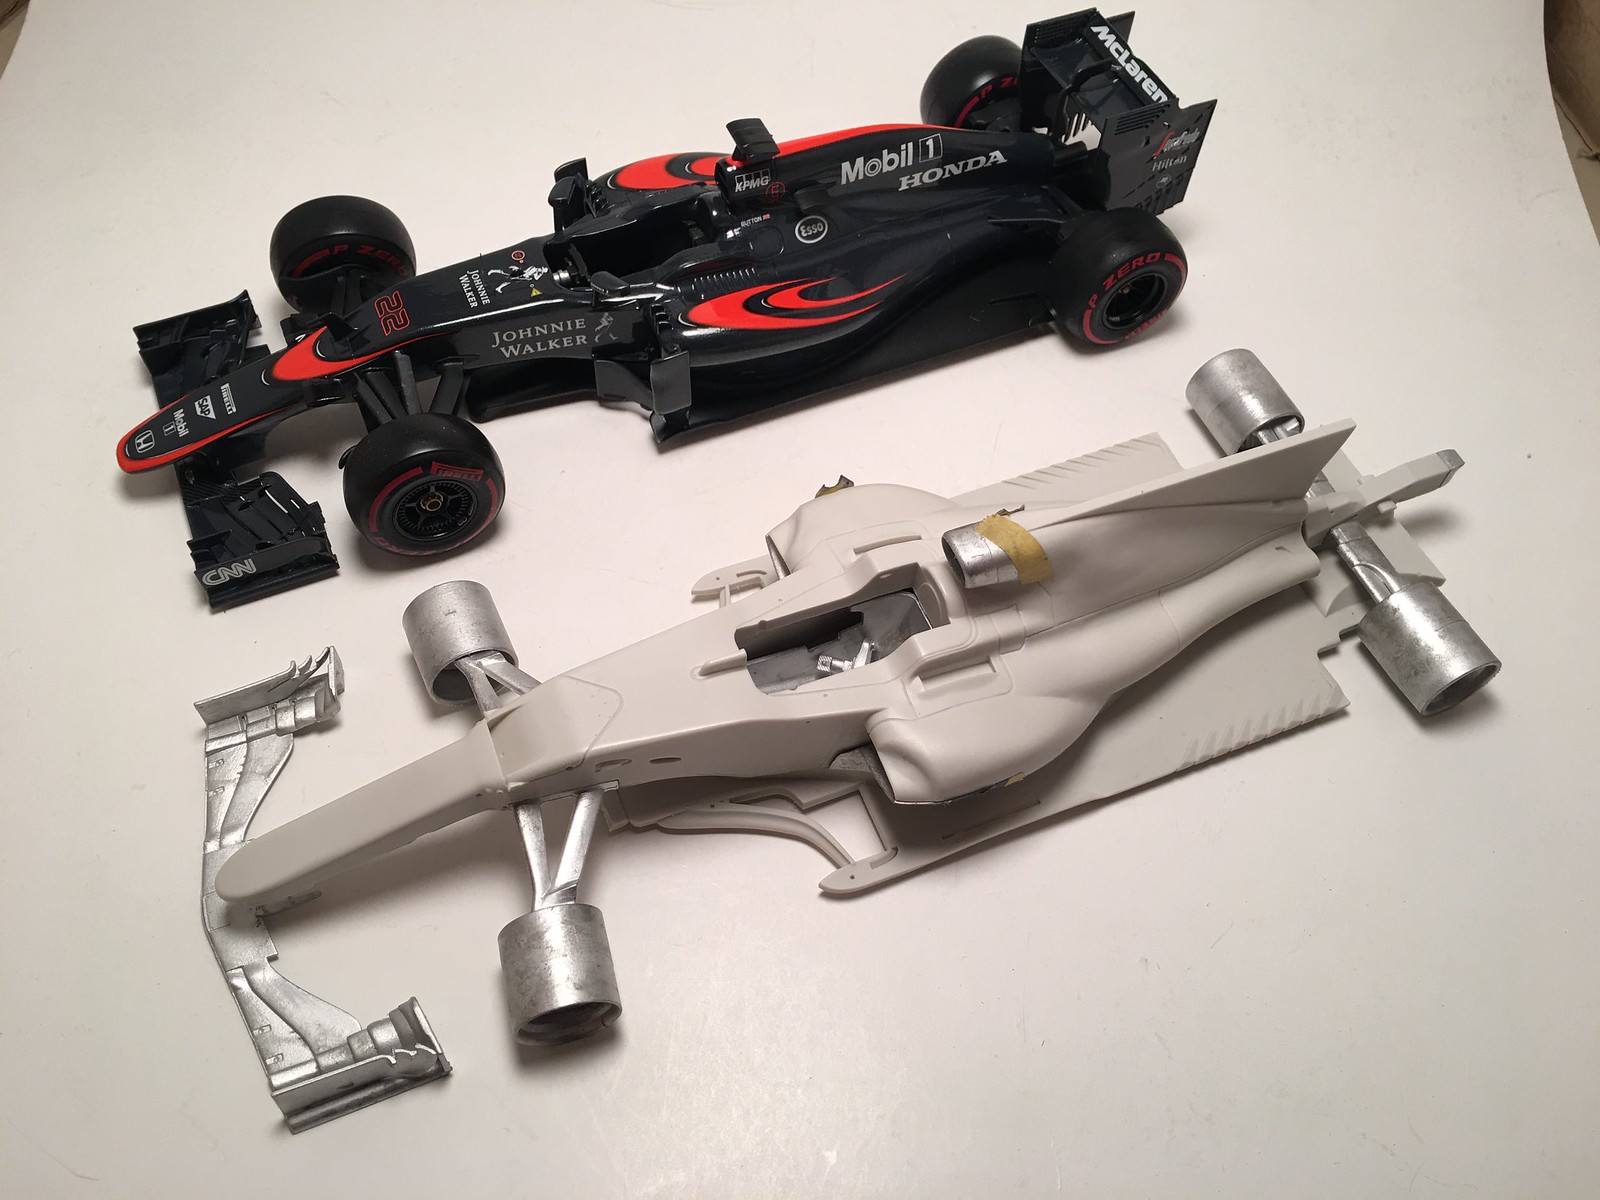
Received my kit little over 2 weeks ago. Since then was itching to start it. Have been collecting reference photos and thinking about what to do with thick fin. Last night made a little start. Usual clean up of parts and test assembly steps started.

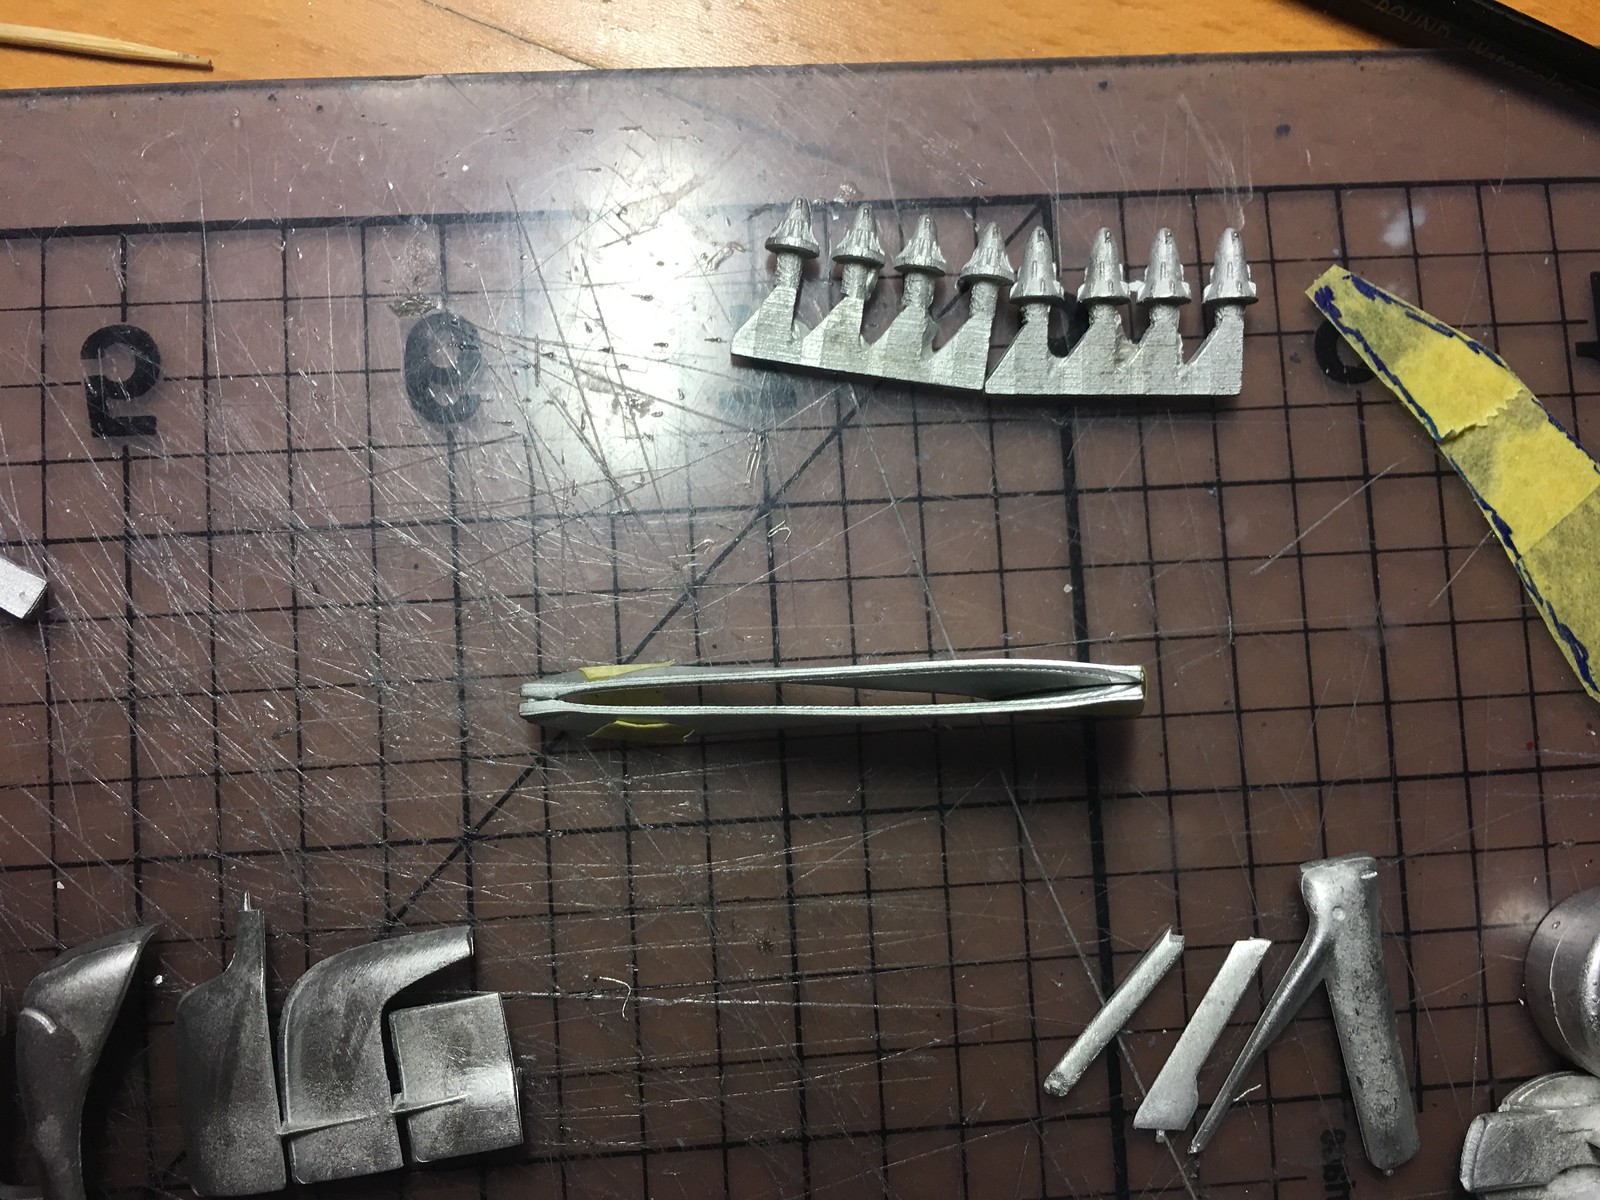
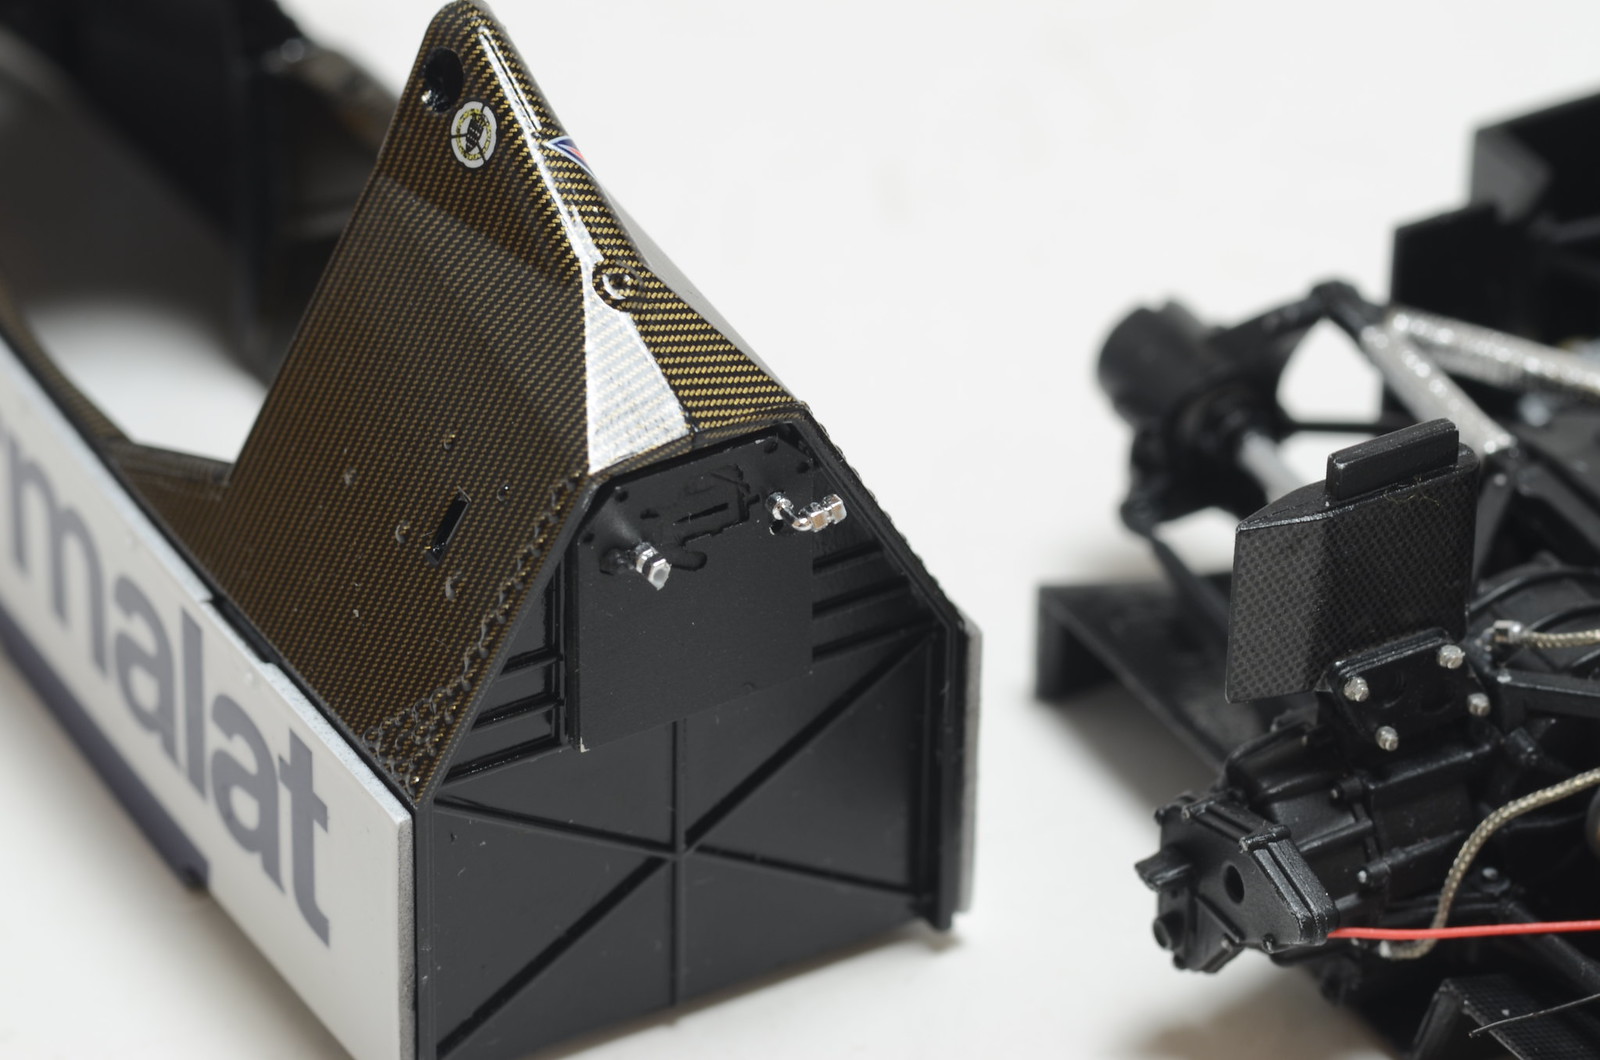
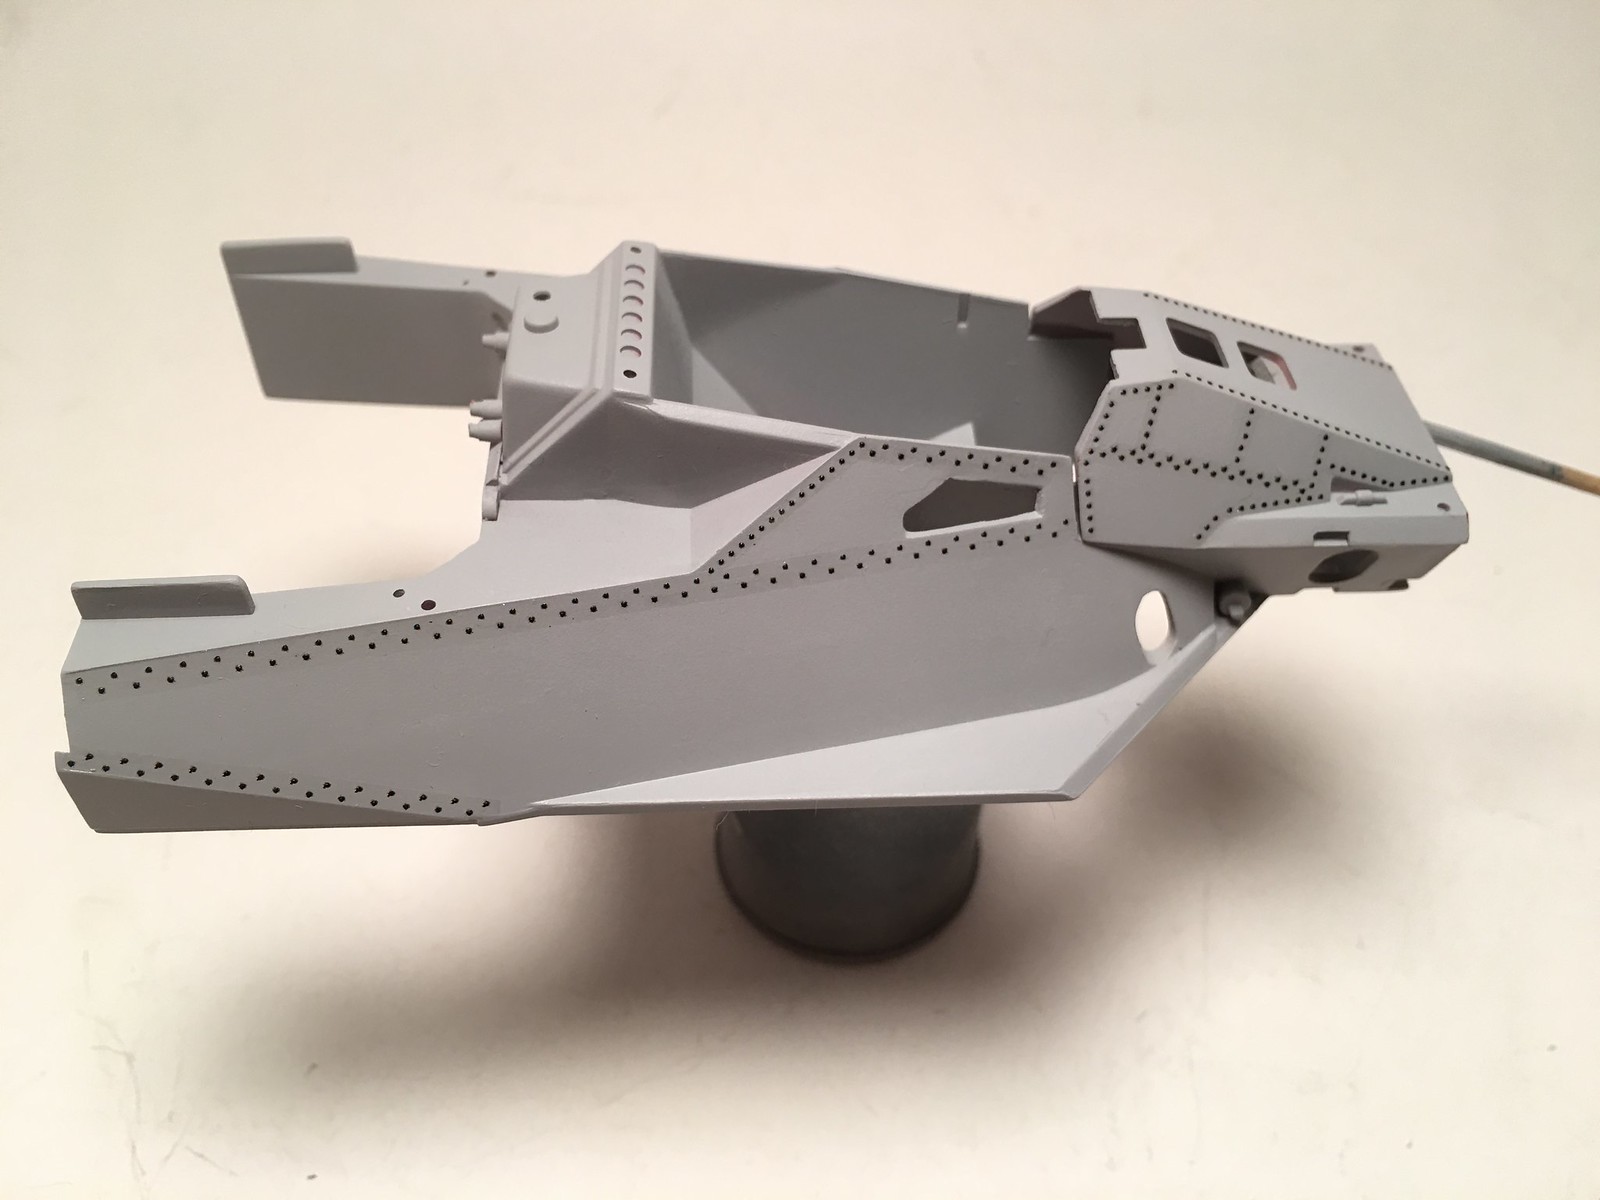
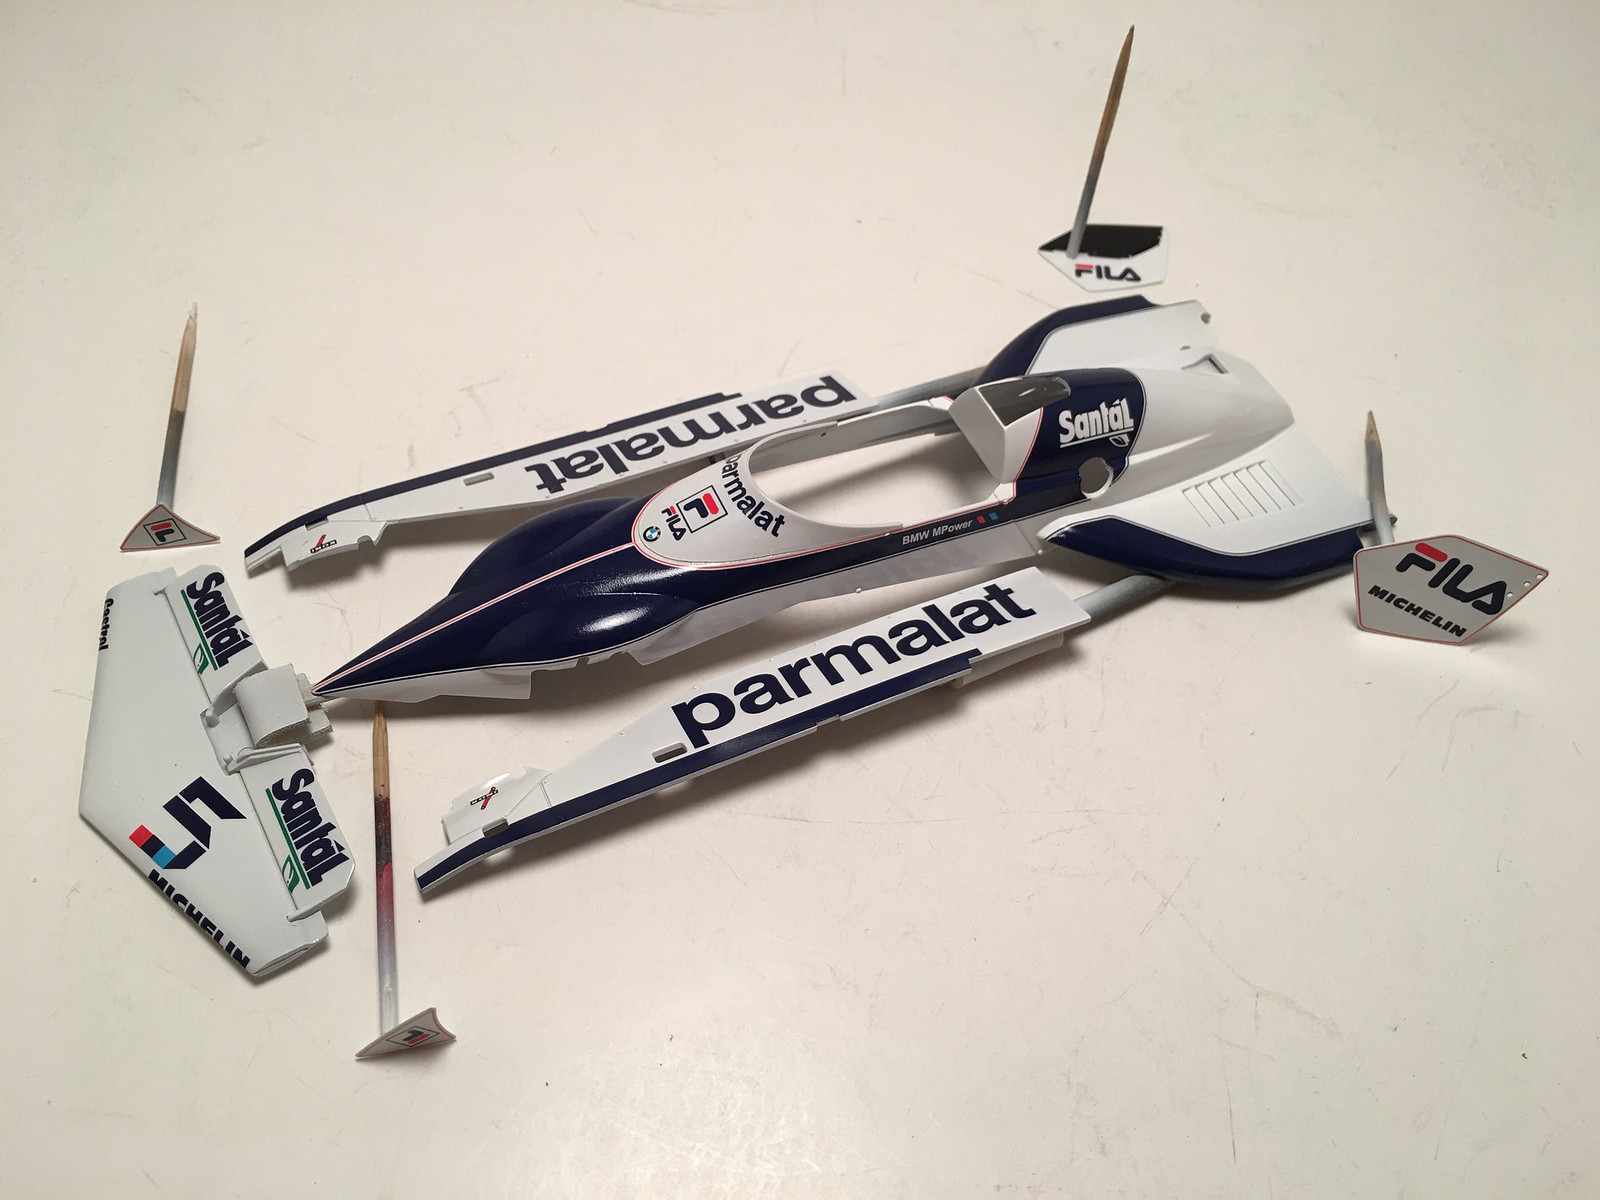
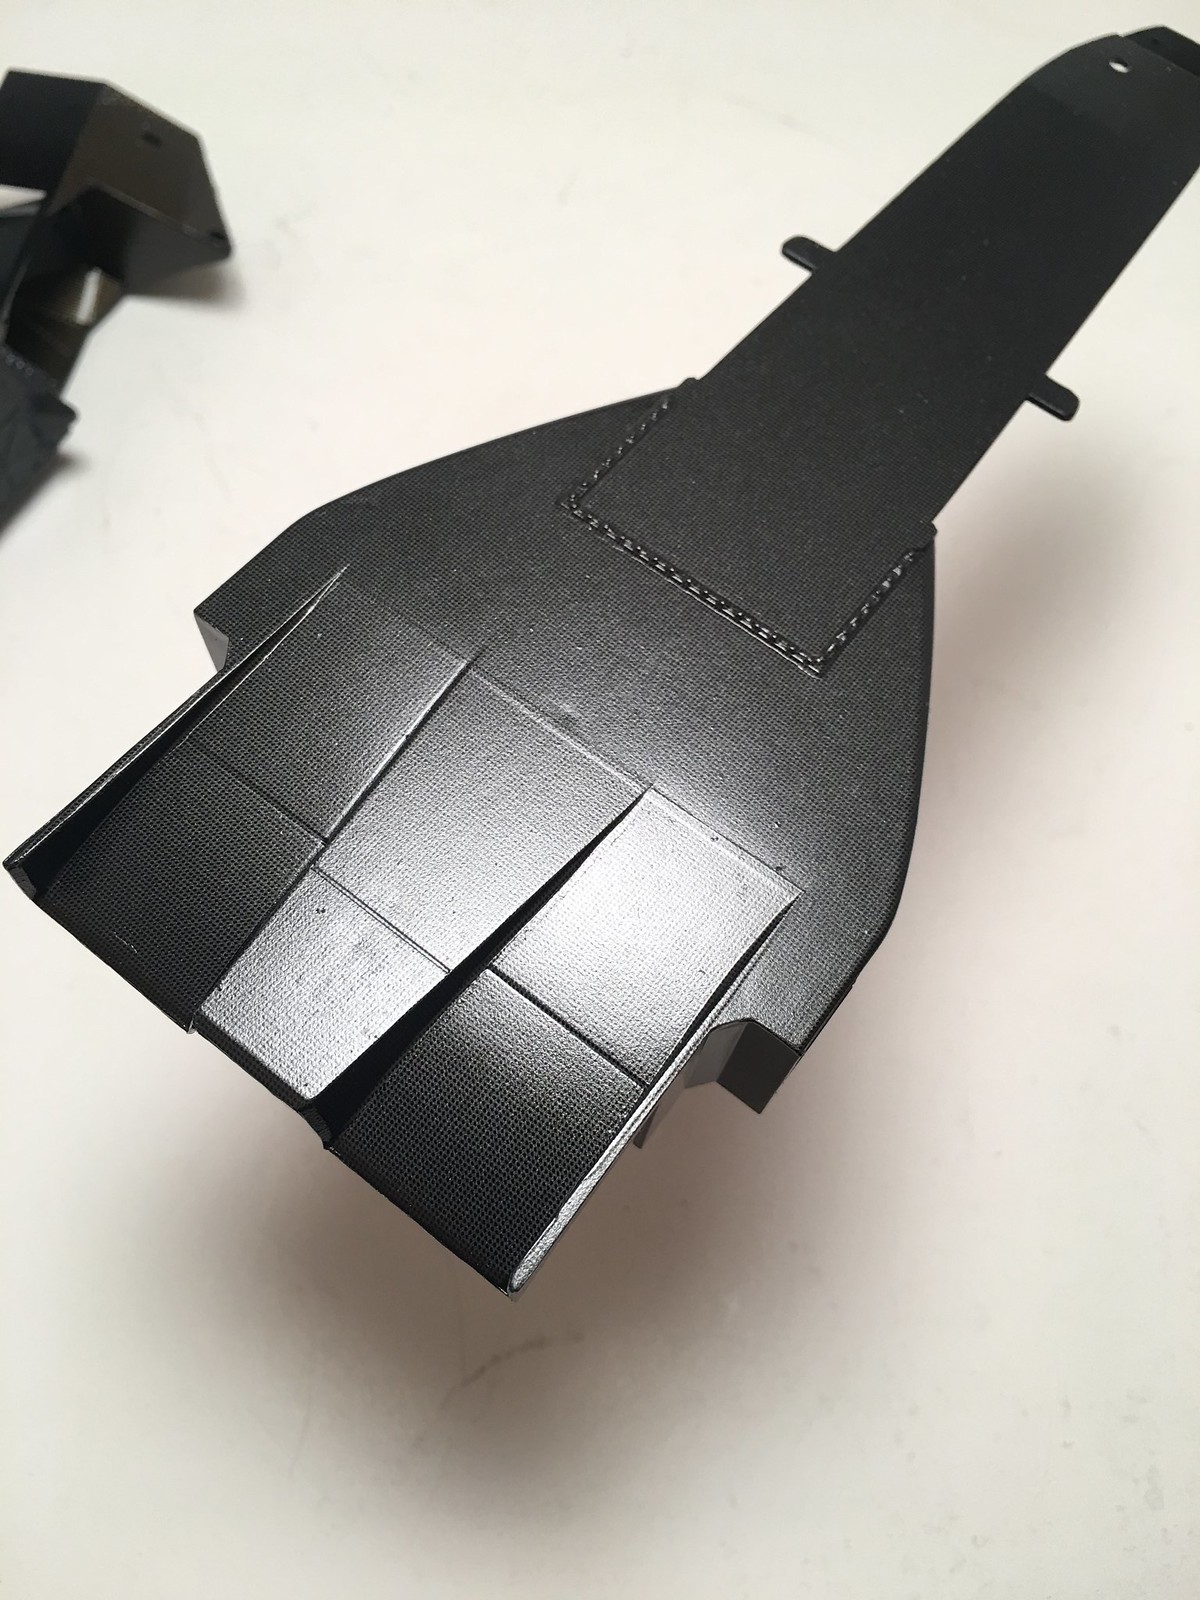
Cannot understand why, by S27 made fin very thick. To be in scale it should have been paper thin. Instead it is about a millimeter thick, this in scale would work out to 20mm in rear size car. On all the ref photos it looks much thinner on real car. In case or US GP matter is complicated by air vent, which was integrated into fin. S27 provides metal parts to replicate that vent. However parts, when assembled, add to same millimeter of thickness. My earlier idea was to remove resin fin completely and replace it with thin copy made out of brass sheet. After examining parts, I don't think any more that's possible. Still looking for solution. If any one has ideas, pleace chime in.

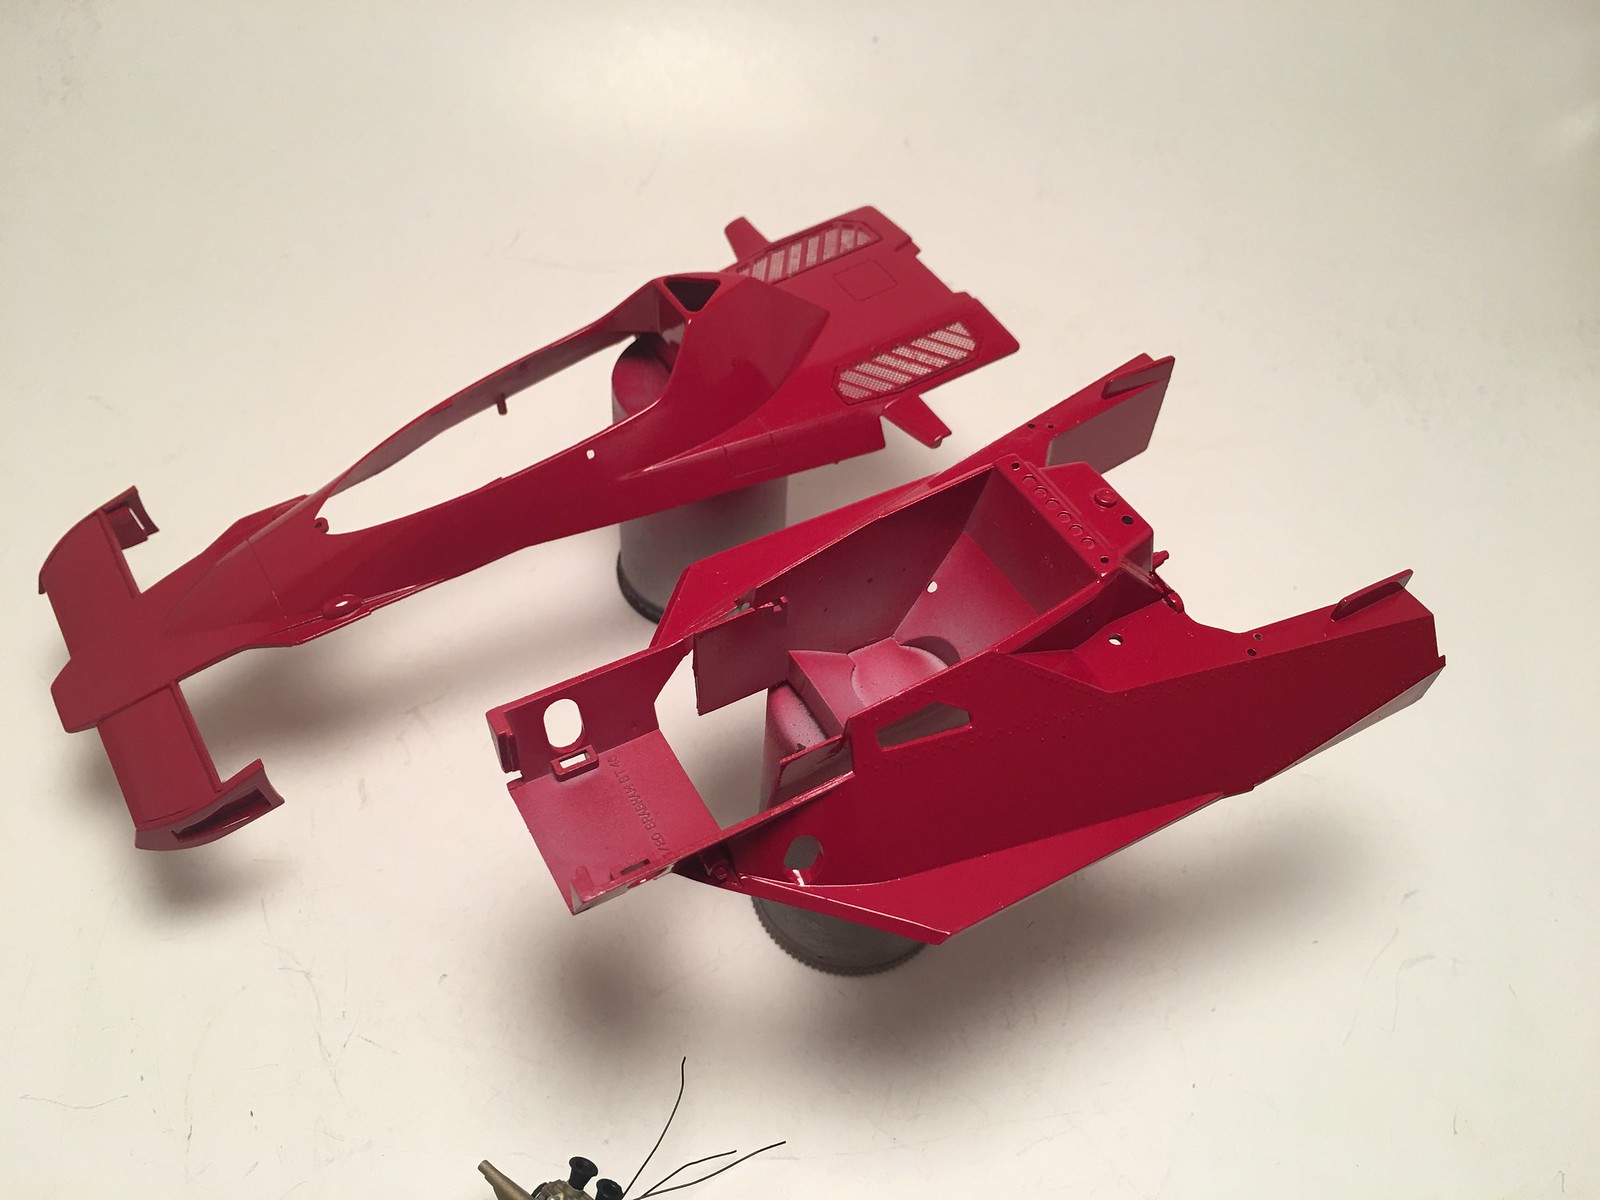
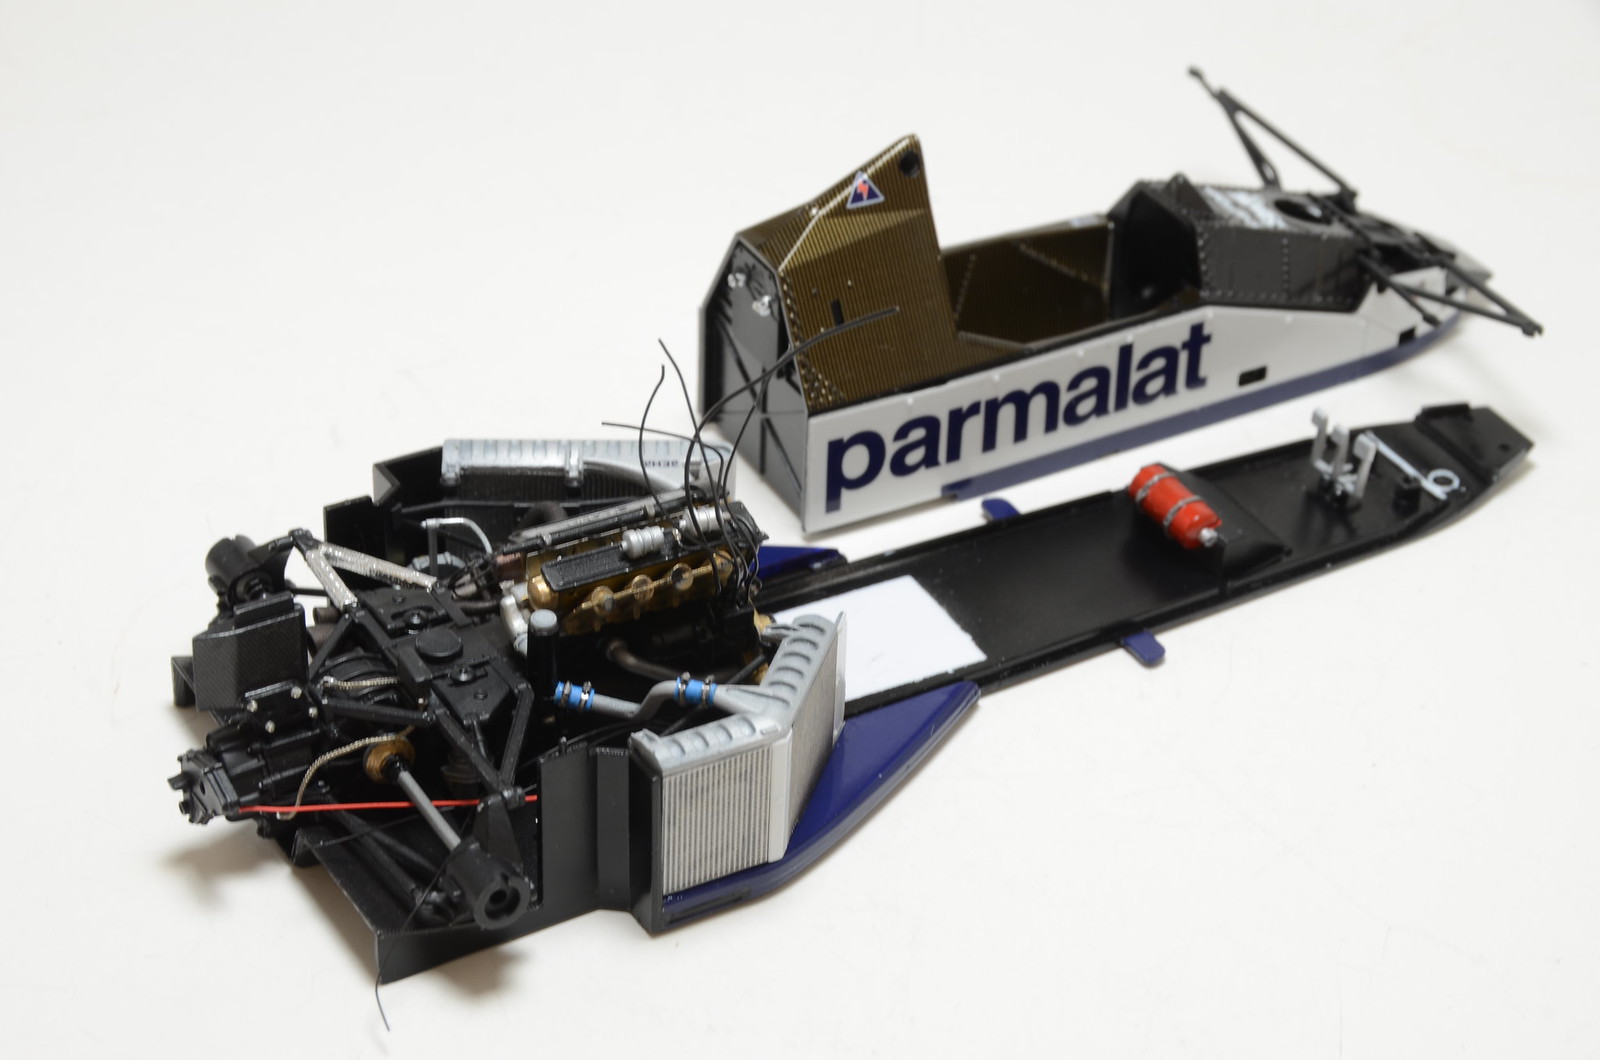
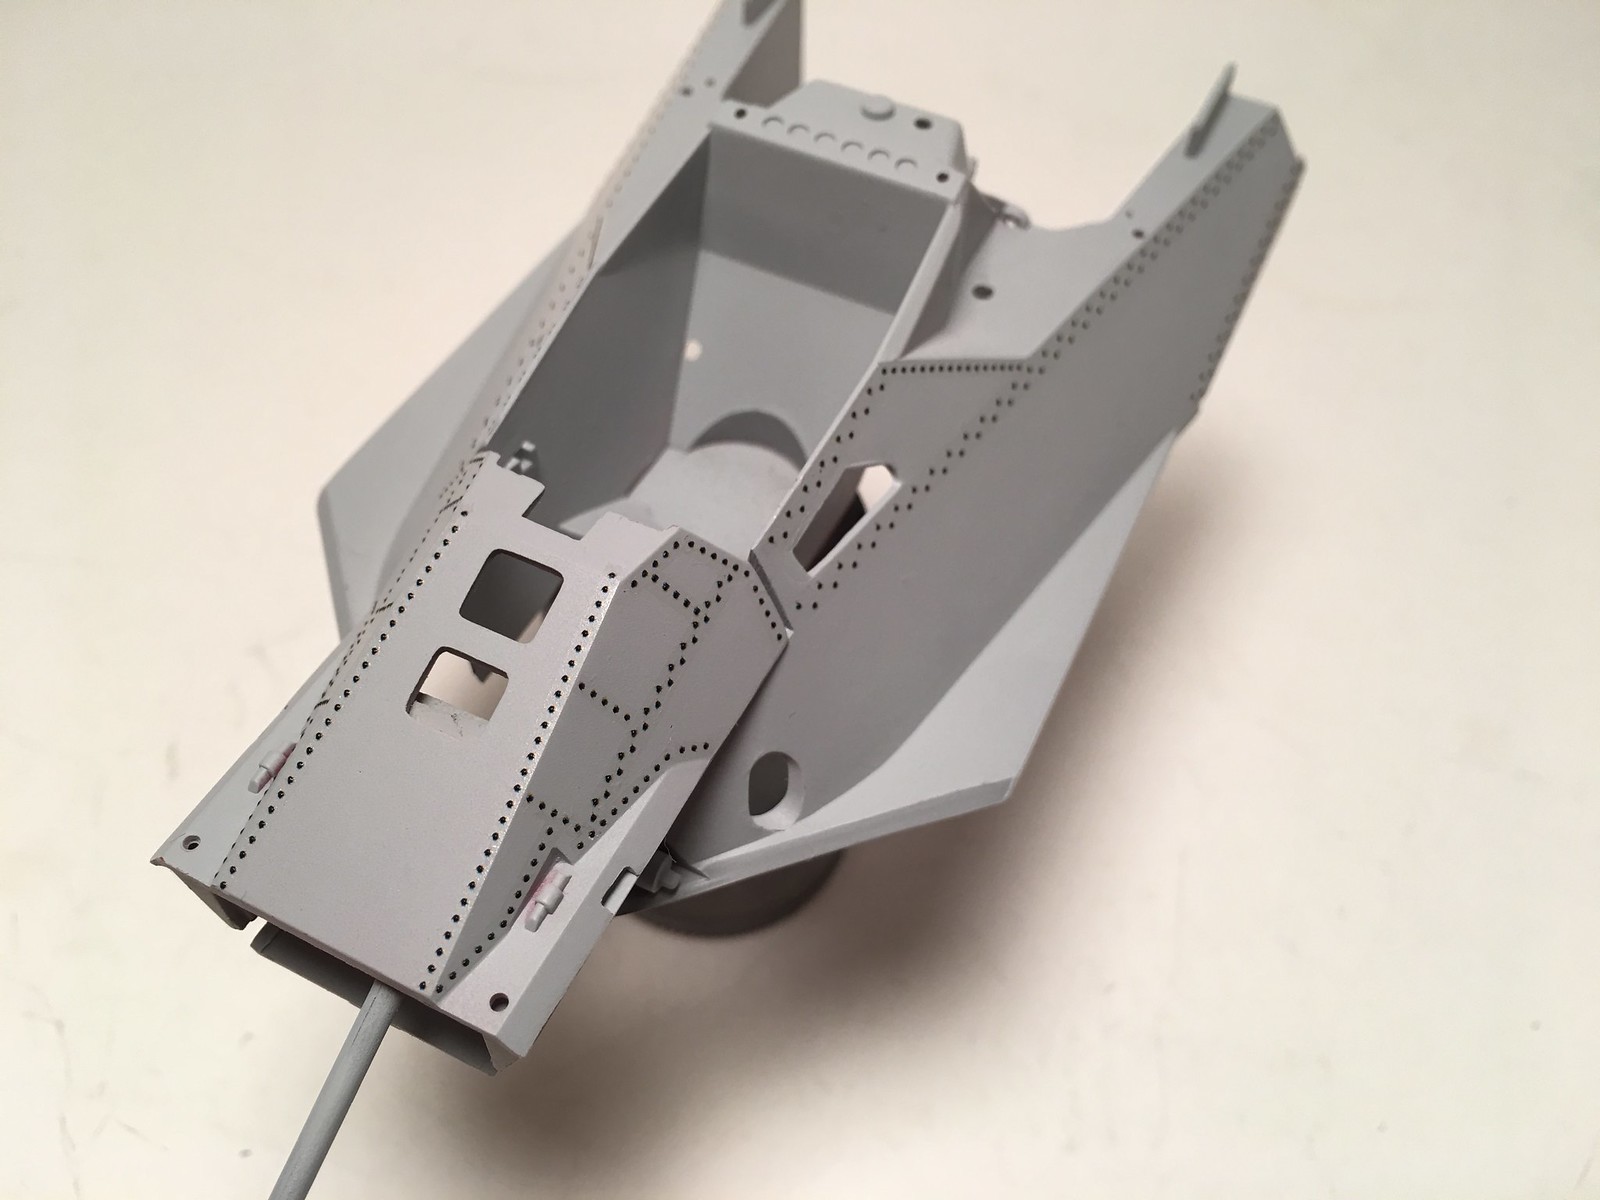
Over quality of the kit seems better then many previous offerings from S27. I am pleased with many relatively faithfully representled aero bits and details. Some compromises are strange, but I think kit presents a decent base to build good model. Just need to work out what to do with that awful thick fin.

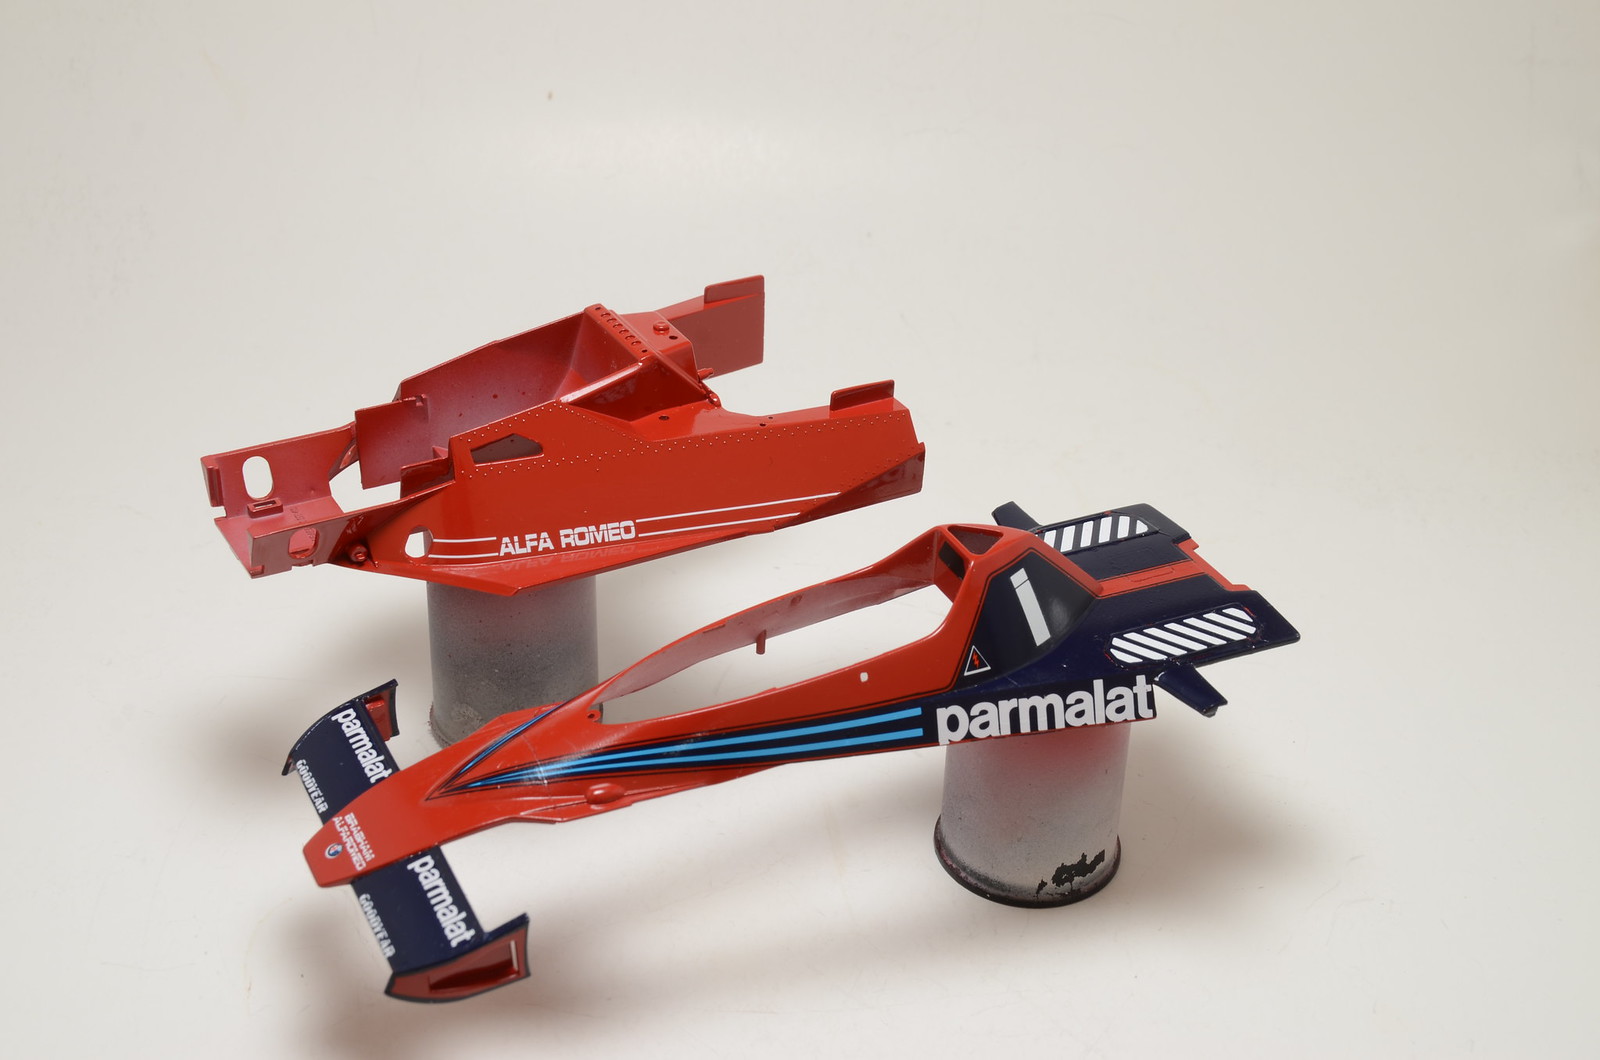
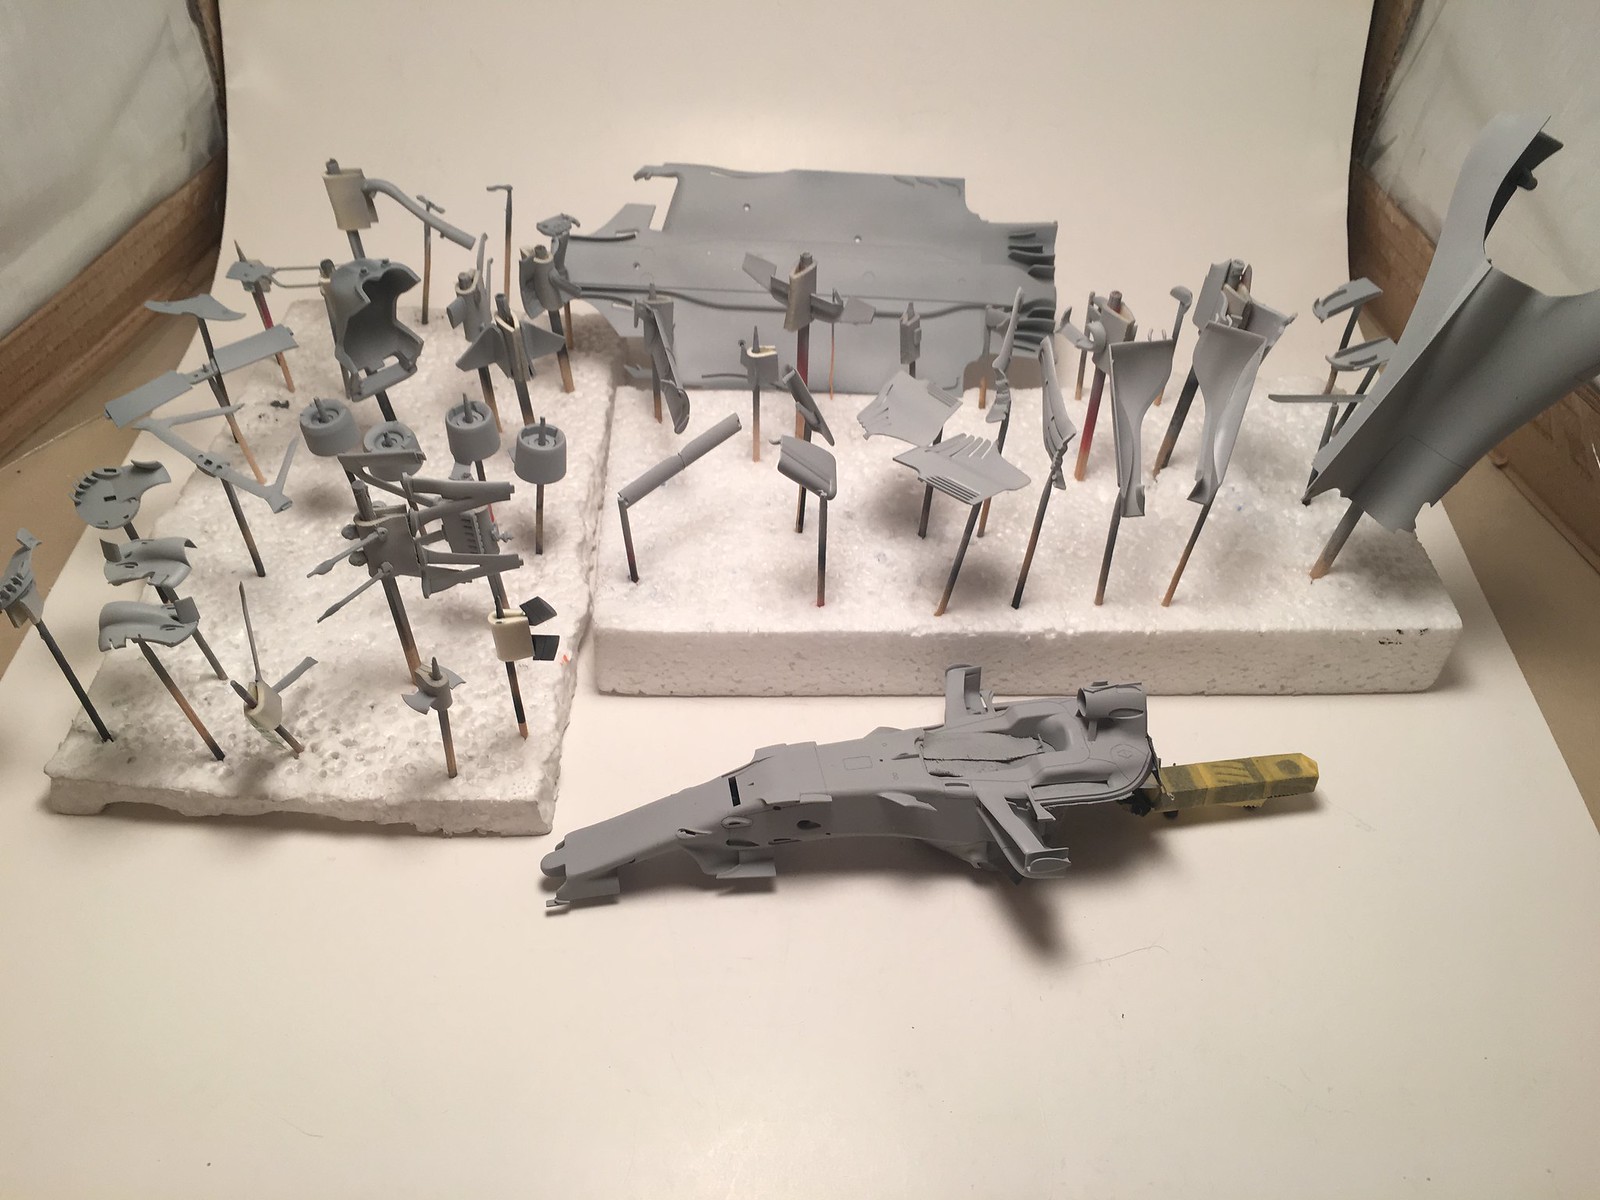
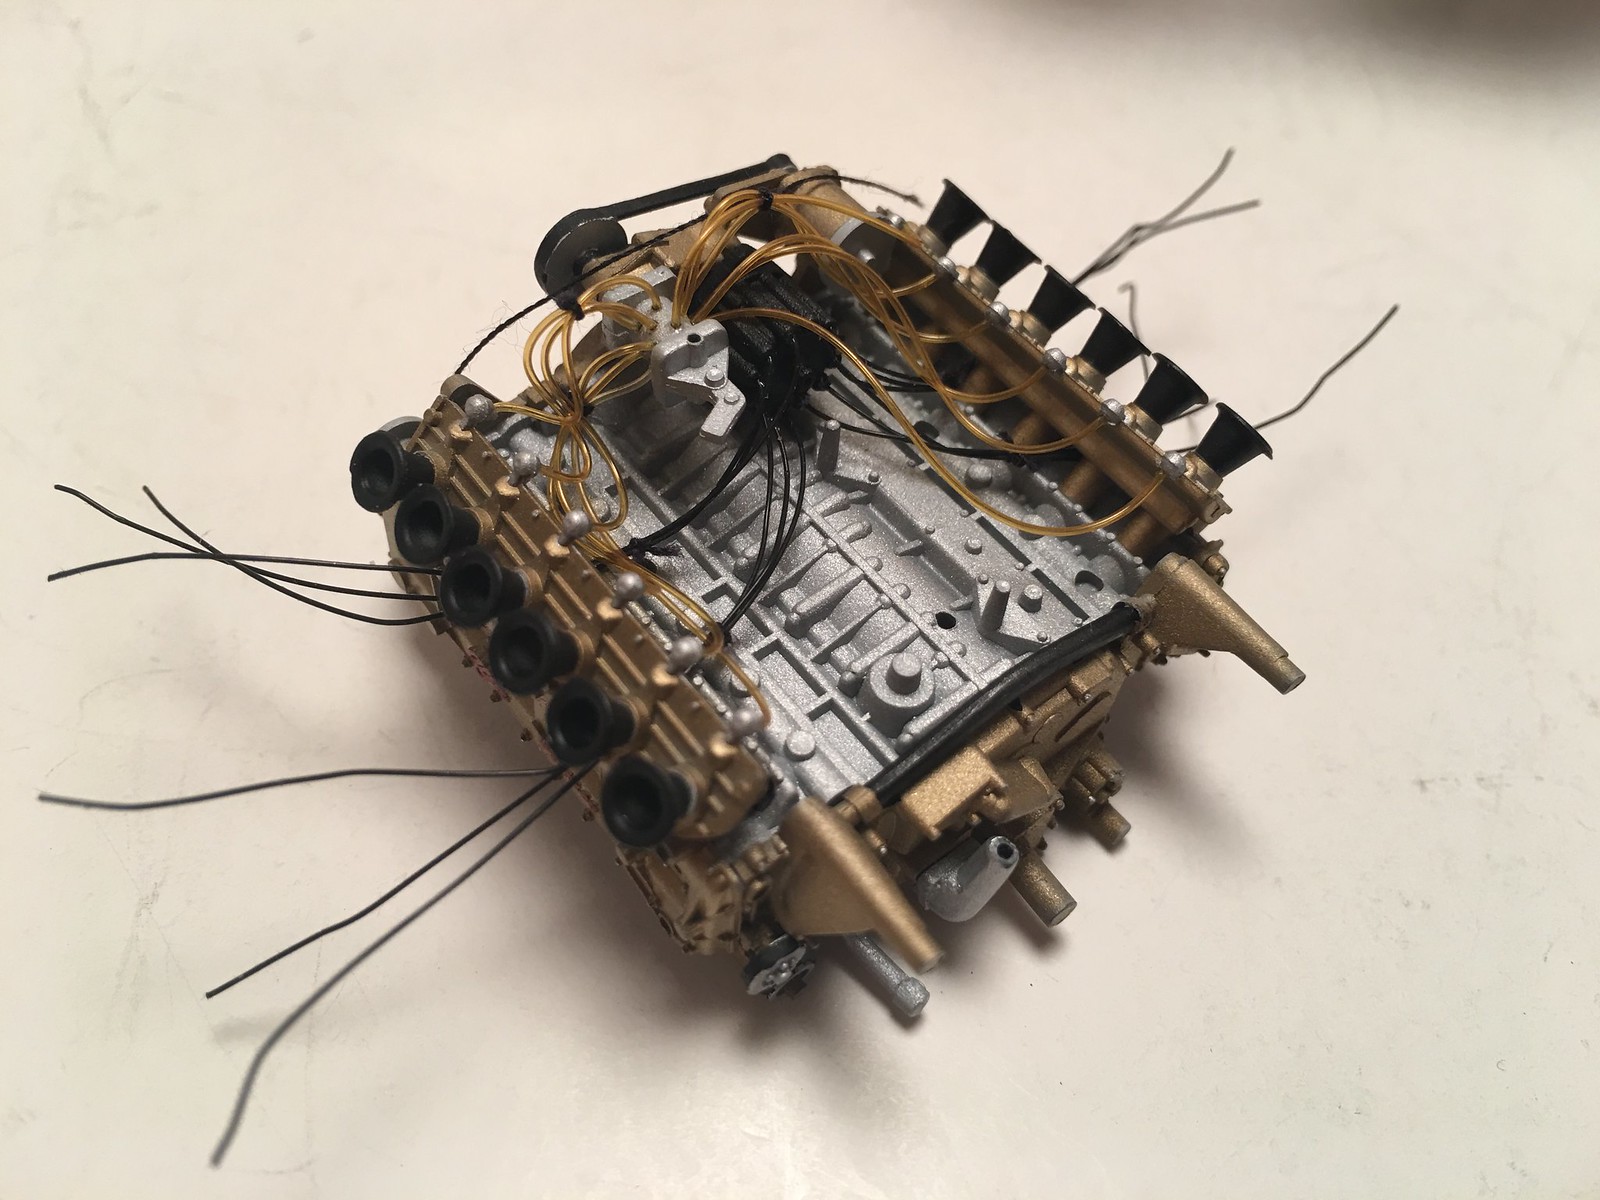
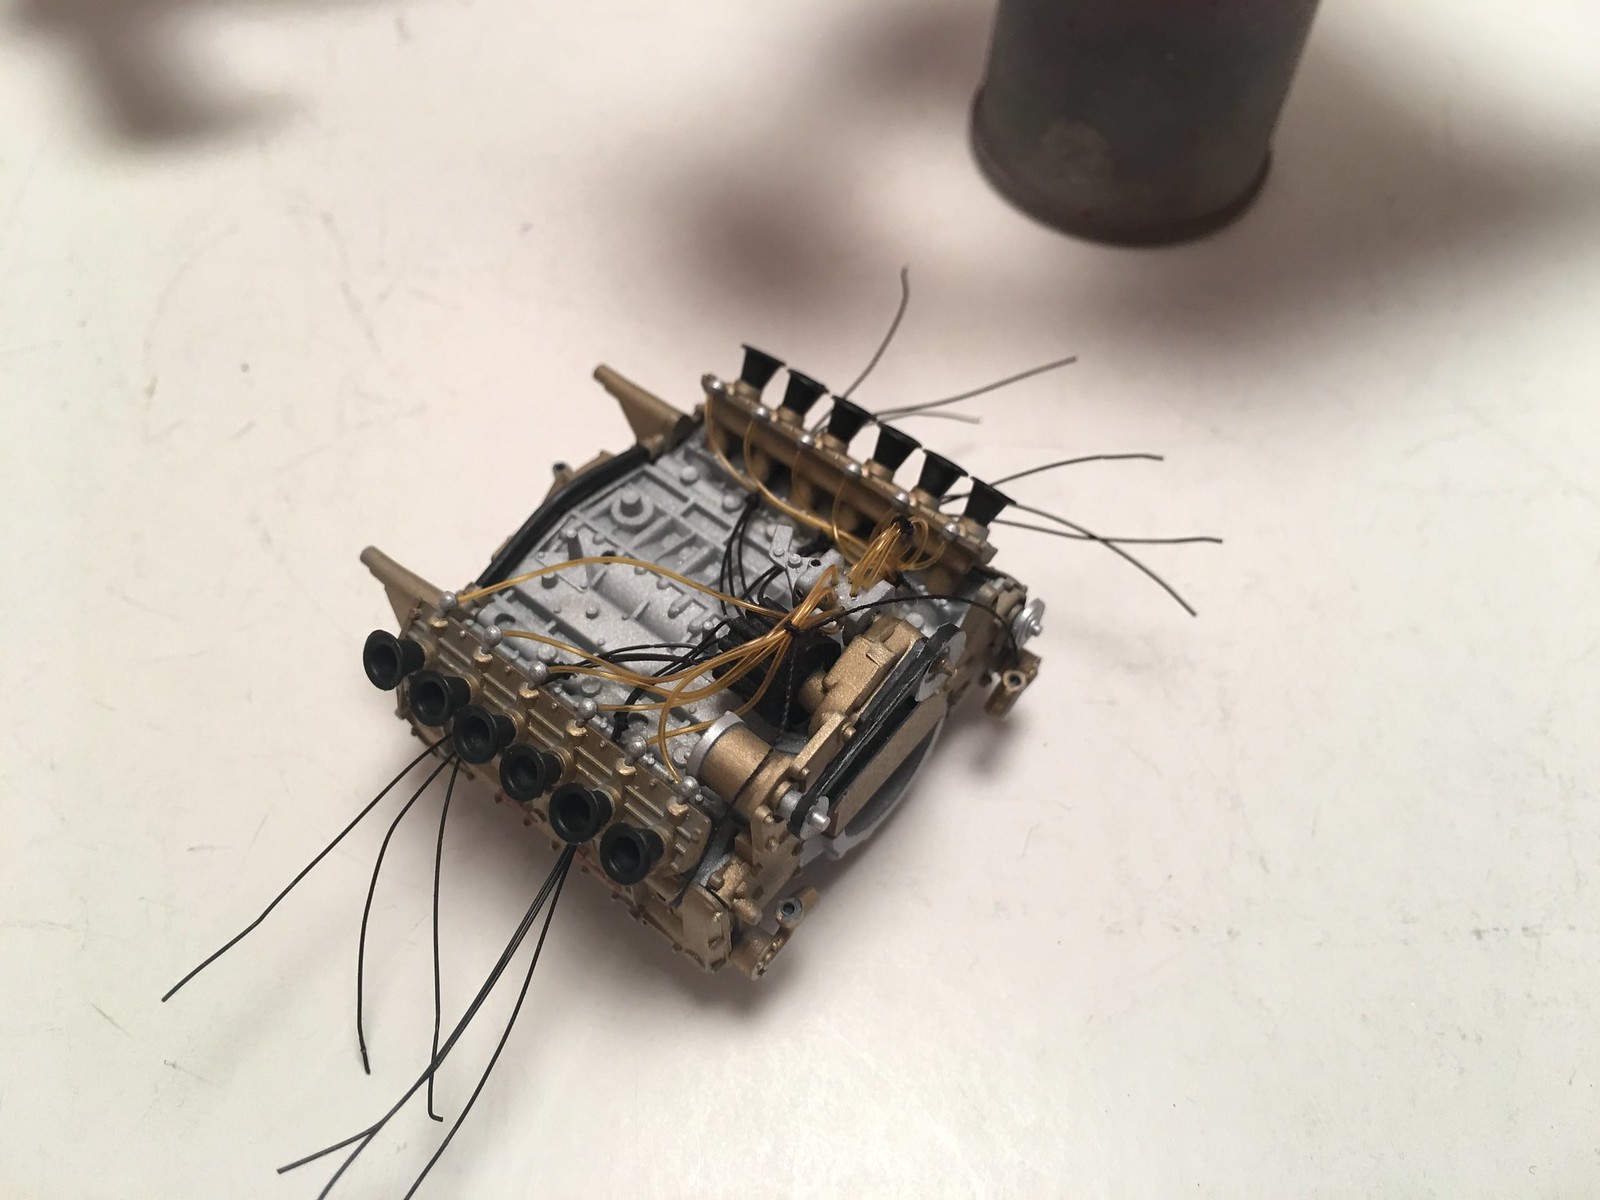
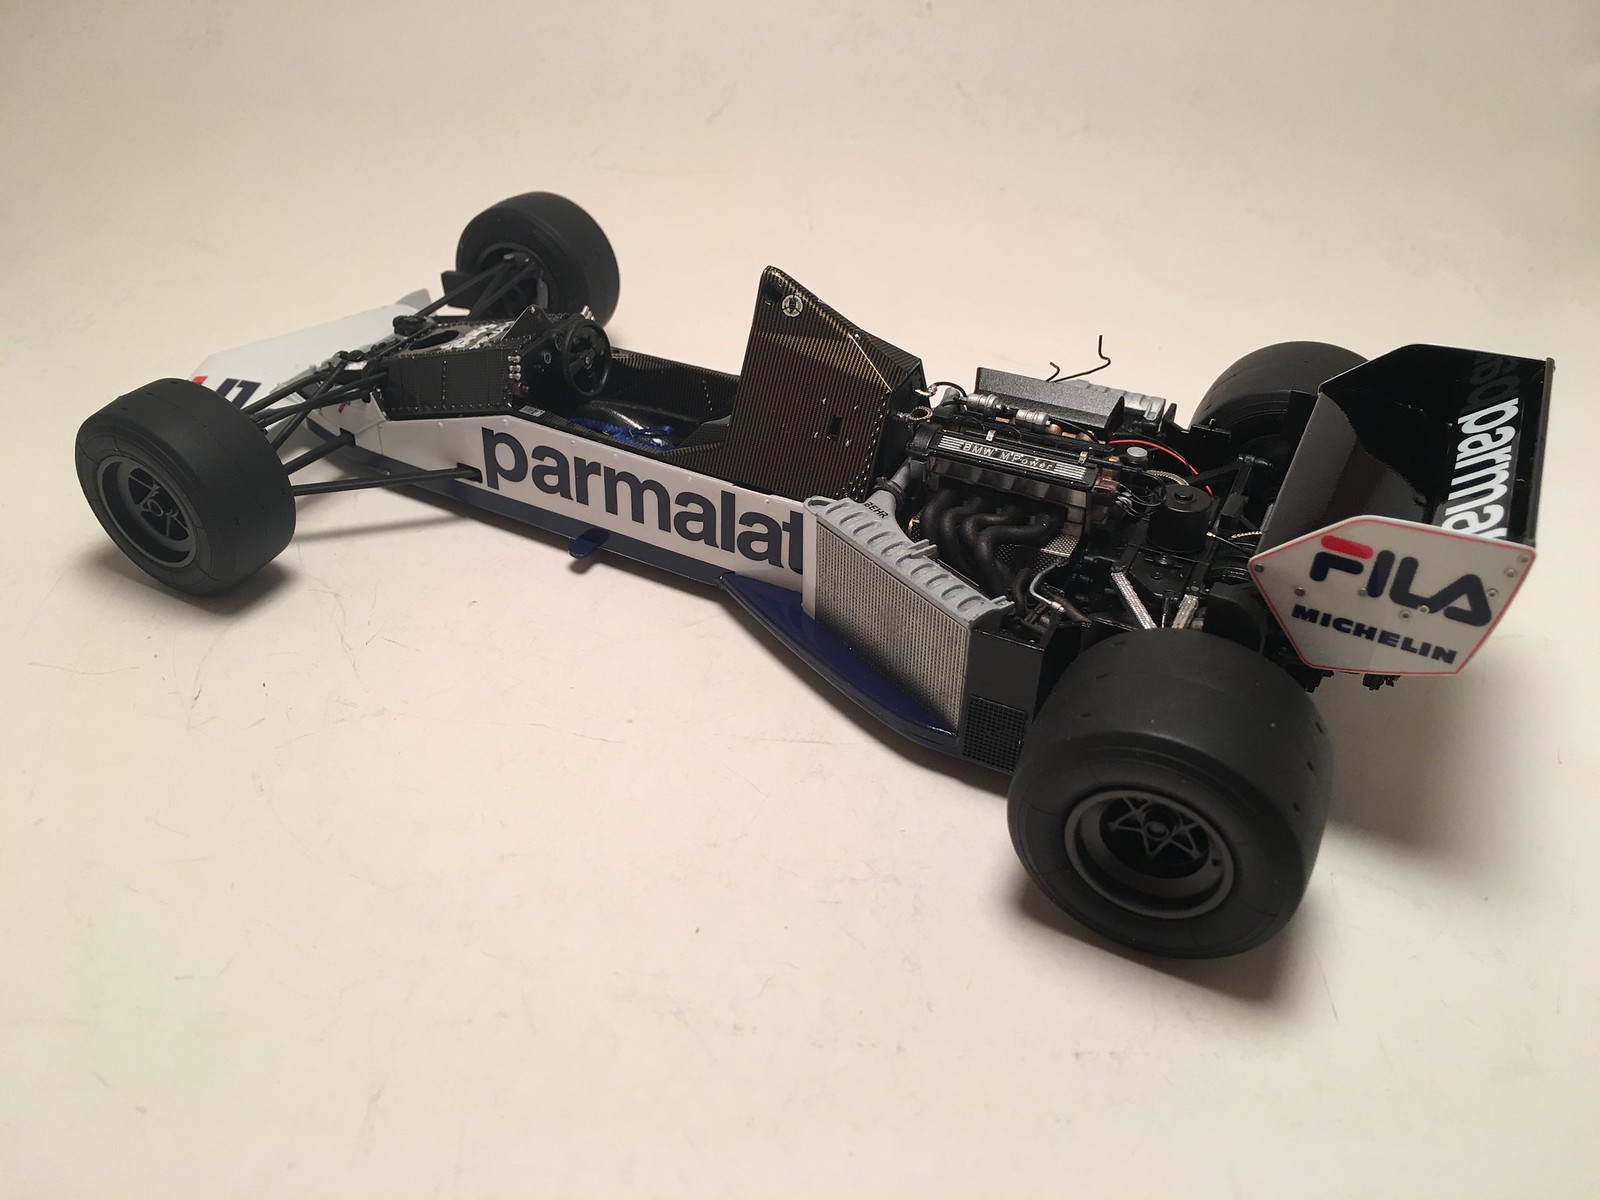
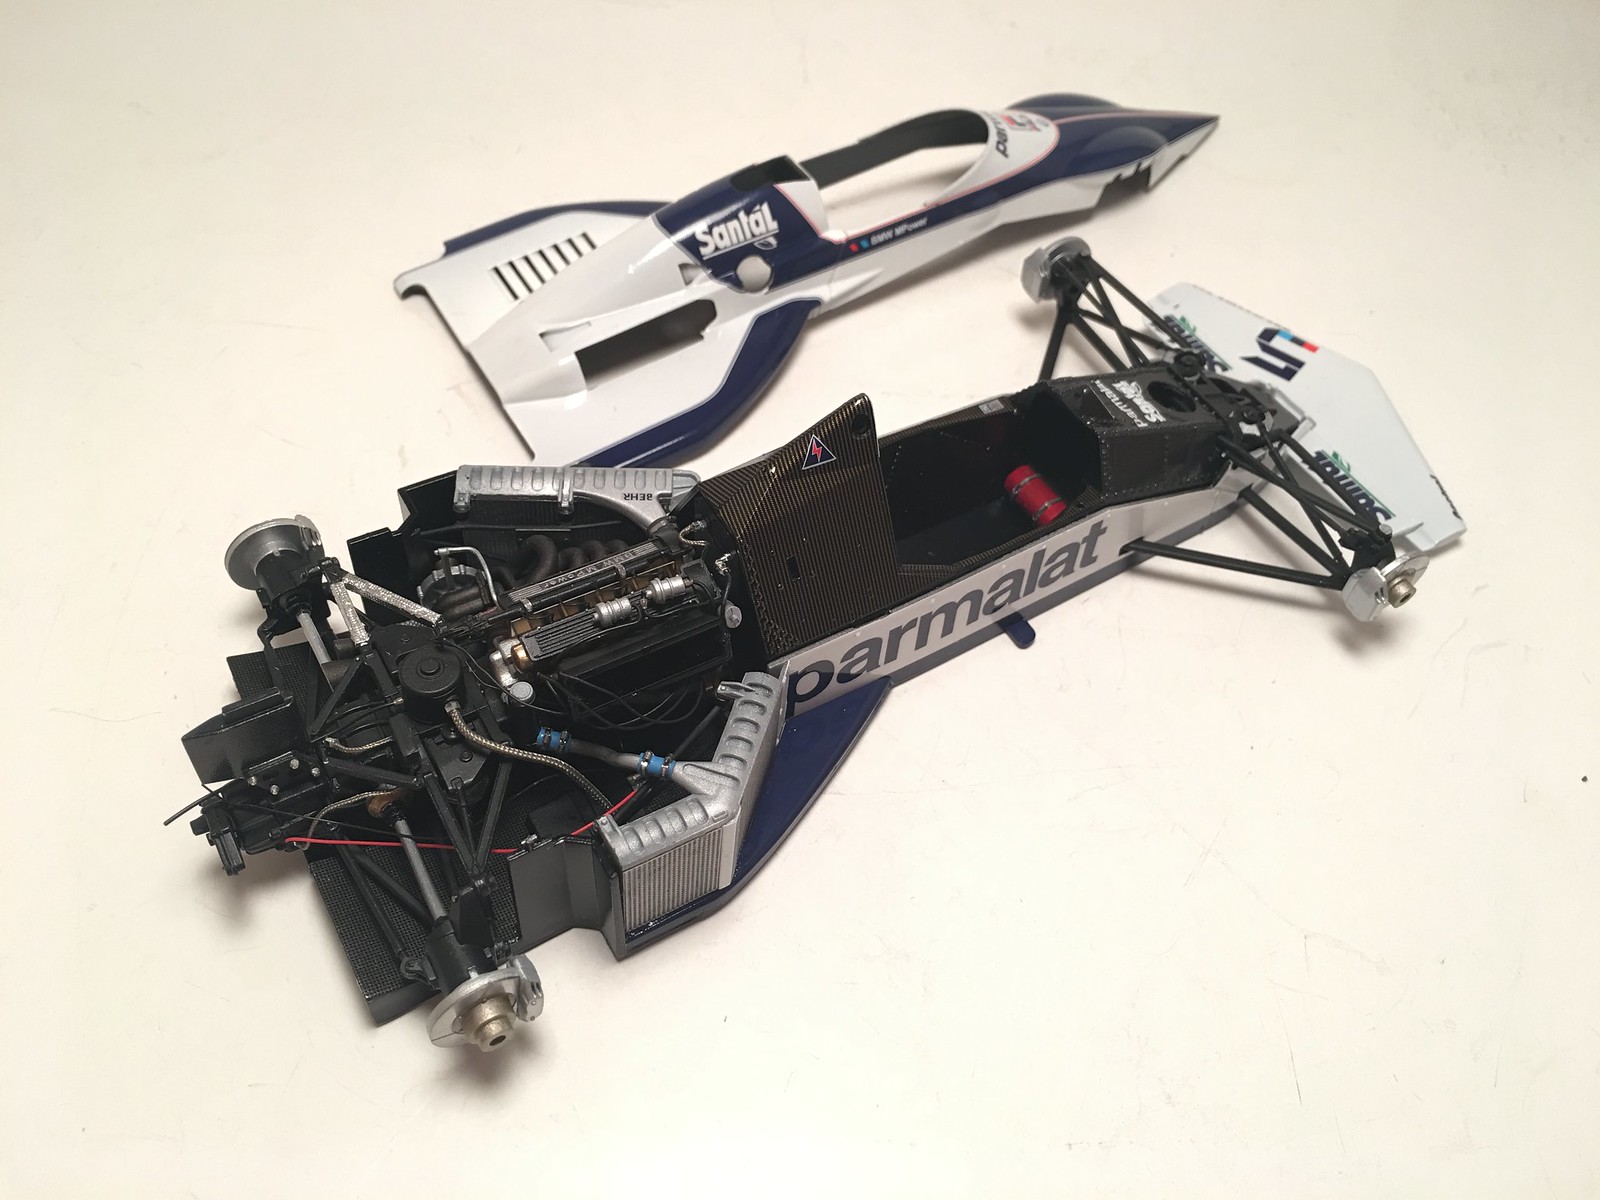
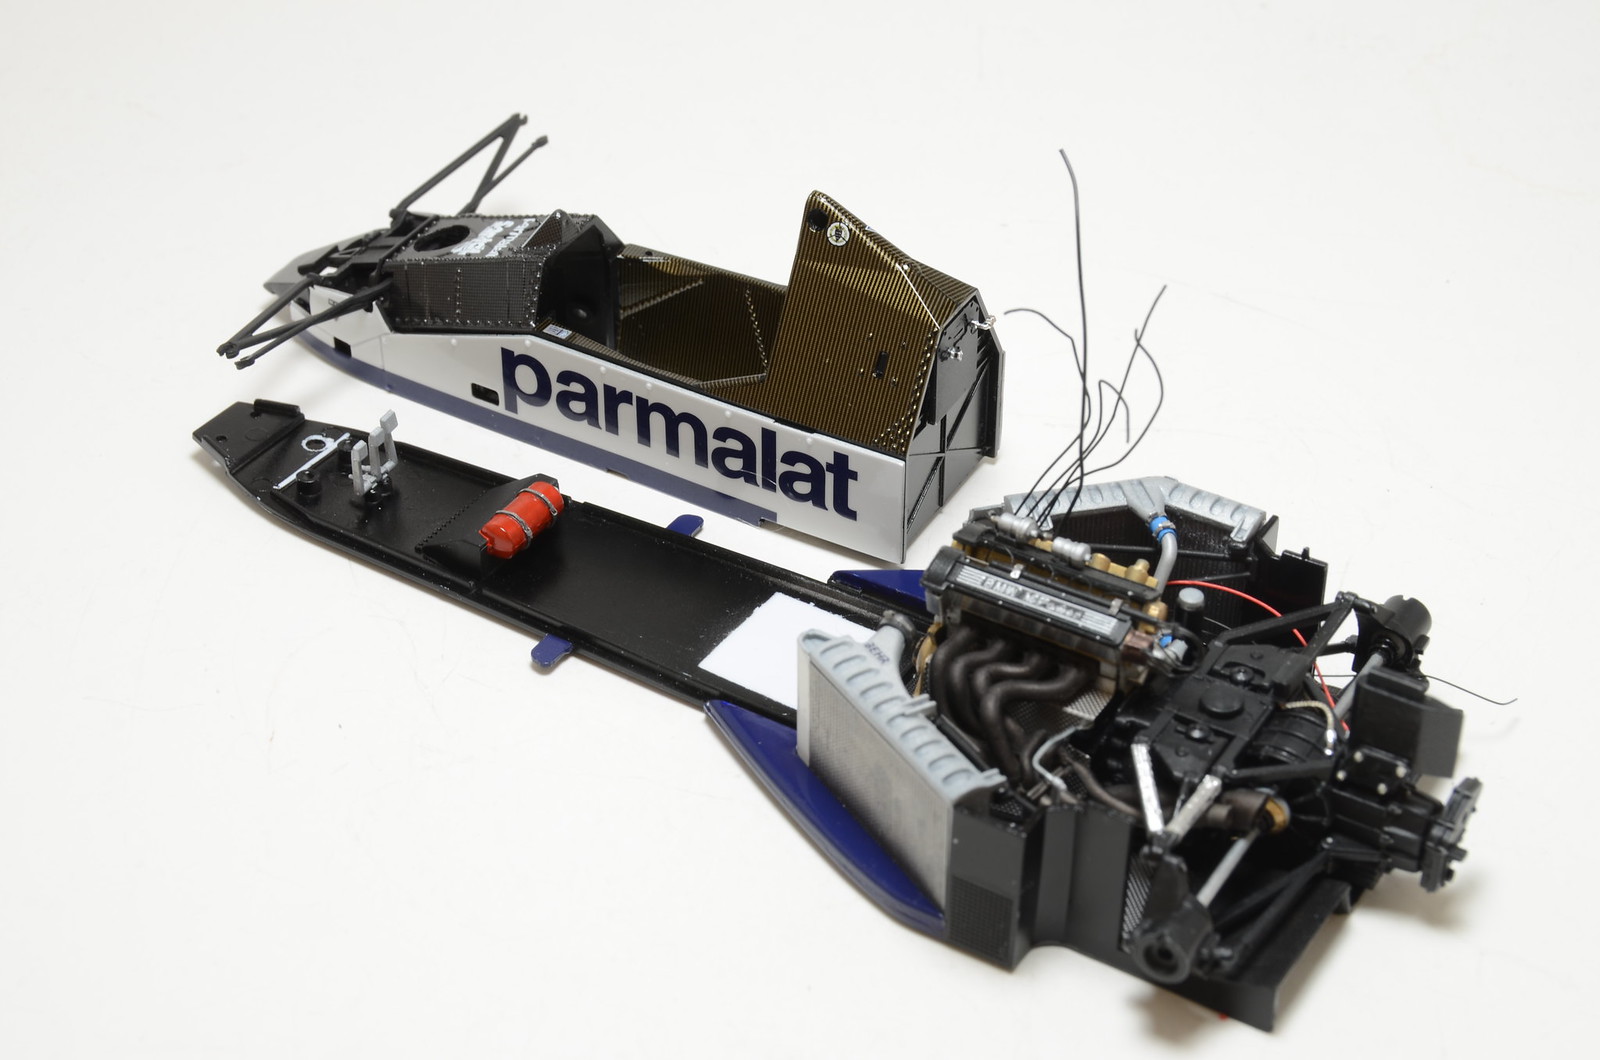
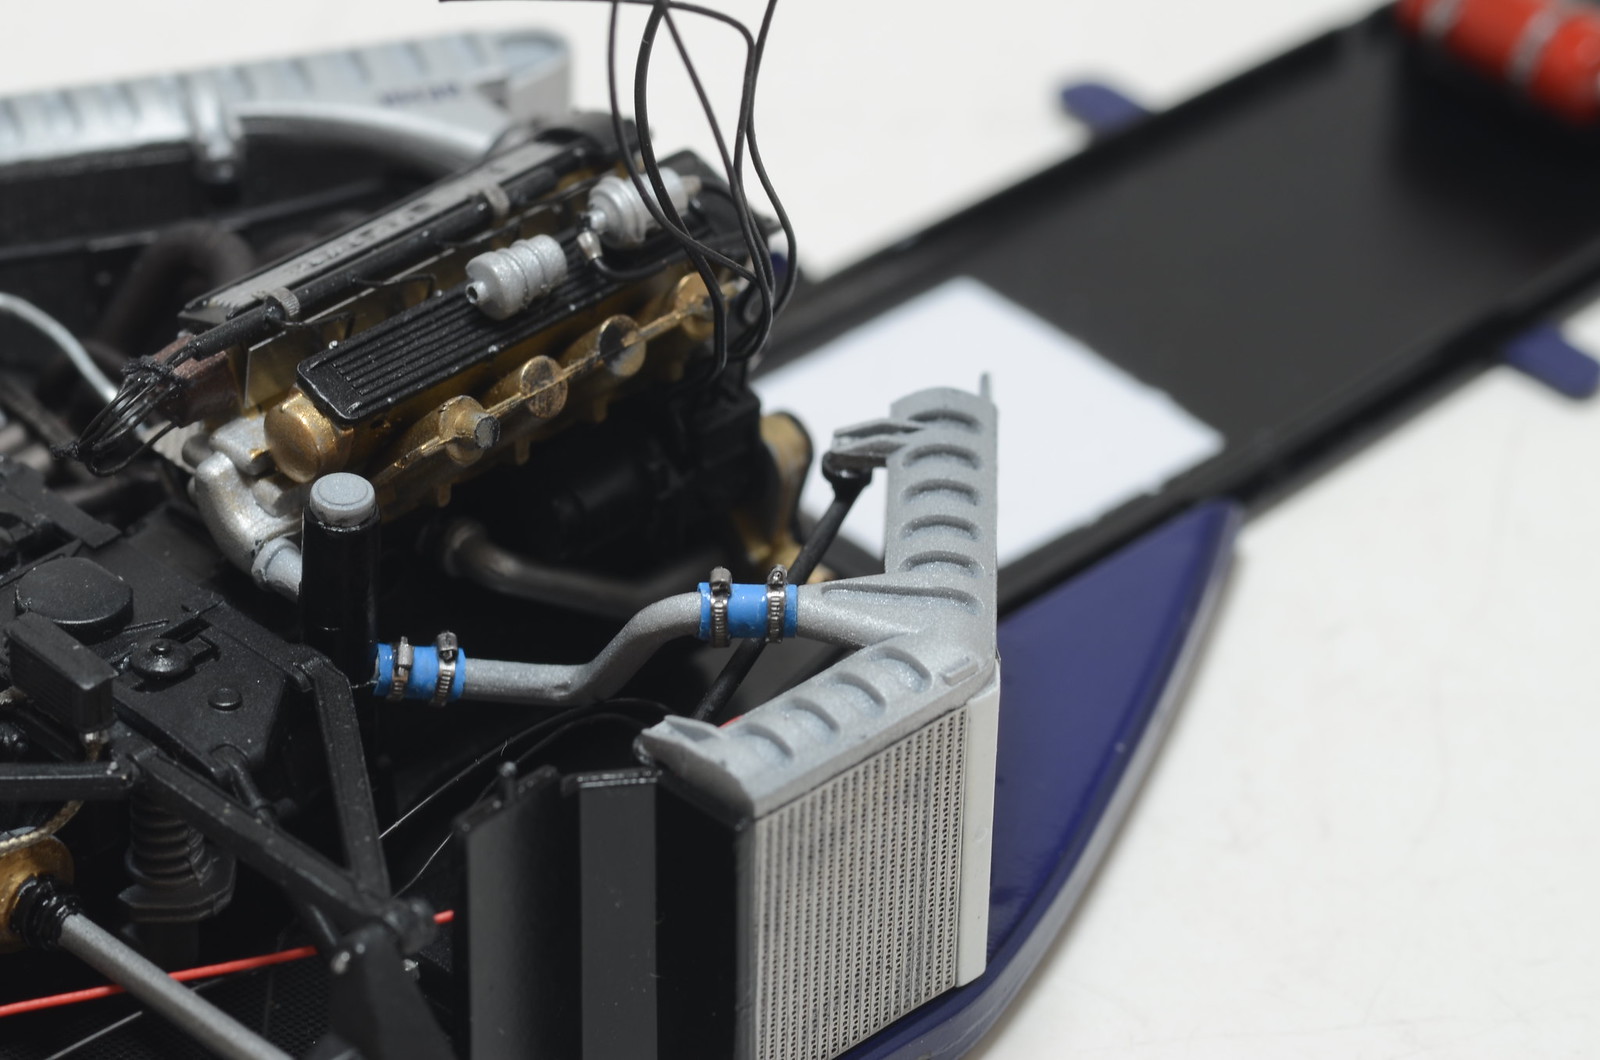
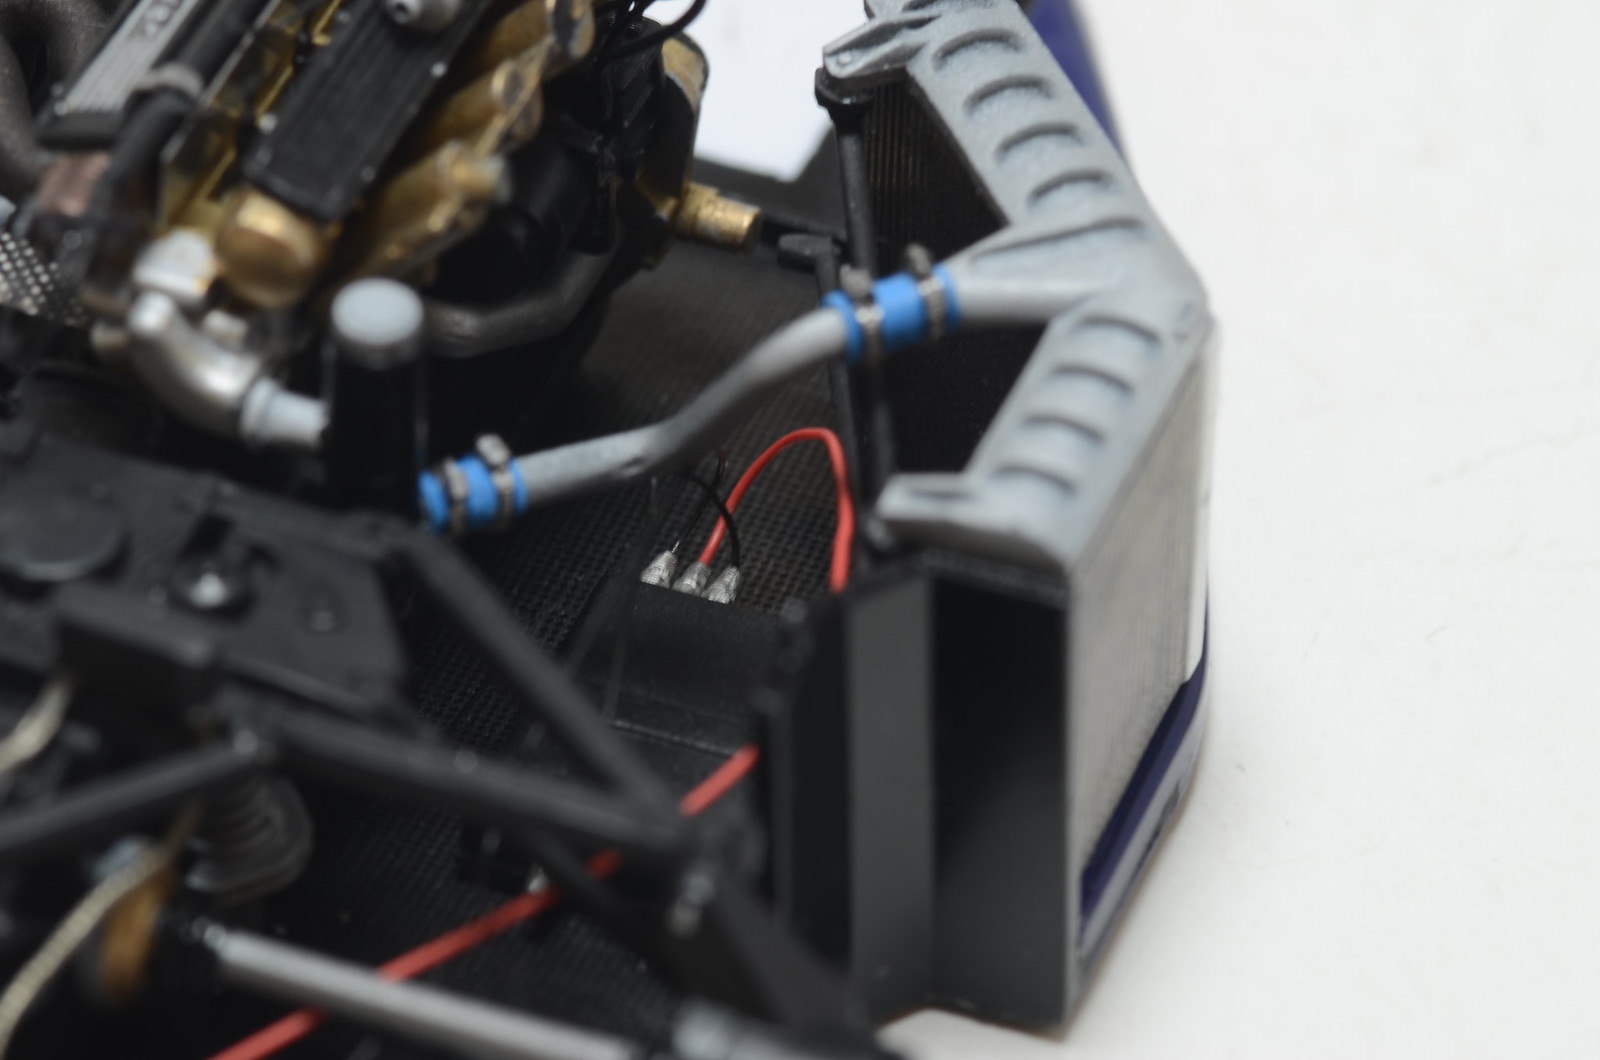
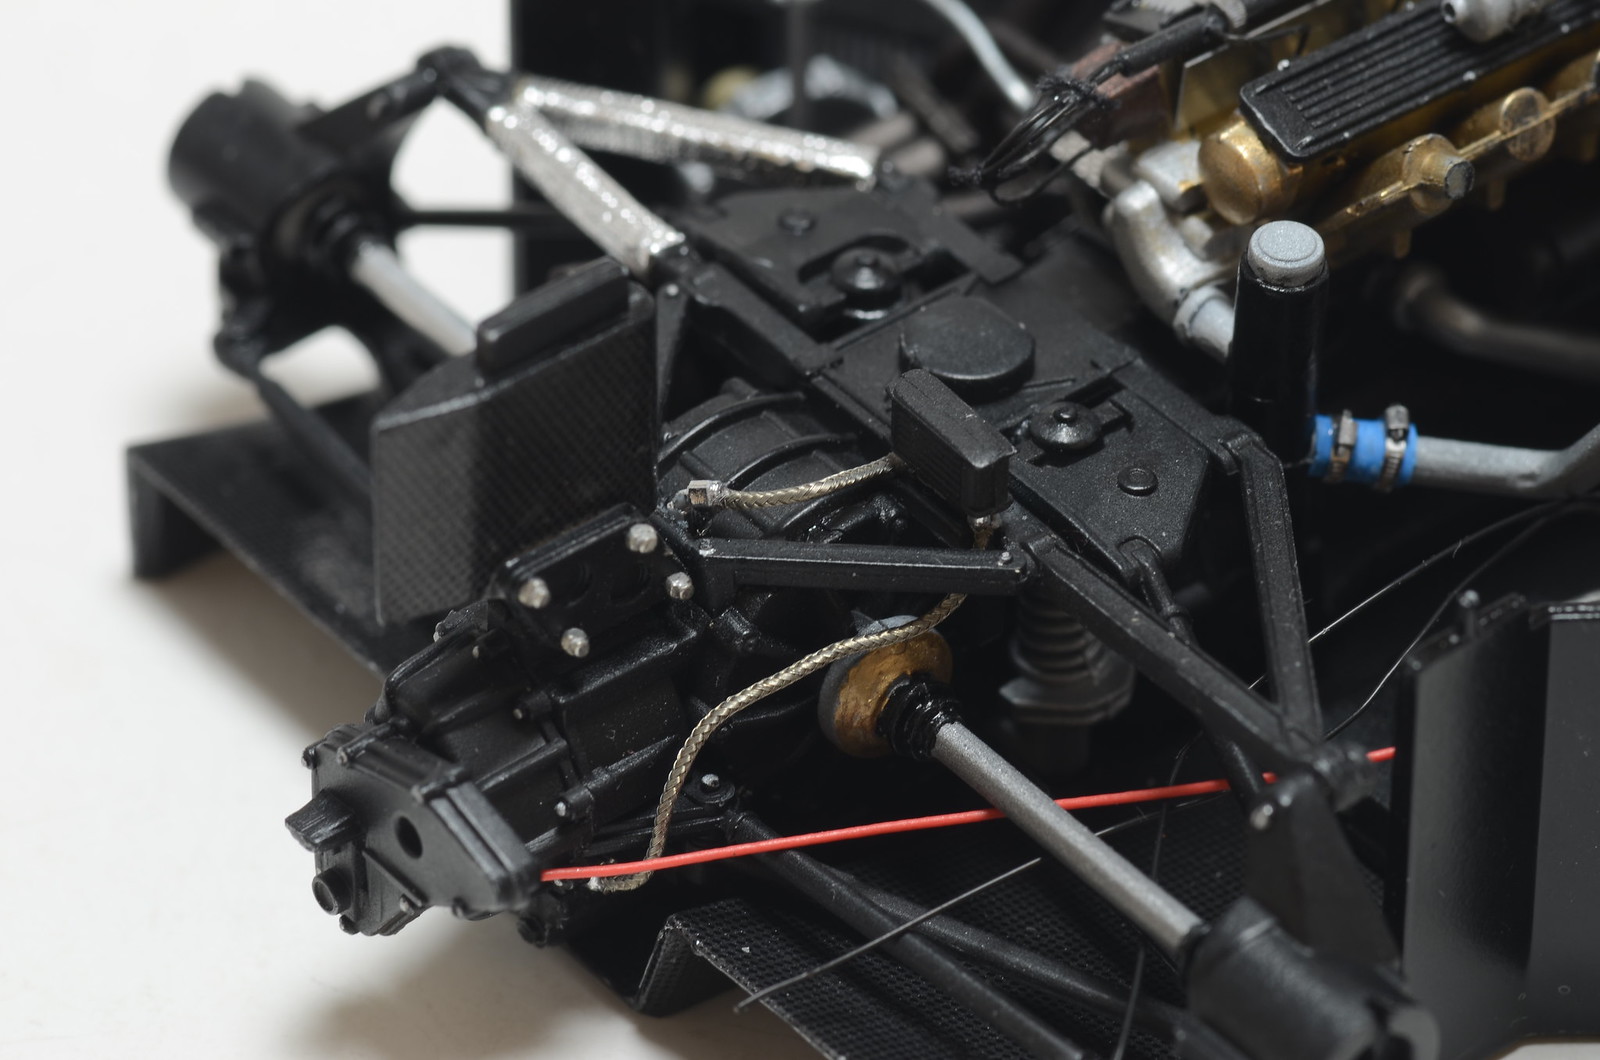
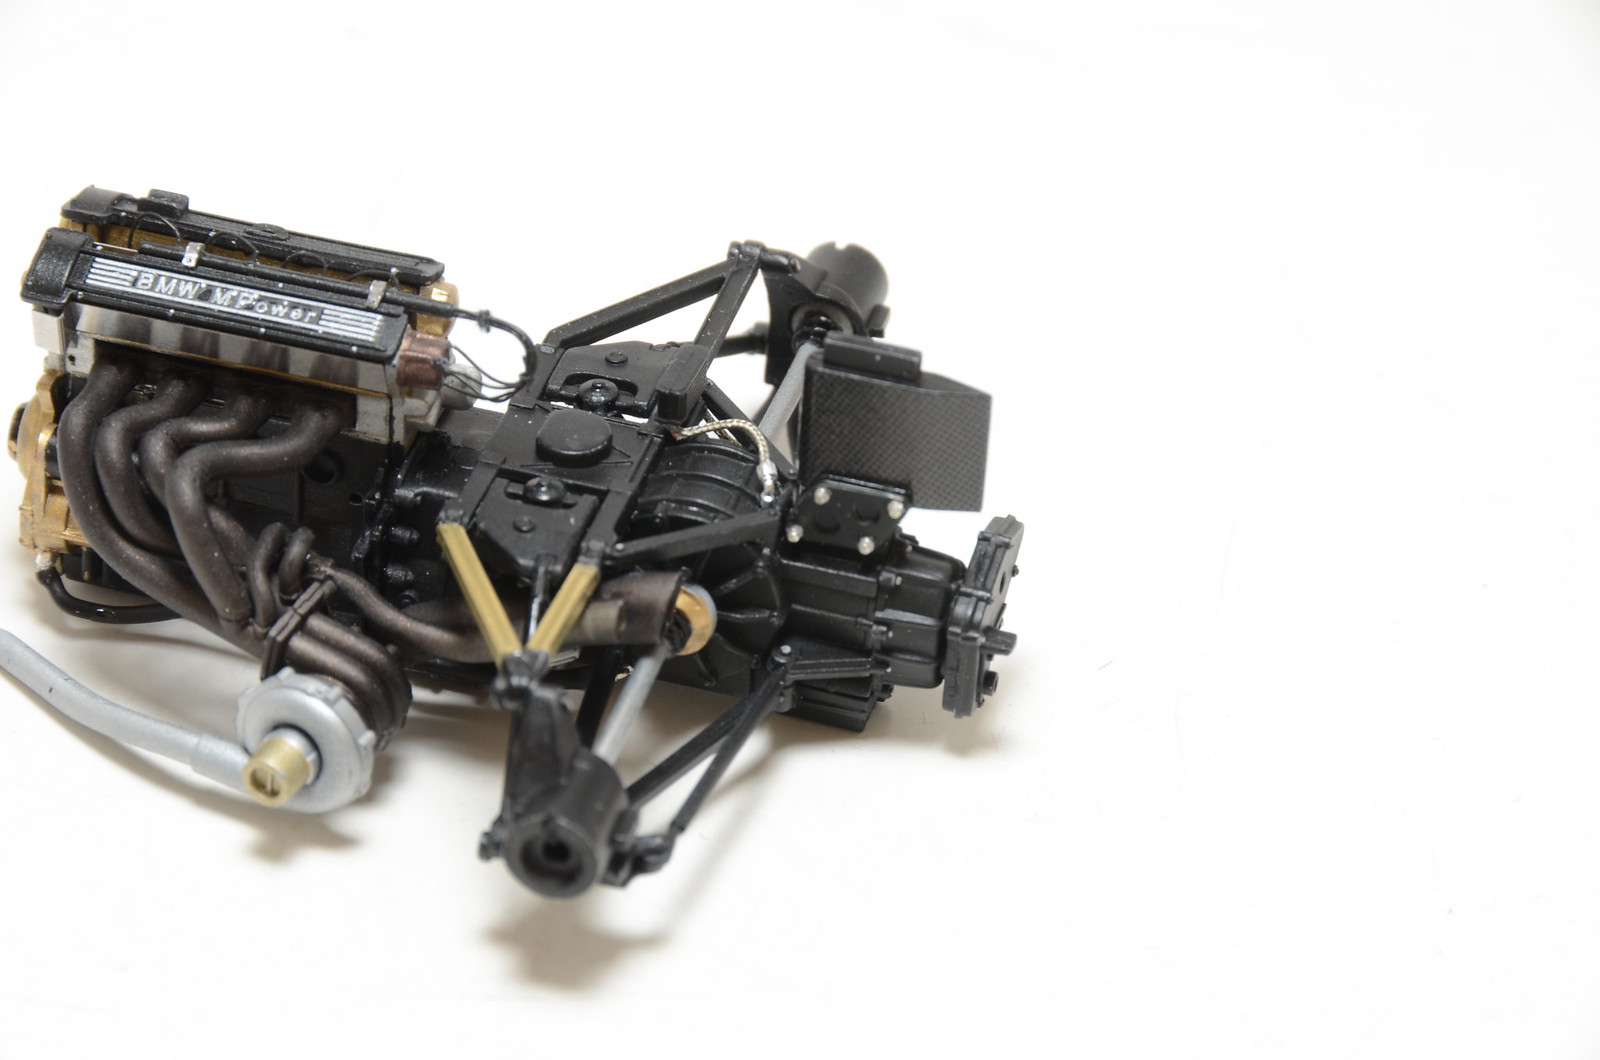
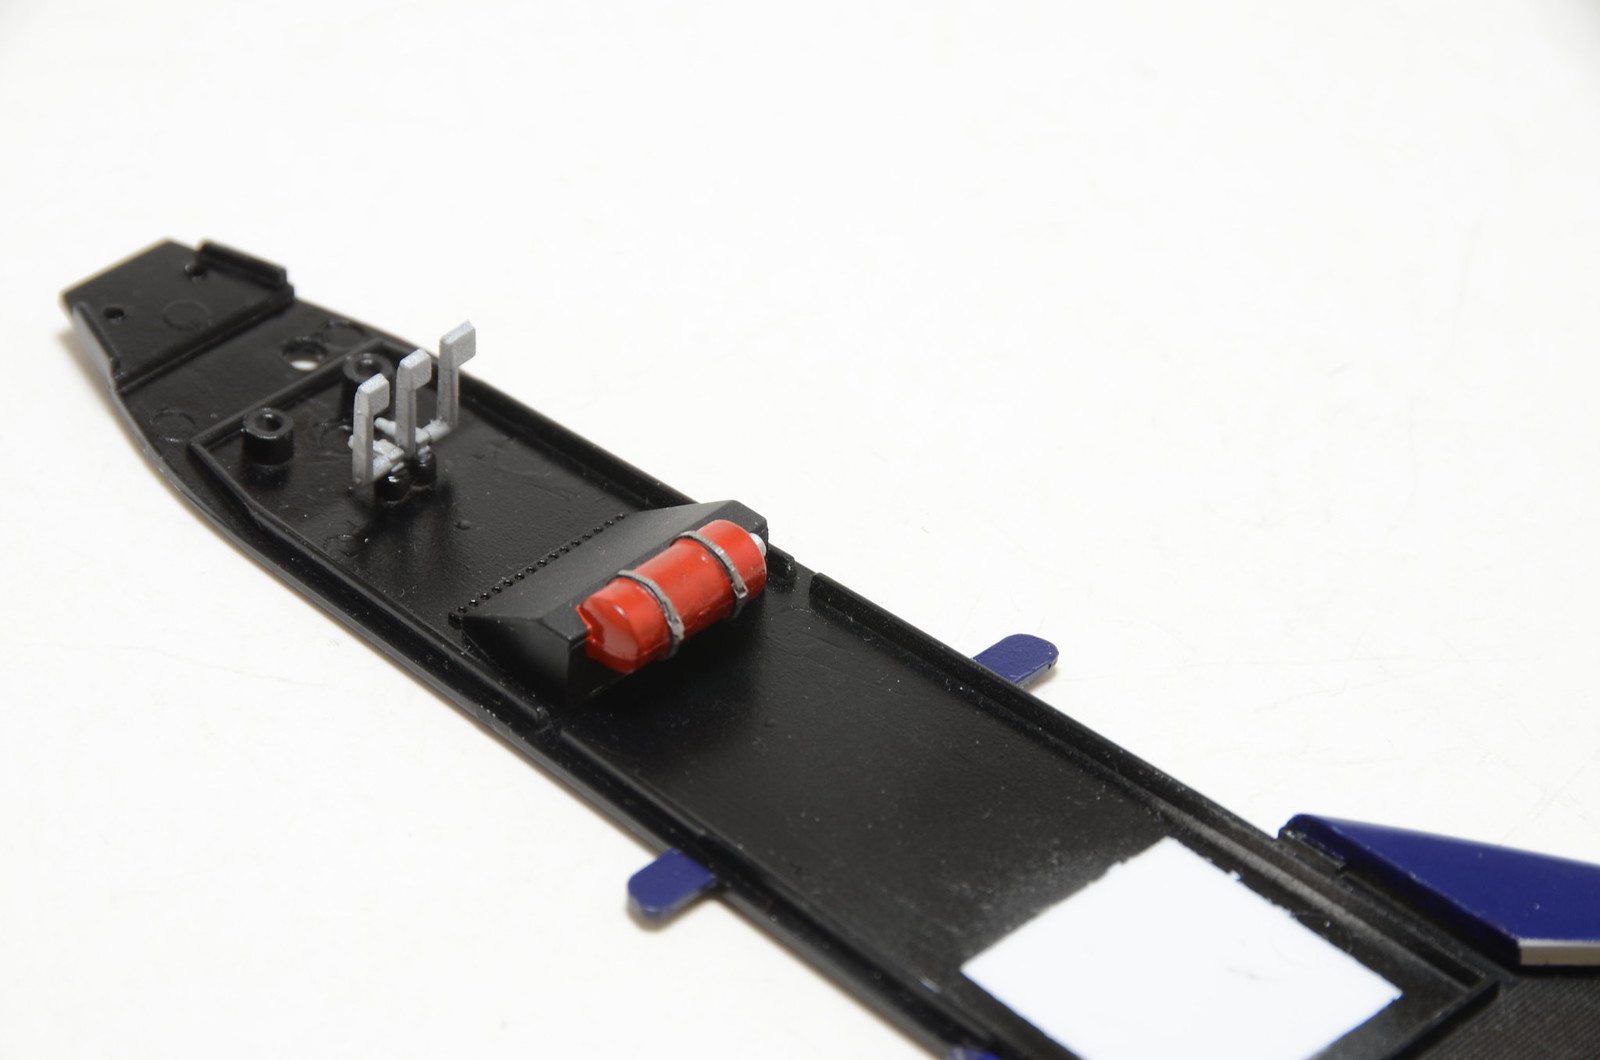
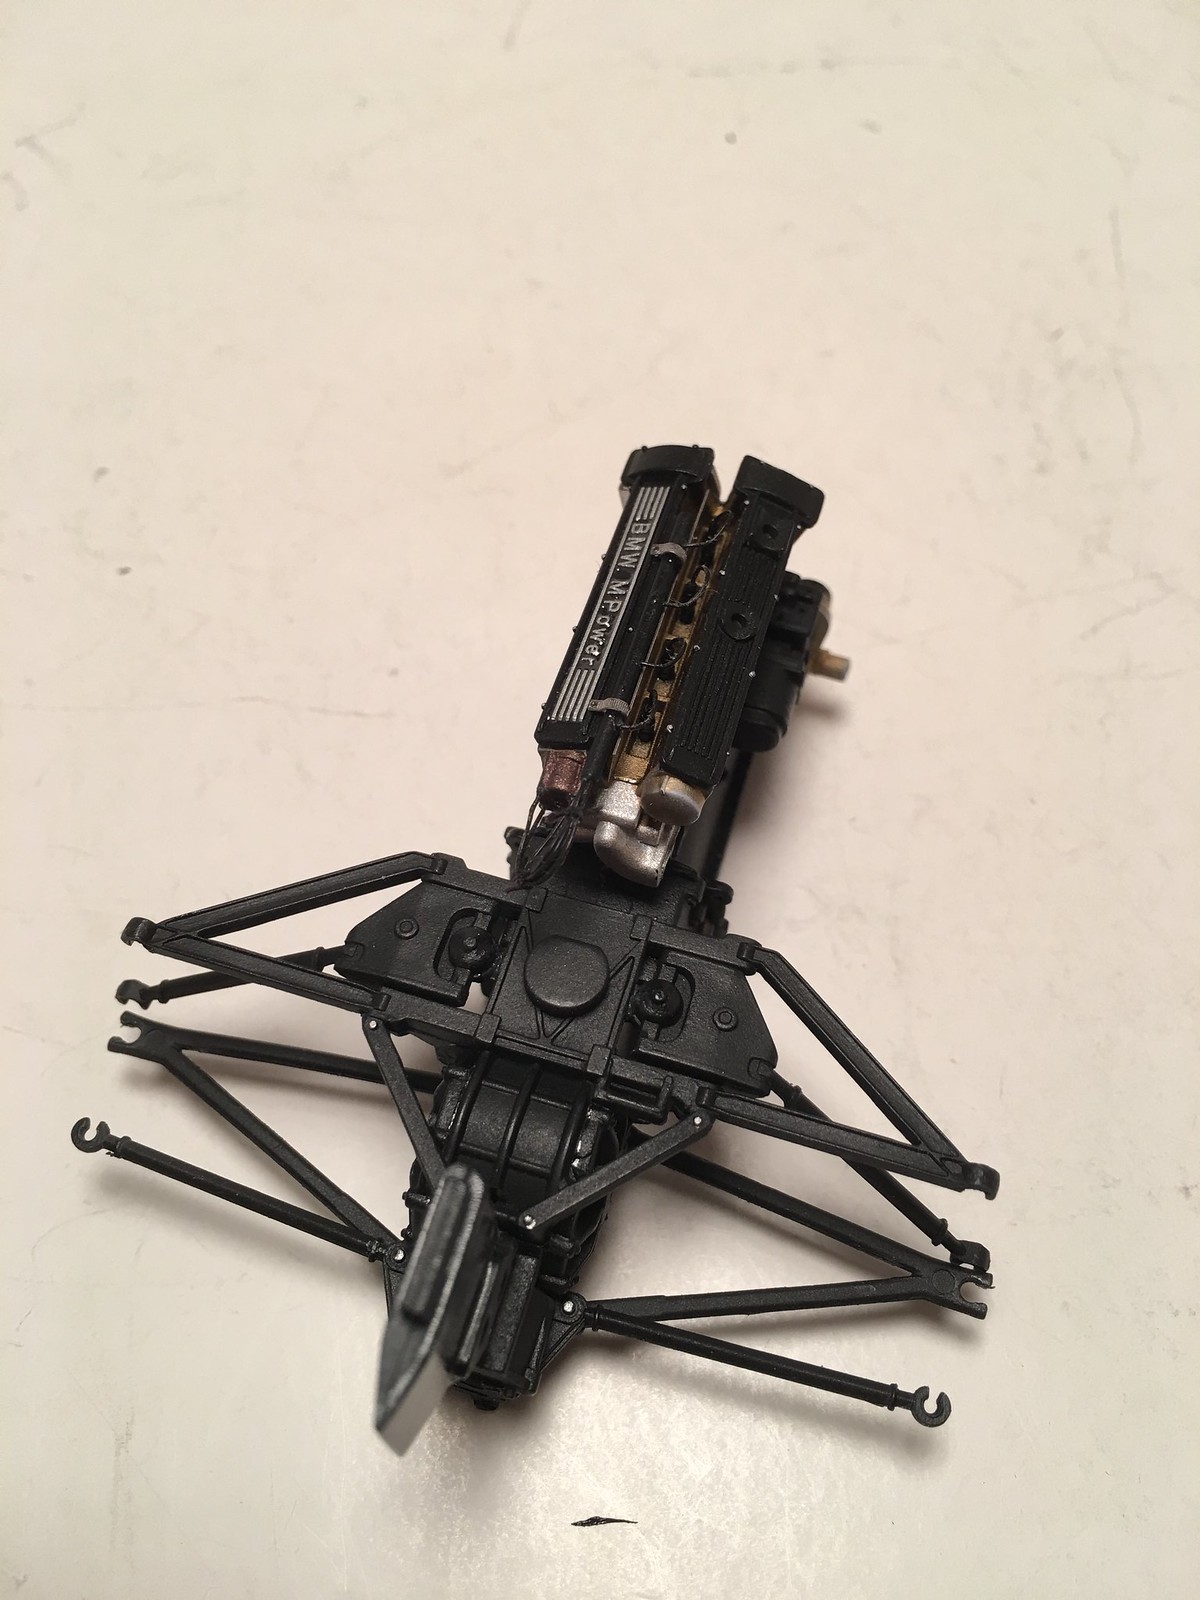
Few shots of current progress.


Monday, February 12, 2018

Main livery decals for BT52

Worked on main livery decals' application for BT52 over the weekend. As predicted decals were a joy to work with. There were few minor fix issues, but otherwise they were great. Pretty much all decals for body panels are applied by now. Still have few to apply to radiators and other accessories. Next, I'll let them dry and then parts will be off to clear coating.

One thing that caught me out by little surprise was a sequence of assembly for parts G3/G4. My own fault mainly. I did not study color and decal application guides and painted these parts in white separately from the floor. However when I get to apply color decals #22/#21, I've realized that these decals overlap onto the floor. Fortunately for me, I was able to just glue G3/G4 to the floor before I ruined decals. In the hindsight, I could have glued G3/G4 to the floor from the start and painted them together. This way I would have been able to fill seams with putty and properly prepare all that for paint and decals. Again, fortunately seams are hardly visible, so I will be able to live with results just fine.


Monday, February 5, 2018

CF work on BT52's floor and monocoque

Small update. Completed CF decals on BT52's floor and monocoque. CF pattern are not easy to capture on photos, but under magnification they could be seen. I the mean time I have painted almost all the parts. Next will be main livery decals and CF for seat.
Couple of quick shots.